Multiple Accounts (23H2)
- Paul Thurrott
- Feb 06, 2024
-
0
Windows 11 supports multiple sign-in accounts. This can be useful in many situations. But the most obvious is for families, in which one or more parents or caretakers, and one or more children, can each have their own account, each with its own customized Windows 11 experience.
Understand account types
One issue with this configuration is that each account must be configured with an account type that determines which tasks they can complete. Windows 11 supports two account types:
Administrator. Sign-in accounts with Administrator privileges have complete control over the system, including other user accounts.
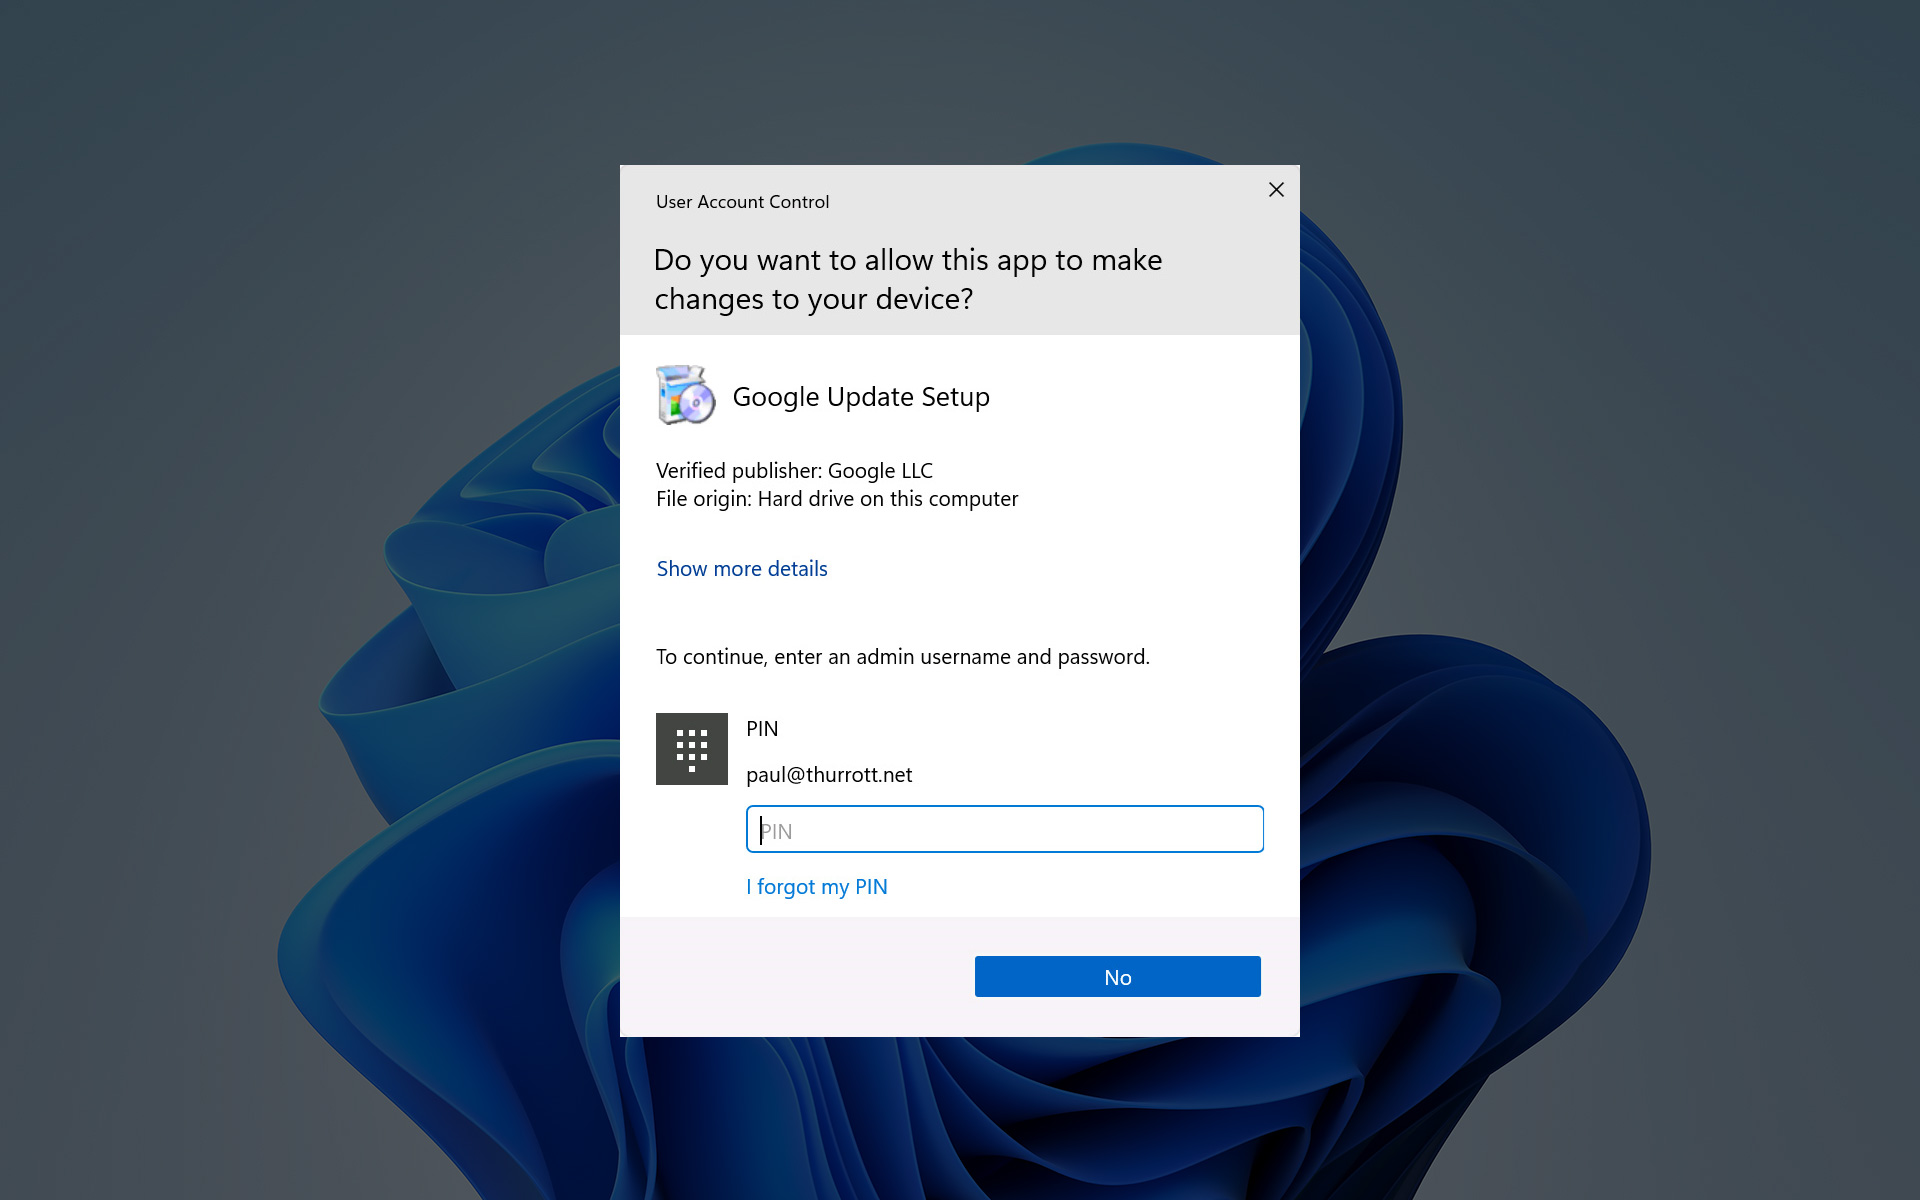
Standard user. Sign-in accounts with Standard privileges can only control their own accounts and may sometimes need to ask a user with Administrator privileges to authorize certain tasks that could result in changes to the system or another user account. This authorization occurs via a User Account Control (UAC) dialog in which the Standard user is prompted to provide an “admin” (Administrator) sign-in.
Those with families can exert additional control over their children and their sign-in accounts using Microsoft Family parental controls. This is configured via the Microsoft Family app, which is available in the Microsoft Store.
The initial sign-in account–usually the Microsoft account you used to complete Windows 11 Setup–is always configured with Administrator privileges. And subsequent sign-in accounts created in the Windows 11 Settings app are given Standard user privileges by default.
Add and manage sign-in accounts
Anyone with Administrator privileges can add additional sign-in accounts. These can be Microsoft accounts, work or school accounts, or local account sign-in accounts.
Add and manage a Microsoft account or local account sign-in
To add a new Microsoft account or local account sign-in, open Settings and navigate to Accounts > Other users. Then, click the “Add account” button next to “Add other user” in the “Other users section.” The Microsoft account window appears.
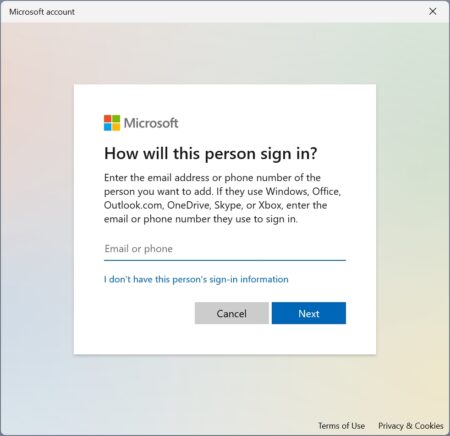
To add a Microsoft account sign-in, enter the email address and authenticate against Microsoft’s servers as prompted. To add a new local account, select the “I don’t have this person’s sign-in information” link and then select the “Add a user without a Microsoft account” link in the Create account window that appears. Then add a username and, optionally, a password, as prompted.
The latter process is described in more detail in the Local Accounts chapter.
Any user with Administrator privileges can change the account type for any other Microsoft account and local accounts that are configured on the PC. But be careful changing configuring other users as an Administrator, as doing so will give them control over the PC, and this includes access to any documents and other files in your account.
To do so, locate the account you wish to change to an Administrator and select it to expand the view. Then, click the “Change account type” button. The “Change account type” window appears.
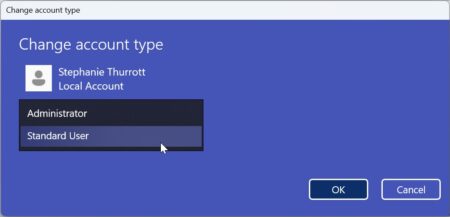
Select “Administrator” from the “Account type” drop-down and click OK.
Add a work or school account sign-in
To add a work or school account sign-in, open Settings and navigate to Accounts > Access work or school. Then, click the “Connect” button next to “Add a work or school account.” In the “Set up a work or school account” window that appears, click the “Join this device to Azure Active Directory” link and then sign-in and authenticate against your work or school account as prompted.
This process is also described in the Work and School Accounts chapter
: all you can really do is remove it from the PC.
Switch between available sign-in accounts
Windows 11 lets you or another configured user sign-in to the PC at any time. You can do this while a current user account is still signed in, so that multiple sign-in accounts are active concurrently, or you can optionally sign out of one first so that another user can sign in.
Only one sign-in account can be used interactively at a time.
To switch user accounts–that is, sign in with a different account while leaving the current account signed in as well–open Start and select your user picture and name in the bottom-left of Start. Then, select the user account you wish to use from the drop-down list.
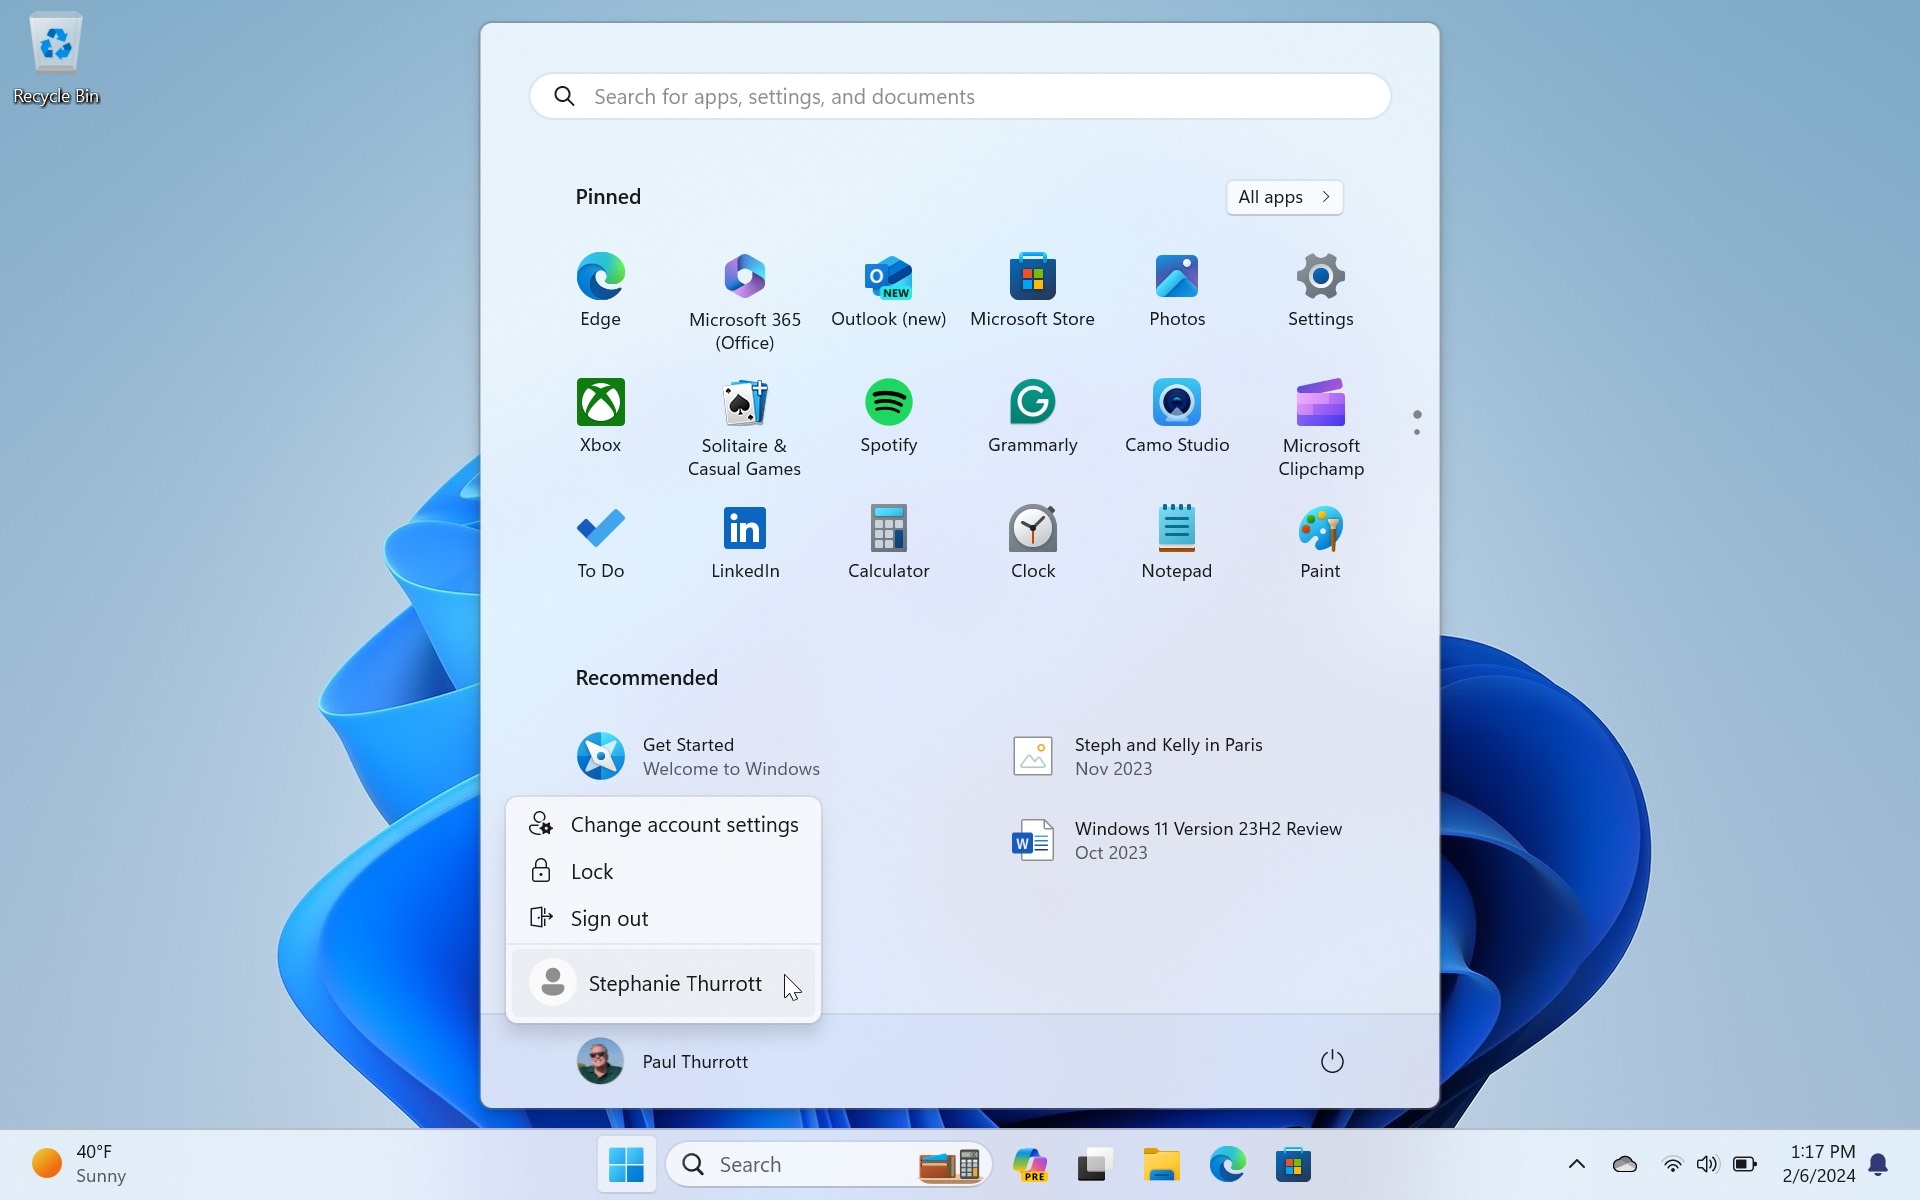
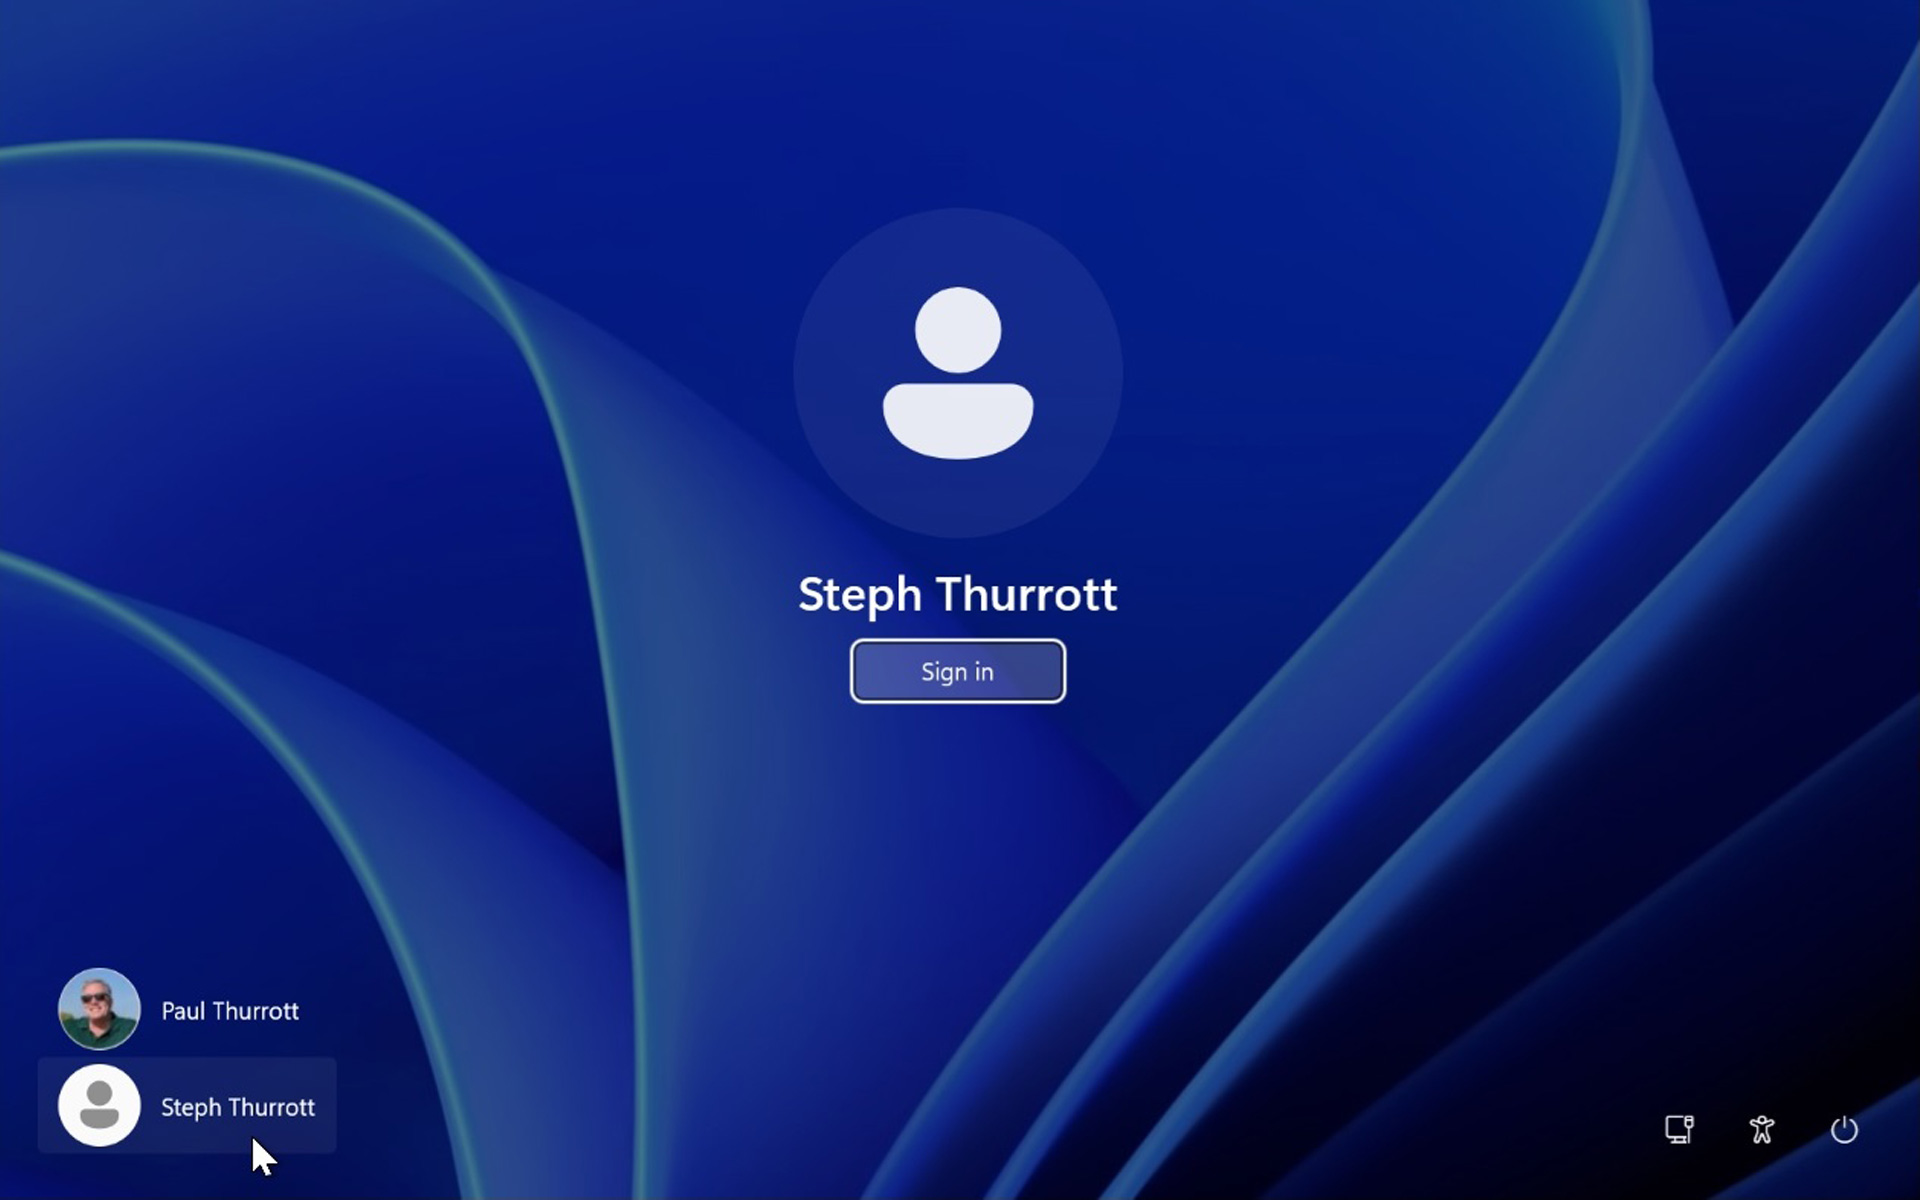
The Sign-in screen for that user will then appear, letting you sign in and access that user’s custom Windows 11 experience: Just select the new user account at the bottom-left.
You could also lock the PC by by clicking your user account at the bottom left of Start and then choosing Lock. Then, you could sign-in with another account normally, and your original account would remain signed in too. Lock is a convenient way to prevent others from accessing your data when you’re away from the PC.
You can more quickly lock the PC by typing WINKEY + L.
Of course, you could also sign out from the current user account first. Then, you will be confronted with a Sign-in screen listing all the available sign-in accounts on the PC. Just select the user you wish to use at the lower left and then sign in with that account.

Gain unlimited access to Premium articles.
With technology shaping our everyday lives, how could we not dig deeper?
Thurrott Premium delivers an honest and thorough perspective about the technologies we use and rely on everyday. Discover deeper content as a Premium member.