Snipping Tool, Screenshots, and Screen Recordings (23H2)
- Paul Thurrott
- Mar 08, 2024
-
0
Microsoft provides the Snipping Tool app in Windows 11 so that you can capture, save, edit, and share screenshots–still images that represent the contents of your PC’s display–and screen recordings, video representations of what’s happening on-screen. Snipping Tool is a modern app that should meet most users’ needs. But Windows 11 also supports other methods for capturing screenshots and screen recordings, some of which have been included with Windows for quite some time.
Get to know Snipping Tool
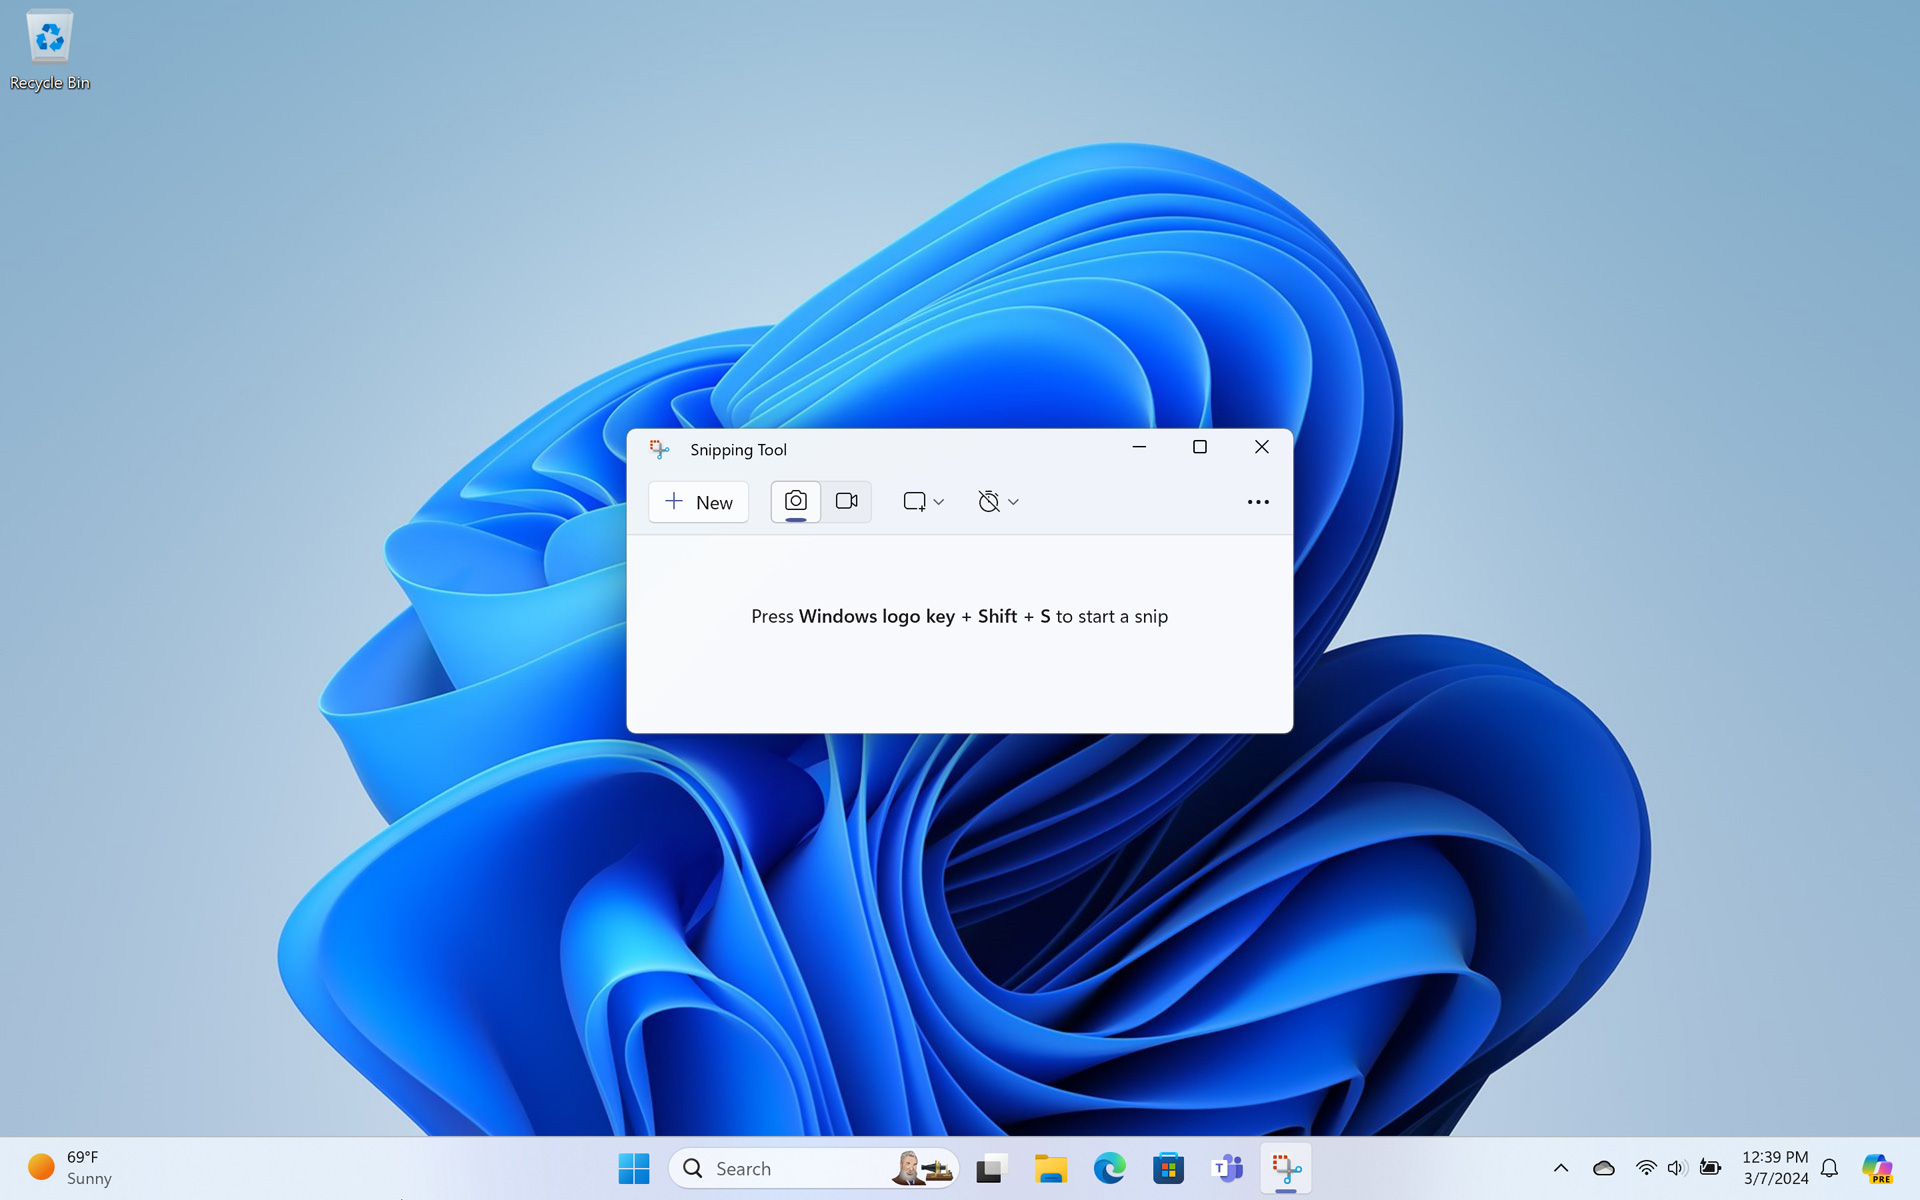
Snipping Tool is a versatile screenshot and screen recording utility. That said, it confuses matters by using its own language for screenshots and screen recordings: It refers to screenshots as “static image snips” and screen recording as “video snips.” The Snipping Tool also offers two different user interfaces, depending on how you access it.
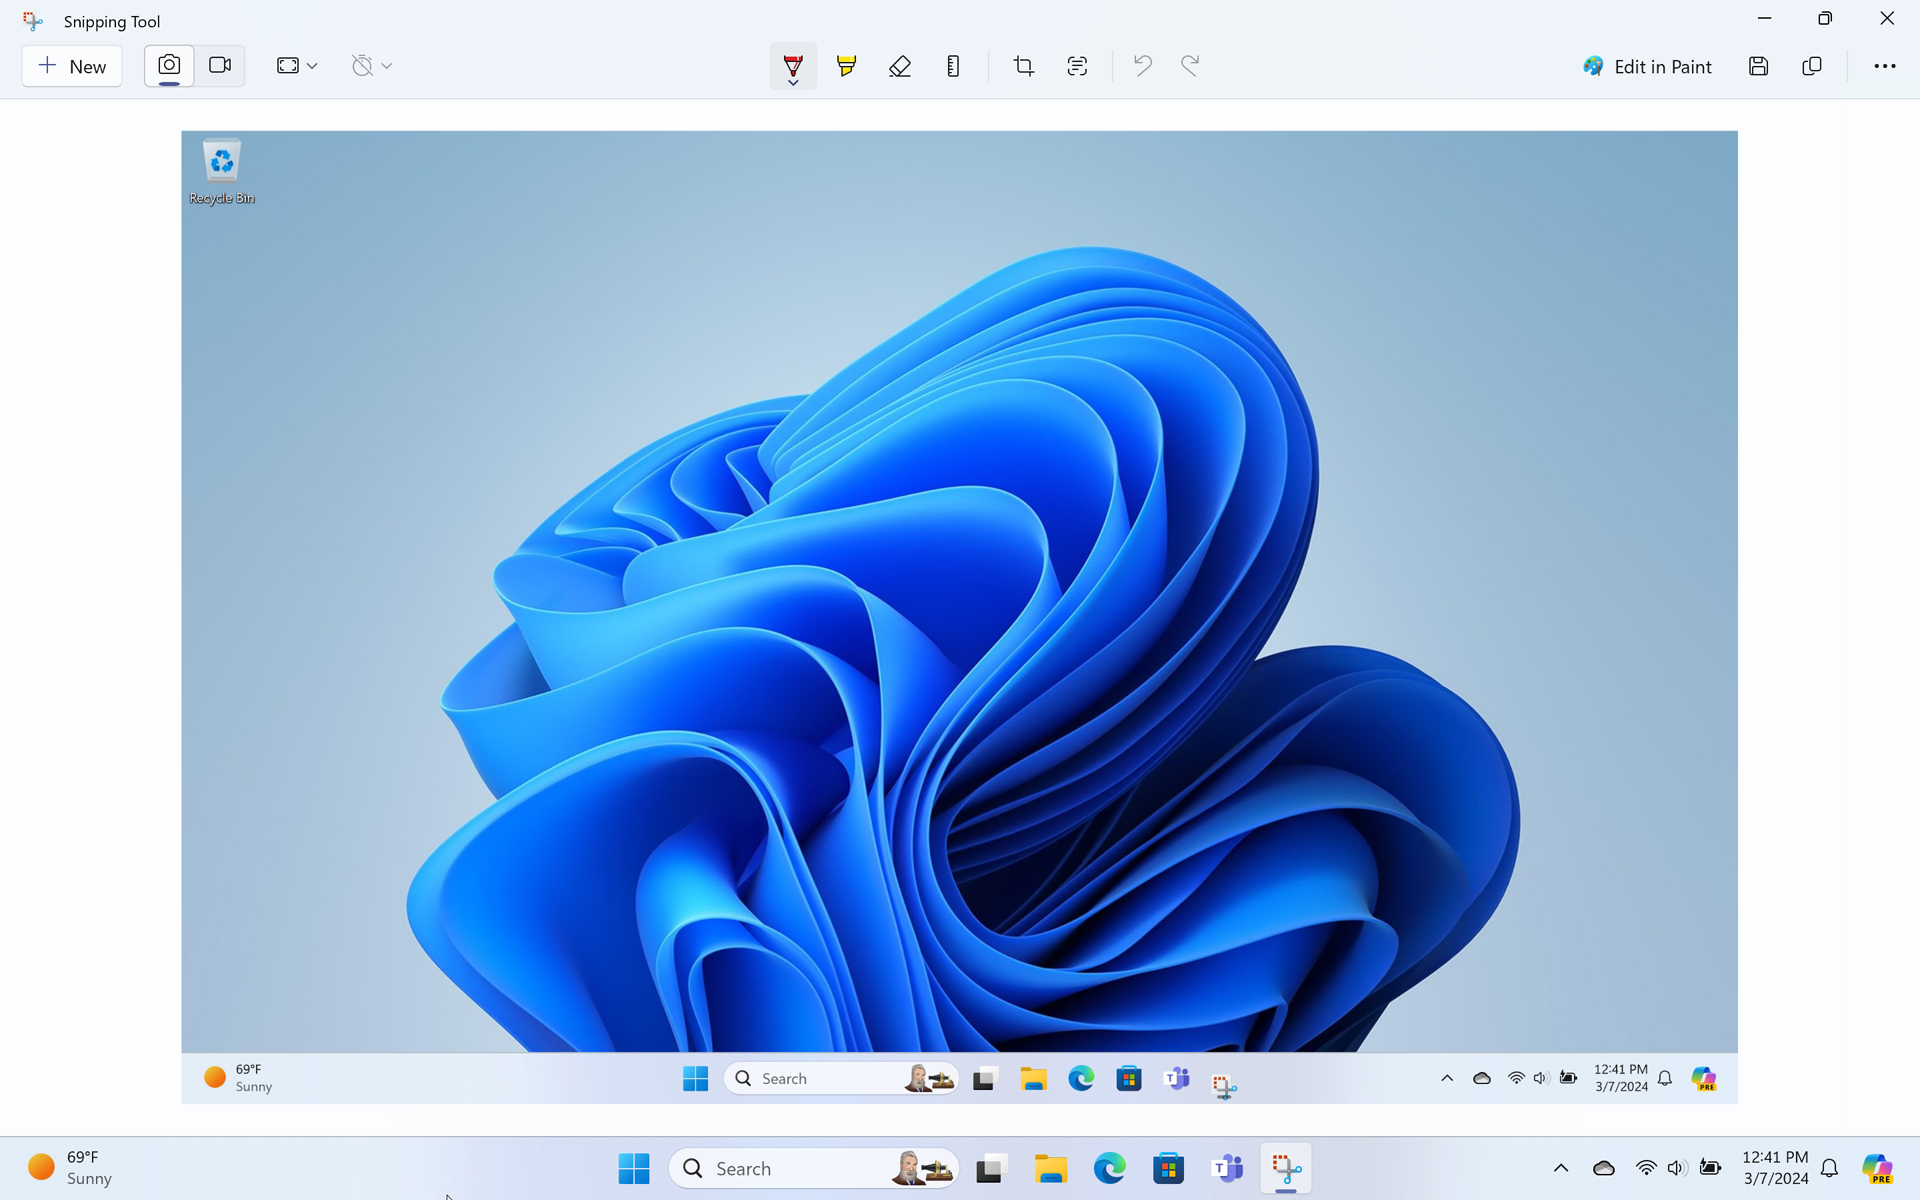
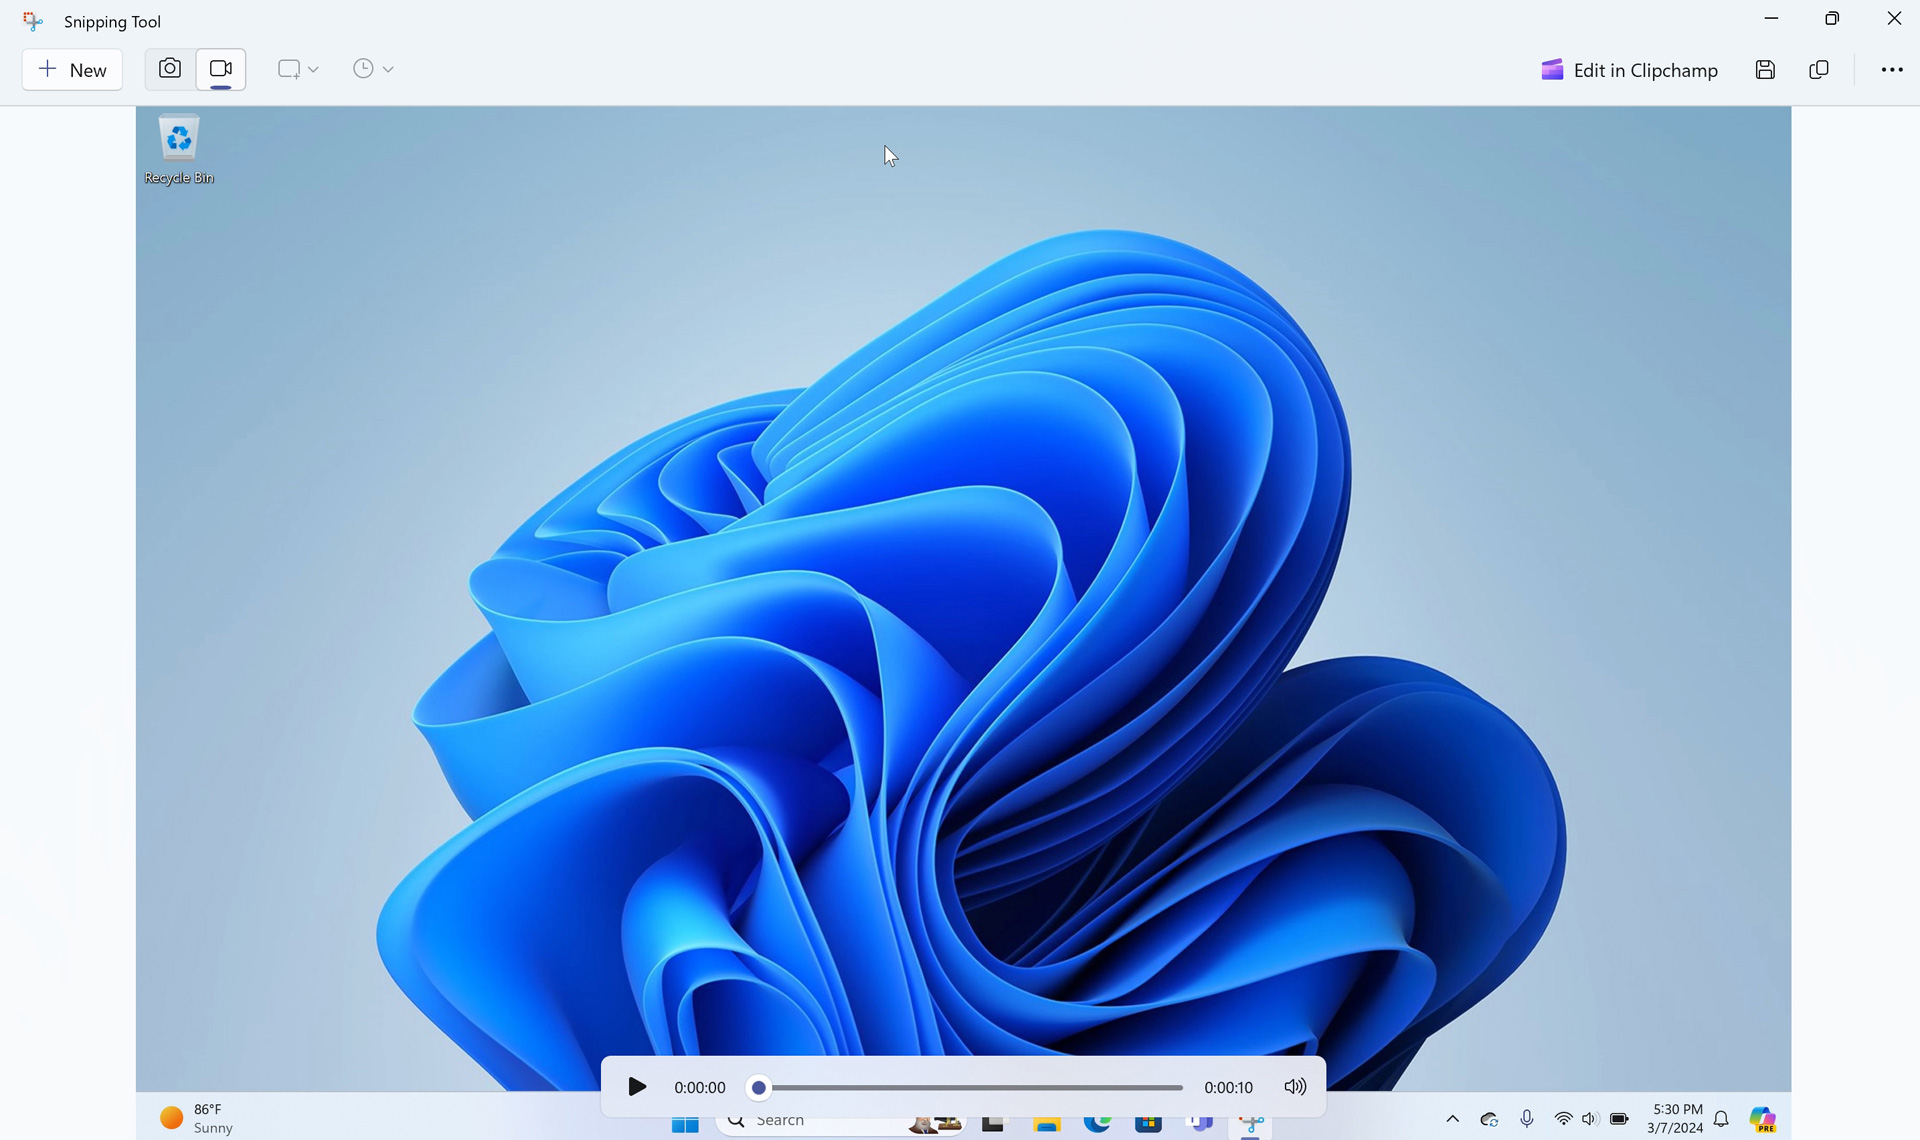
If you launch Snipping Tool with a Start shortcut or Search, it appears as a small floating window that provides just a handful of commands via toolbar buttons.
These buttons are:
New screenshot/recording. The “+ New” button is used to capture a new screenshot or screen recording, depending on which capture mode the app is currently configured to use.
You can also type “CTRL + N” to capture a new screenshot or screen recording.
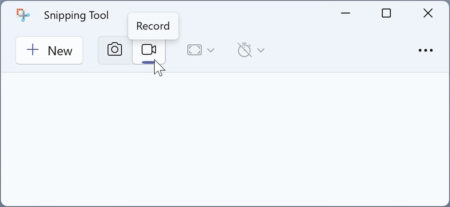
Capture mode. The “Snip/Record” toggle button is used to switch the app between its two available capture modes.
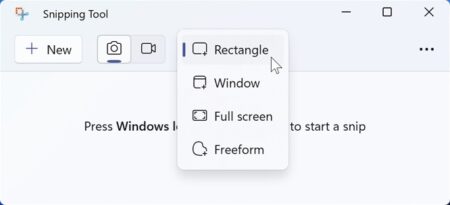
Snipping mode. The “Snipping mode” button is available when Snipping Tool is configured to take a screenshot. It lets you choose between “Rectangle,” “Window,” “Full screen,” and “Freeform” snipping modes.
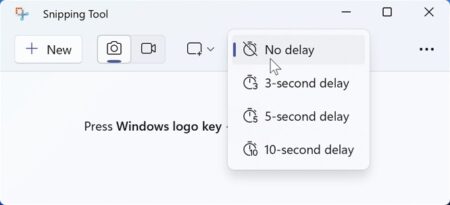
Delay timer. The “Delay snip” button is available when Snipping Tool is configured to take a screenshot. It lets you optionally delay the start of a screenshot capture by 3, 5, or 10 seconds.
See more (“…”). This item provides access to secondary commands like “Open” and “Settings.”
After you capture a screenshot or screen recording, a thumbnail of the capture appears in the Snipping Tool window, along with several new controls related to editing, sharing, and saving the capture. Those options are different for each type of capture.
Note that the Snipping Tool window is resizable, and that you can maximize it to better view and edit the capture.
We examine these capabilities in more detail later in the chapter.
New to Windows 11 version 23H2, Snipping Tool also appears by default when you type PRINT SCREEN, and it does so using a unique minimalist user interface in which the screen dims a bit and two buttons–the “Snip/Record” toggle button and “Snipping mode”–appear in a floating toolbar. (OK, three: There’s a “Close” button as well.)
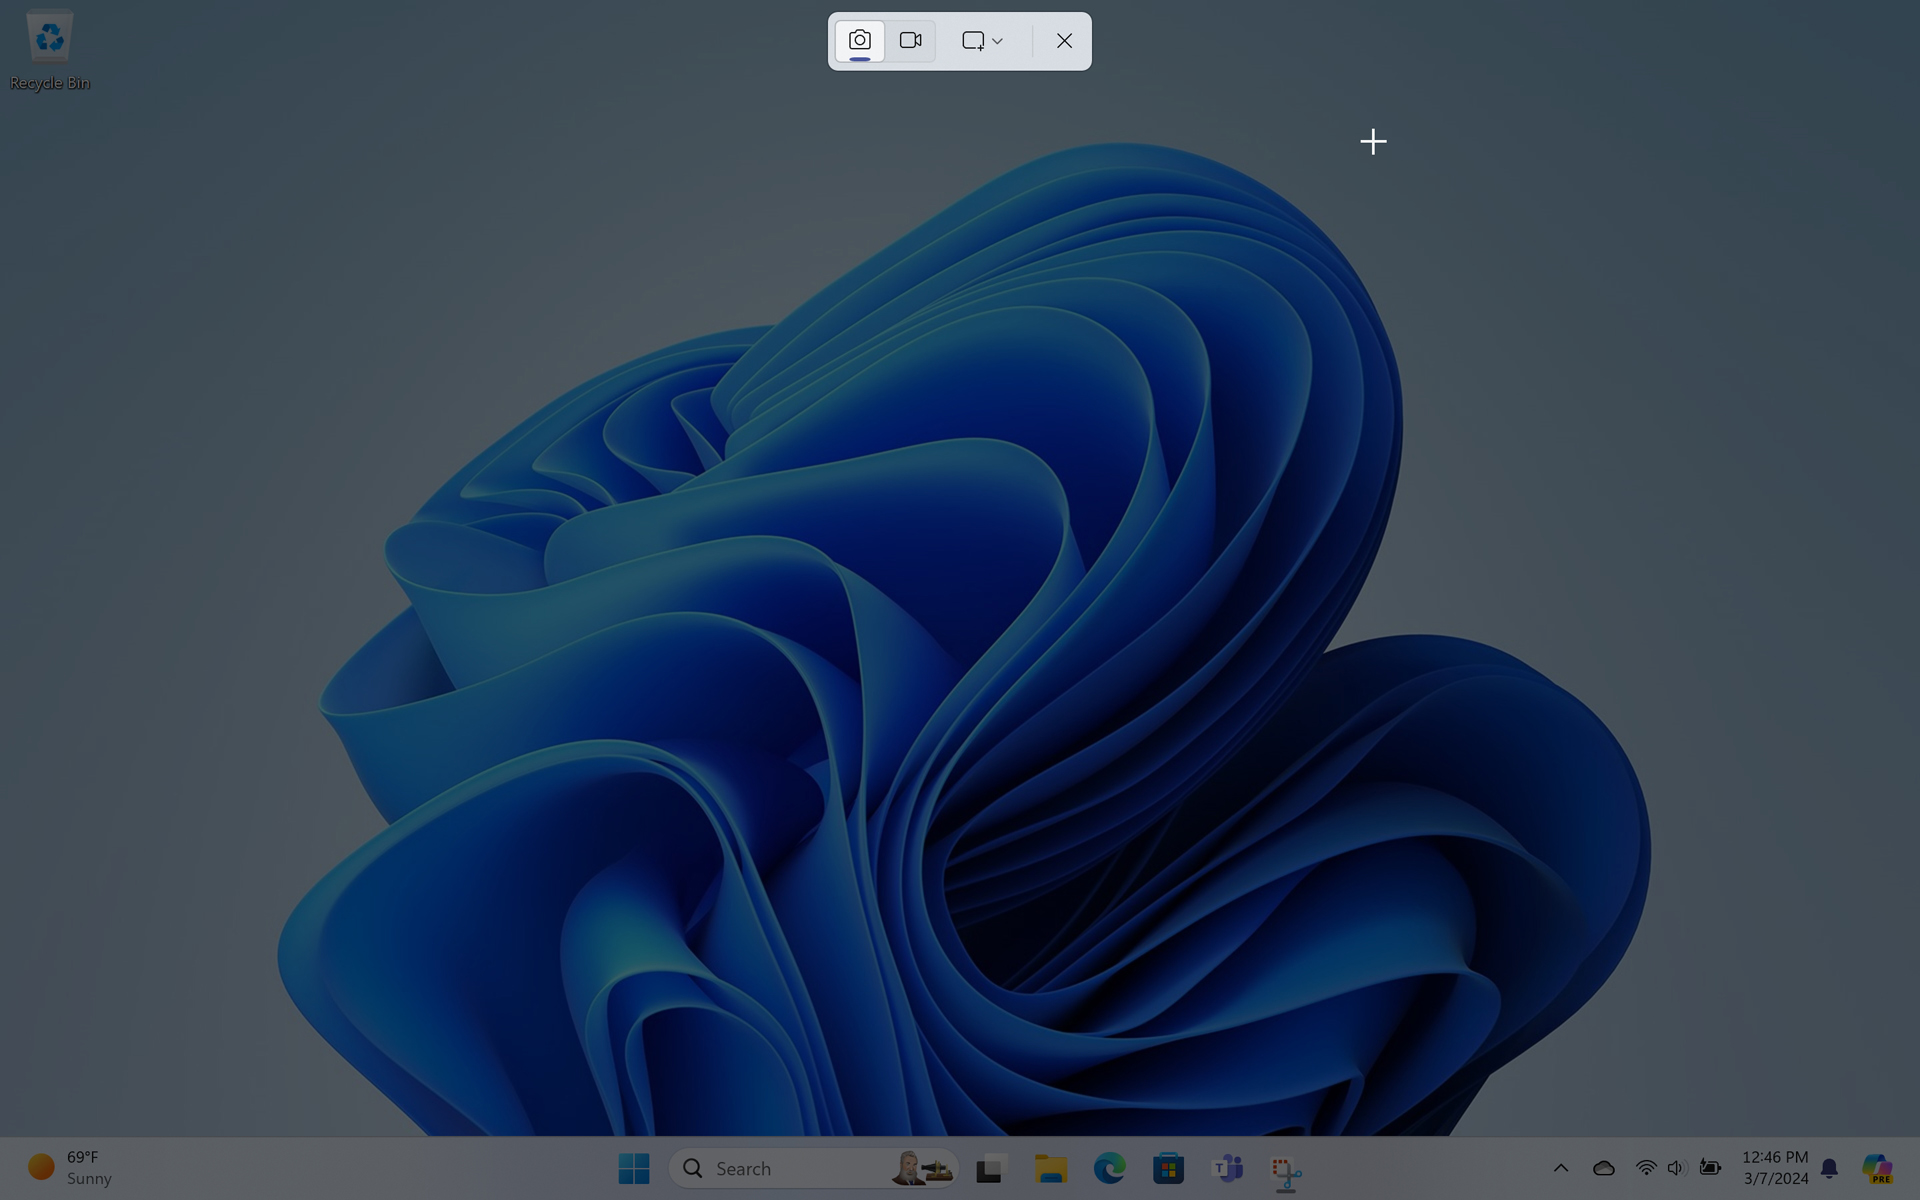

After it completes the capture, a banner notification appears, explaining that the image has been saved to disk and copied to the Windows Clipboard.

You can click the banner to bring Snipping Tool back to foreground if you wish to edit it or capture a new screenshot (or screen recording).
Where did it go?
As you probably know, typing PRINT SCREEN in all previous versions of Windows would immediately save a full-screen screenshot to the Windows Clipboard. If you prefer that behavior to using Snipping Screen, you can configure Windows 11 to work that way again. We explain how later in this chapter.
By default, Snipping Tool auto-saves screenshots to a Screenshots sub-folder in your Pictures folder. But it doesn’t auto-save screen recordings. The first time you save a screen recording manually, Snipping Tool will offer to save it to your Videos folder by default.
Configure Snipping Tool
Before using Snipping Tool to capture screenshots or screen recordings, you should make sure it’s configured properly for your needs.
To do so, open the app, click “See more” (“…”), and then choose “Settings” in the menu that appears. As with other modern in-box Windows 11 apps, the settings interface appears inside the main app window rather than in a separate window. But if Snipping Tool is in its default configuration–a small floating window–then most of the settings interface will be cut off.
To see more, resize or maximize the Snipping Tool app window.
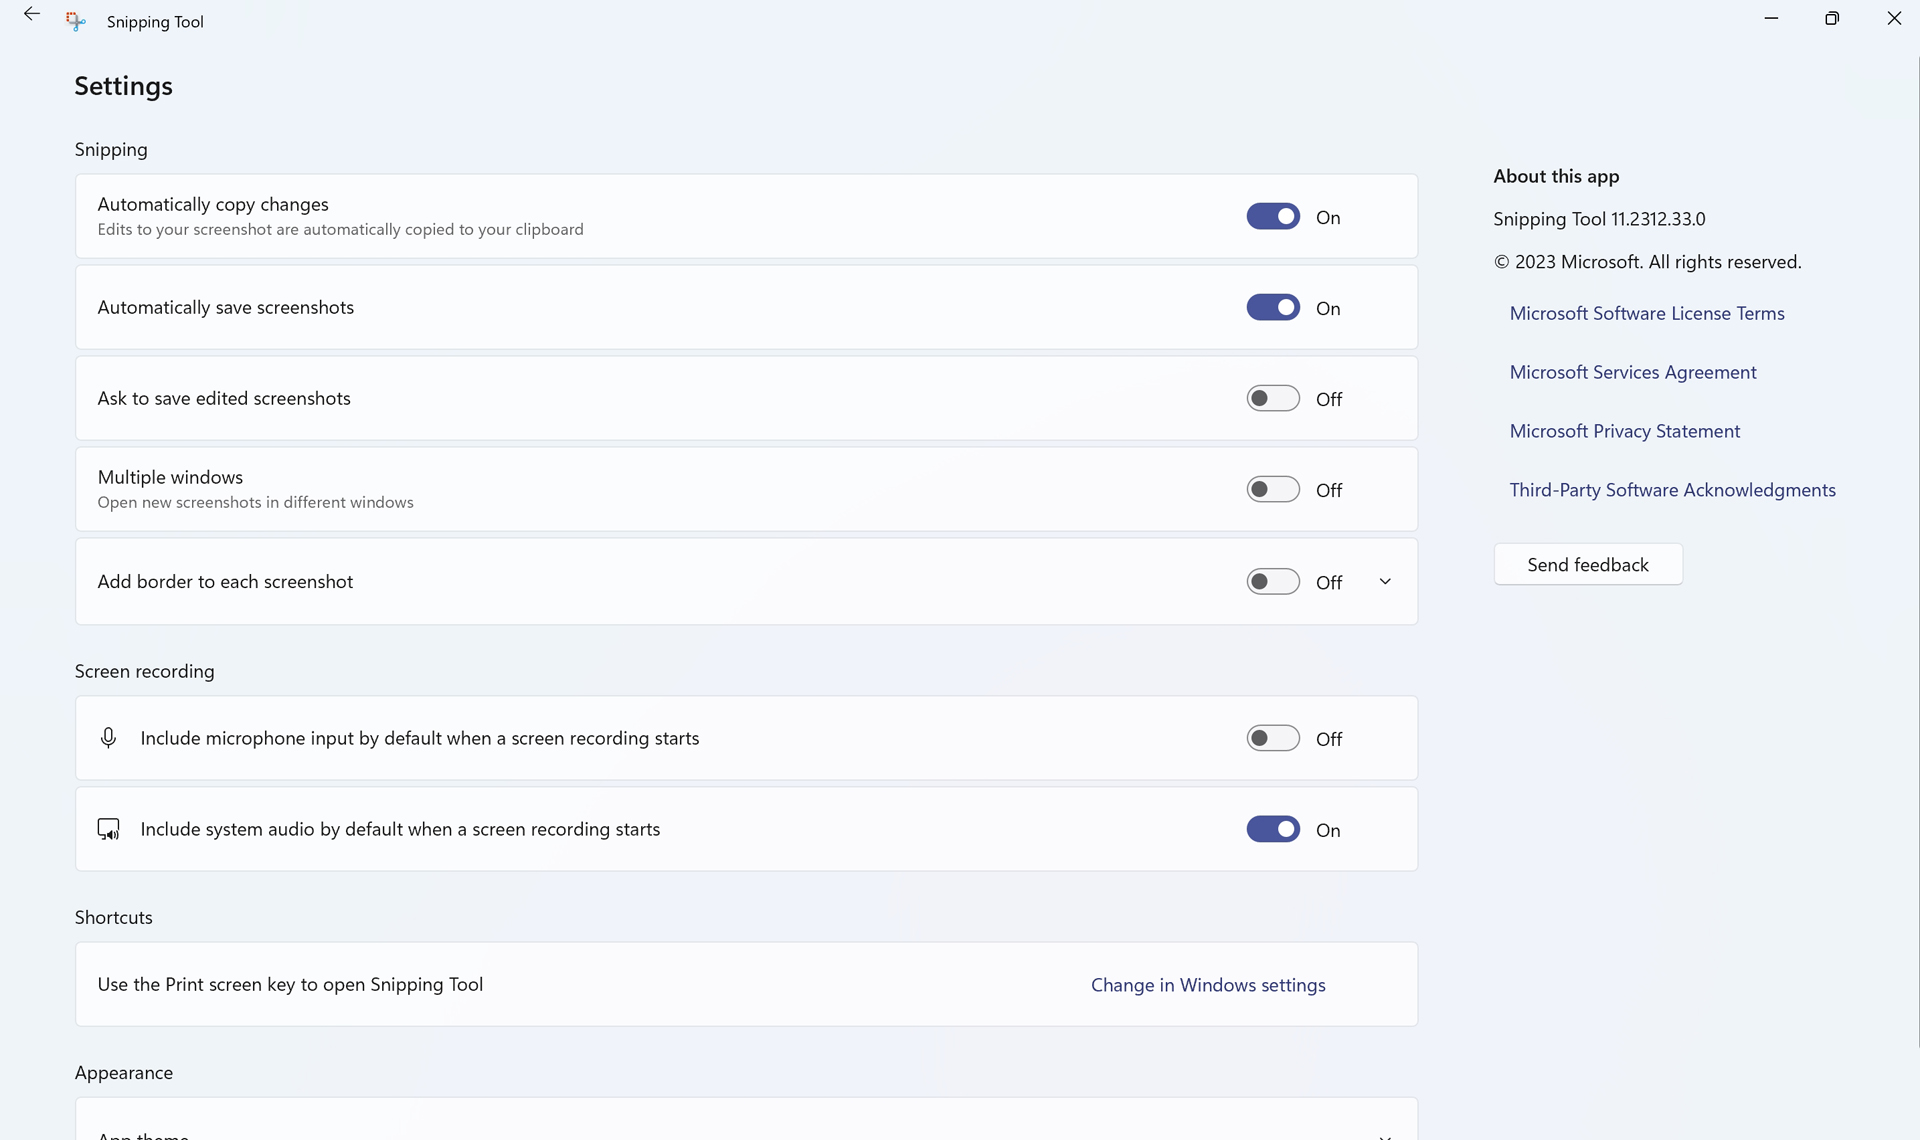
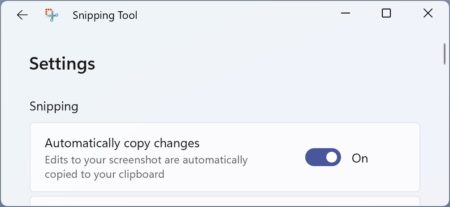
Snipping Tool settings has different sections for screen captures (“Snipping”) and screen recordings. Most of these are straightforward, but it’s worth noting that in addition to saving screen captures to disk automatically, Snipping Tool also copies them to the Clipboard. So in that way, it still works like the old Print Screen feature.
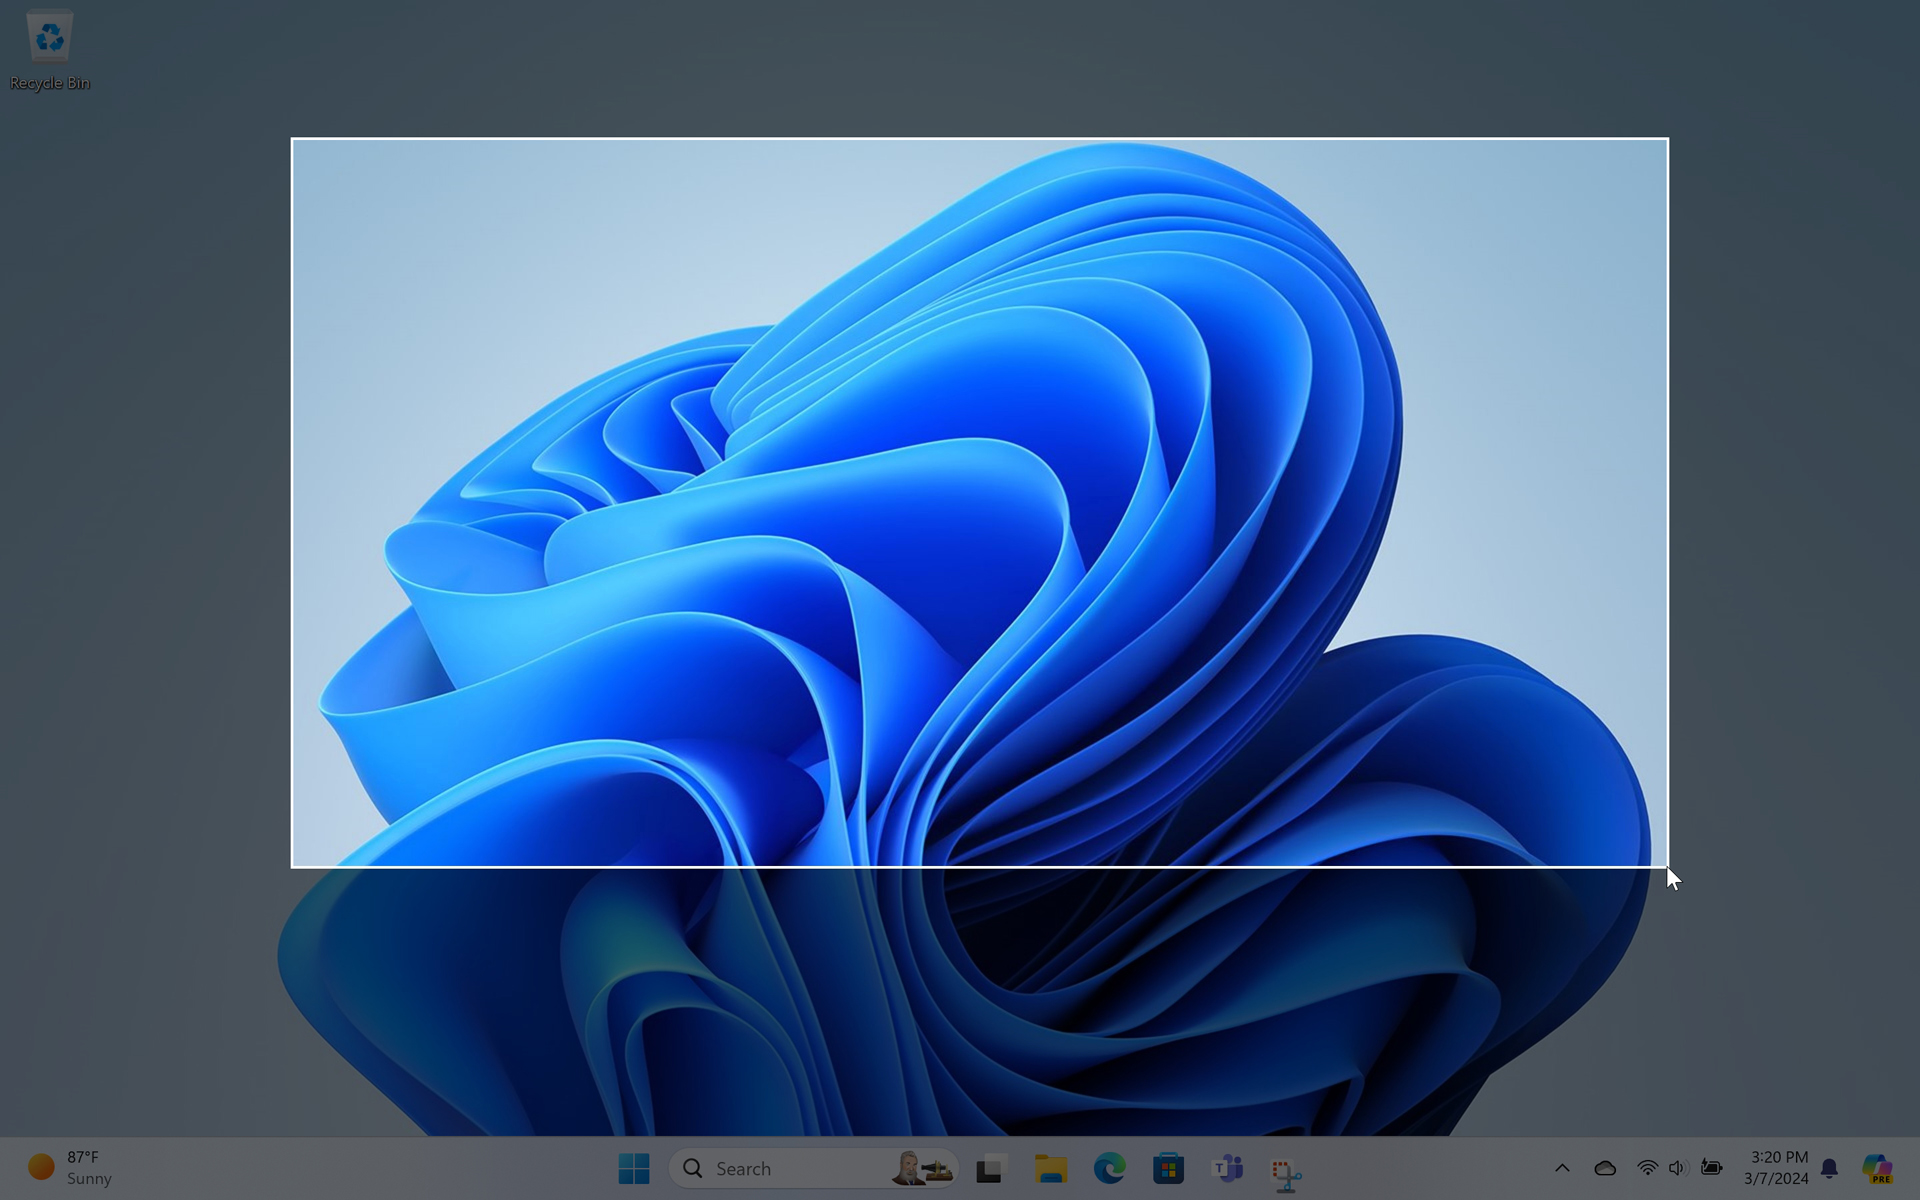
Use Snipping Tool to capture a screenshot of the entire screen, a window, or an area
To take a screenshot, type PRINT SCREEN or open Snipping Tool and click “New.” Either way, the screen dims and a floating toolbar appears as described earlier.

Unless you changed this previously, Snipping mode is in Snip (screenshot) capture mode by default, so all you have to do now is choose a Snipping mode.
The following choices are available.
Rectangular mode. With this mode selected, you can draw a rectangular area on-screen that lights up as you go. When you have configured the area you wish to capture, let go of the mouse button to take the screenshot.
Window mode. With this mode selected, you can mouse-over available windows, noting that each will light up in turn as you do so. When you’ve found the window you wish to take a screenshot of, click the mouse button to take a screenshot.
Note that if there is a window in front of the window you wish to screenshot that you will capture parts of the front-most window as well.
Full-screen mode. As expected, this option takes a screenshot of the entire display.
If you launch Snipping Tool and select this Snipping mode before clicking “New,” the overlay will not appear. Instead, it will simply take the screenshot.
Freeform mode. With this mode selected, you can draw an arbitrary shape on-screen that lights up as you go. When you have configured the area you wish to capture, let go of the mouse button to take a screenshot.
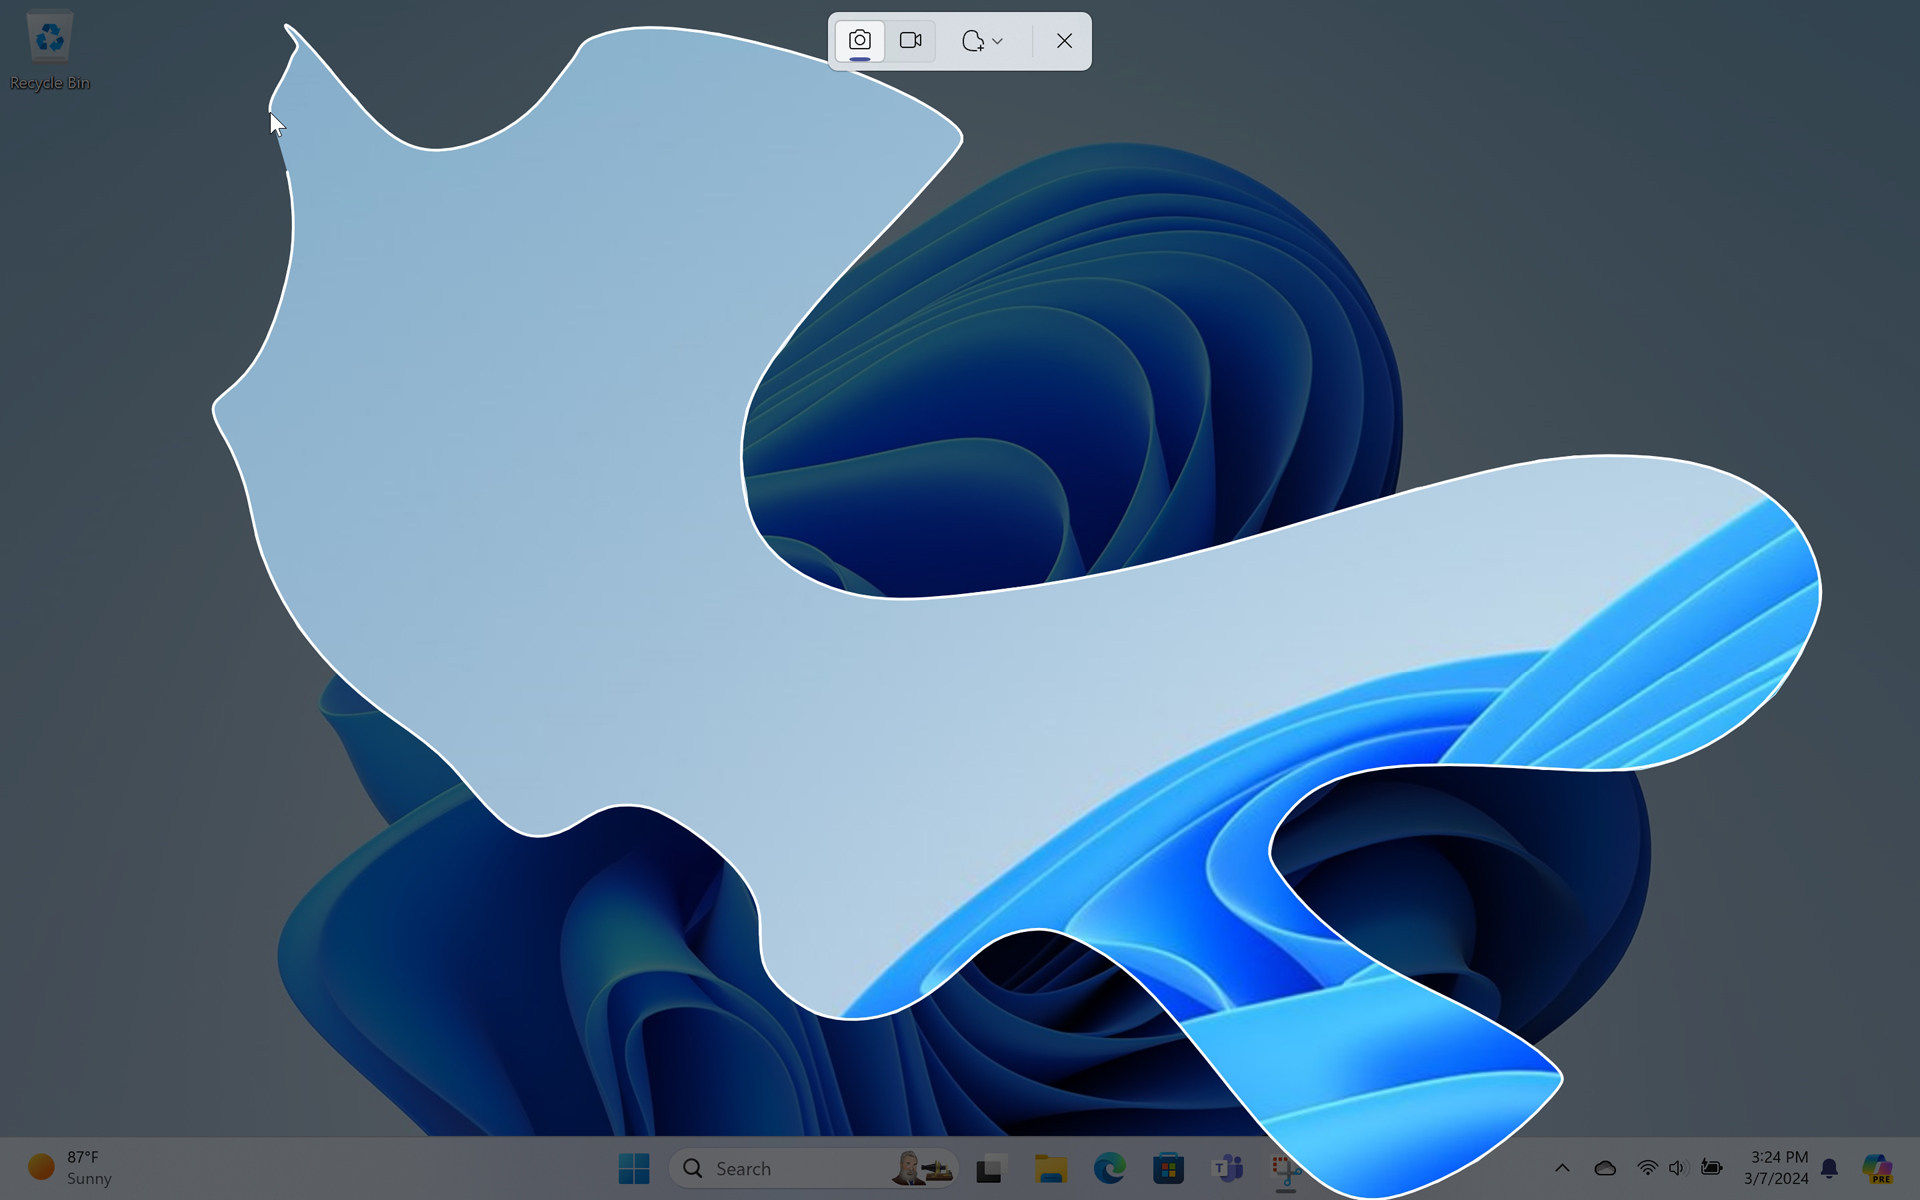
Freeform mode makes more sense with a smart pen or multi-touch.
Close. Click the “Close” (“X”) button to cancel this operation. If you launched the Snipping Tool app previously, it will return to focus now.
You can also type ESC to close the Snipping Tool.
Snipping Tool saves screenshots as PNG files in the Screenshots folder in your account’s Pictures folder.
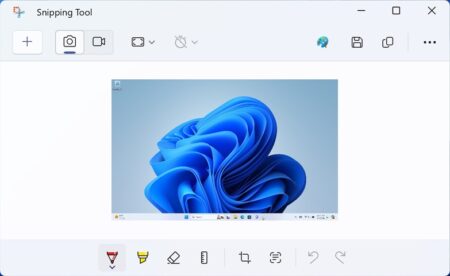
If you launched the Snipping Tool app before taking the screenshot, it will reappear now and display the screenshot along with some basic editing tools that typically appear in a toolbar at the bottom of the window, a few additional command buttons in the upper-right of the app window, and, less obviously, four more commands in the “See more” (“…”) menu. (If the window is big enough, the toolbar with editing command button will appear at the middle top.)
If you typed PRINT SCREEN to access this functionality, Snipping Tool will instead display a banner notification with a thumbnail of the screenshot. To view or edit this screenshot, click the notification, and the window shown above will appear.
Use Snipping Tool to edit a screenshot
You can use Snipping Tool to edit a screenshot you just took. But you can also use it to edit any image, including screenshots you took long ago. This is particularly useful if you want to use the app’s new Text actions functionality, which detects text in images and can copy it to the Clipboard so you can use it in other apps.
To open another screenshot or image with Snipping Tool directly from the app, click “See more” (“…) > “Open File” and then locate the file with the dialog that appears.
Or, type CTRL + O.
To open another screenshot or image from File Explorer, locate the file, right-click it, and choose “Open with” and then “Snipping Tool” from the context menu that appears. (If a “Select an open this .png file” window appears, click “Just once.”)
However you get a screenshot or image to open with Snipping Tool, the app changes to display numerous new commands in three different places: A toolbar with editing tools, three additional command buttons in the upper-right, and four new commands in the “See more” (“…”) menu.
Confusingly, where the editing tools appear depends on the size of the Snipping Tool window. Most commonly, they appear at the bottom of the app window, but if it’s large enough, the editing tools will appear in the center-top of the window instead.

Most of the editing tools are obvious enough. They include:
Ballpoint pen. This tool lets you draw or write on the screenshot in various colors and sizes.
Highlighter. This tool works like a virtual highlighter and it also supports multiple colors and sizes.
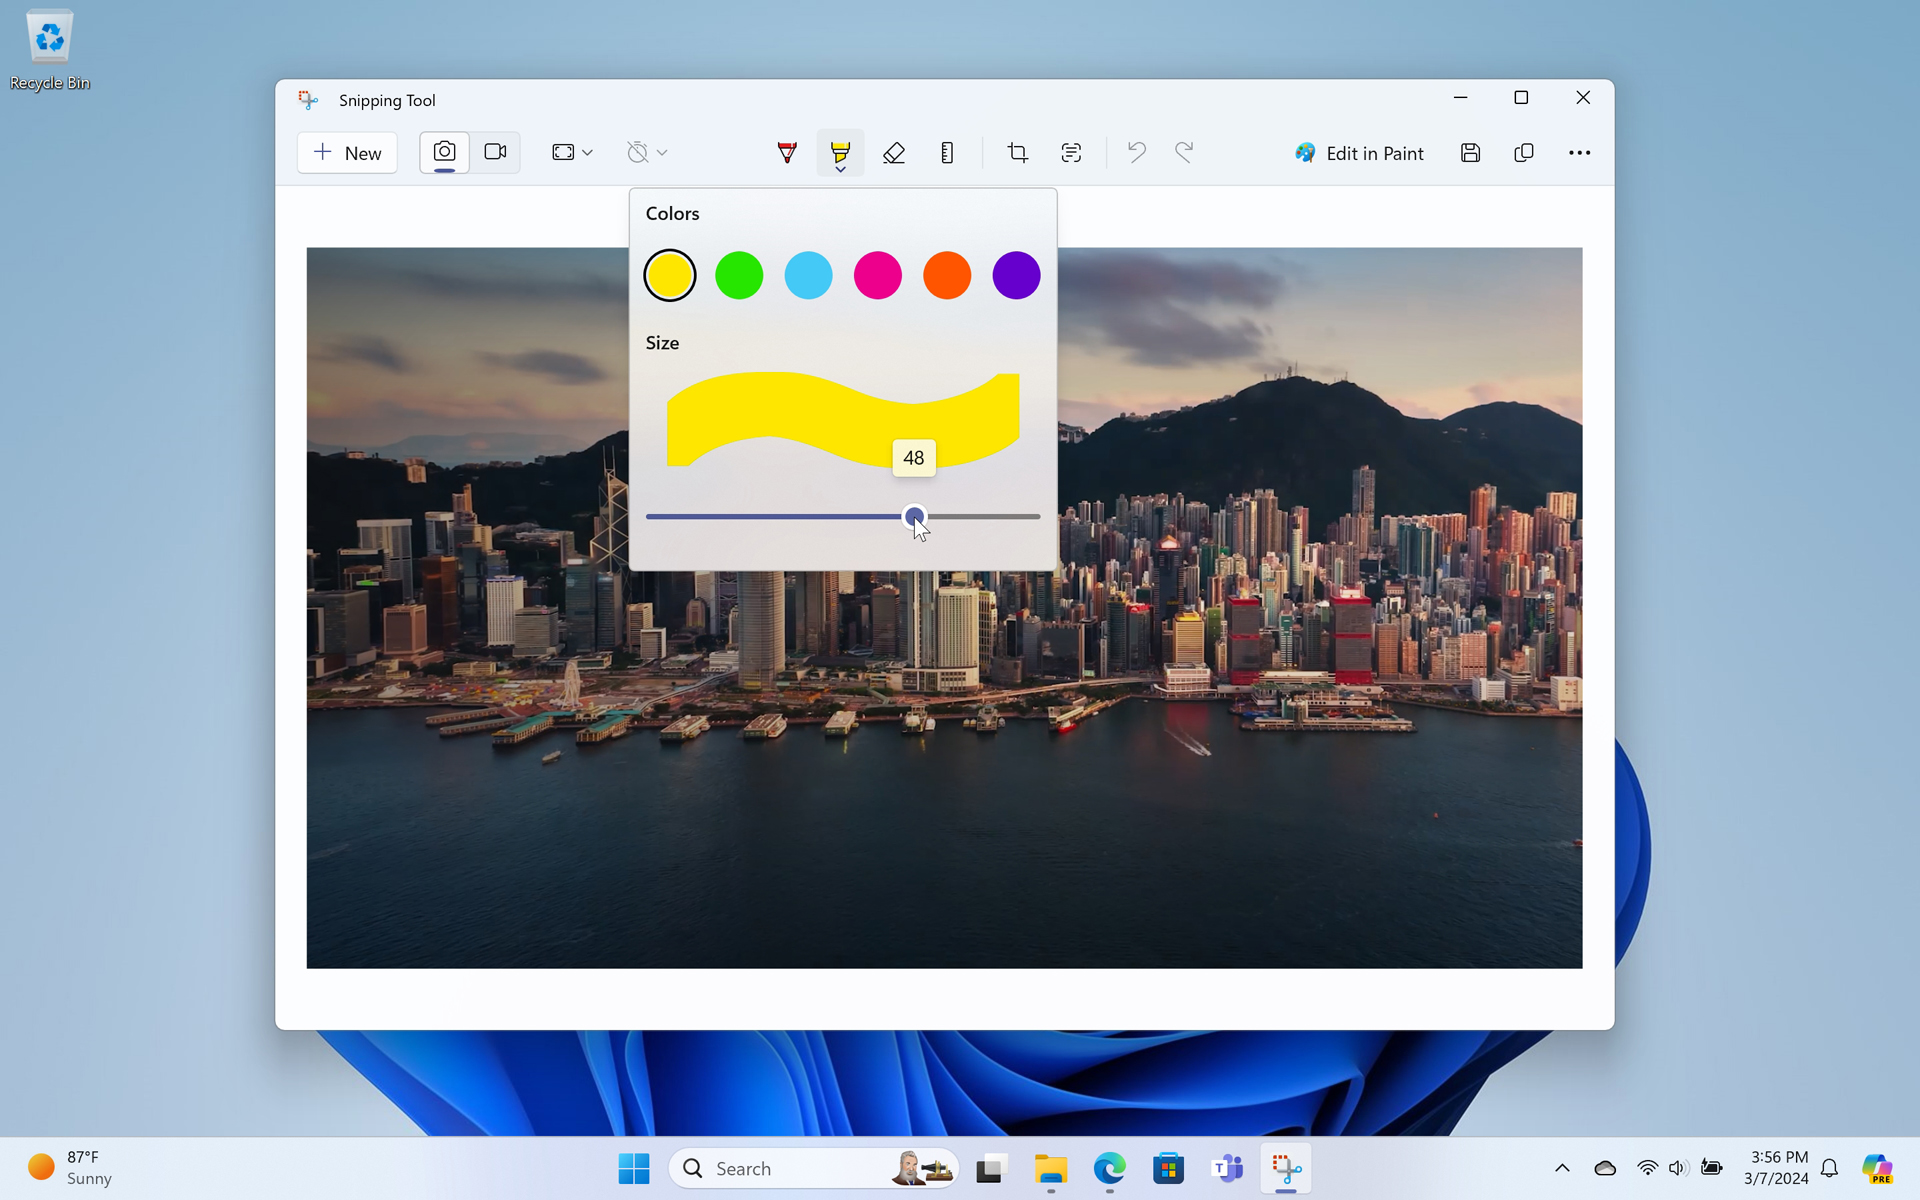
Eraser. This tool lets you erase all the ballpoint pen and highlighter additions you previously made with one click. That is, it doesn’t help you to arbitrarily remove parts of the screenshot.
Ruler. This bizarre tool lets you choose between an on-screen ruler or protractor so that you can create precise straight lines using the Ballpoint pen or highlighter in the former case or measure angles in the latter. Rotating the ruler and resizing the protractor work similarly: Just position the mouse cursor in the middle of the tool and then use whatever scrolling mechanism your pointing device provides (the scroll wheel on a mouse or the two-finger scroll gesture on a touchpad.)
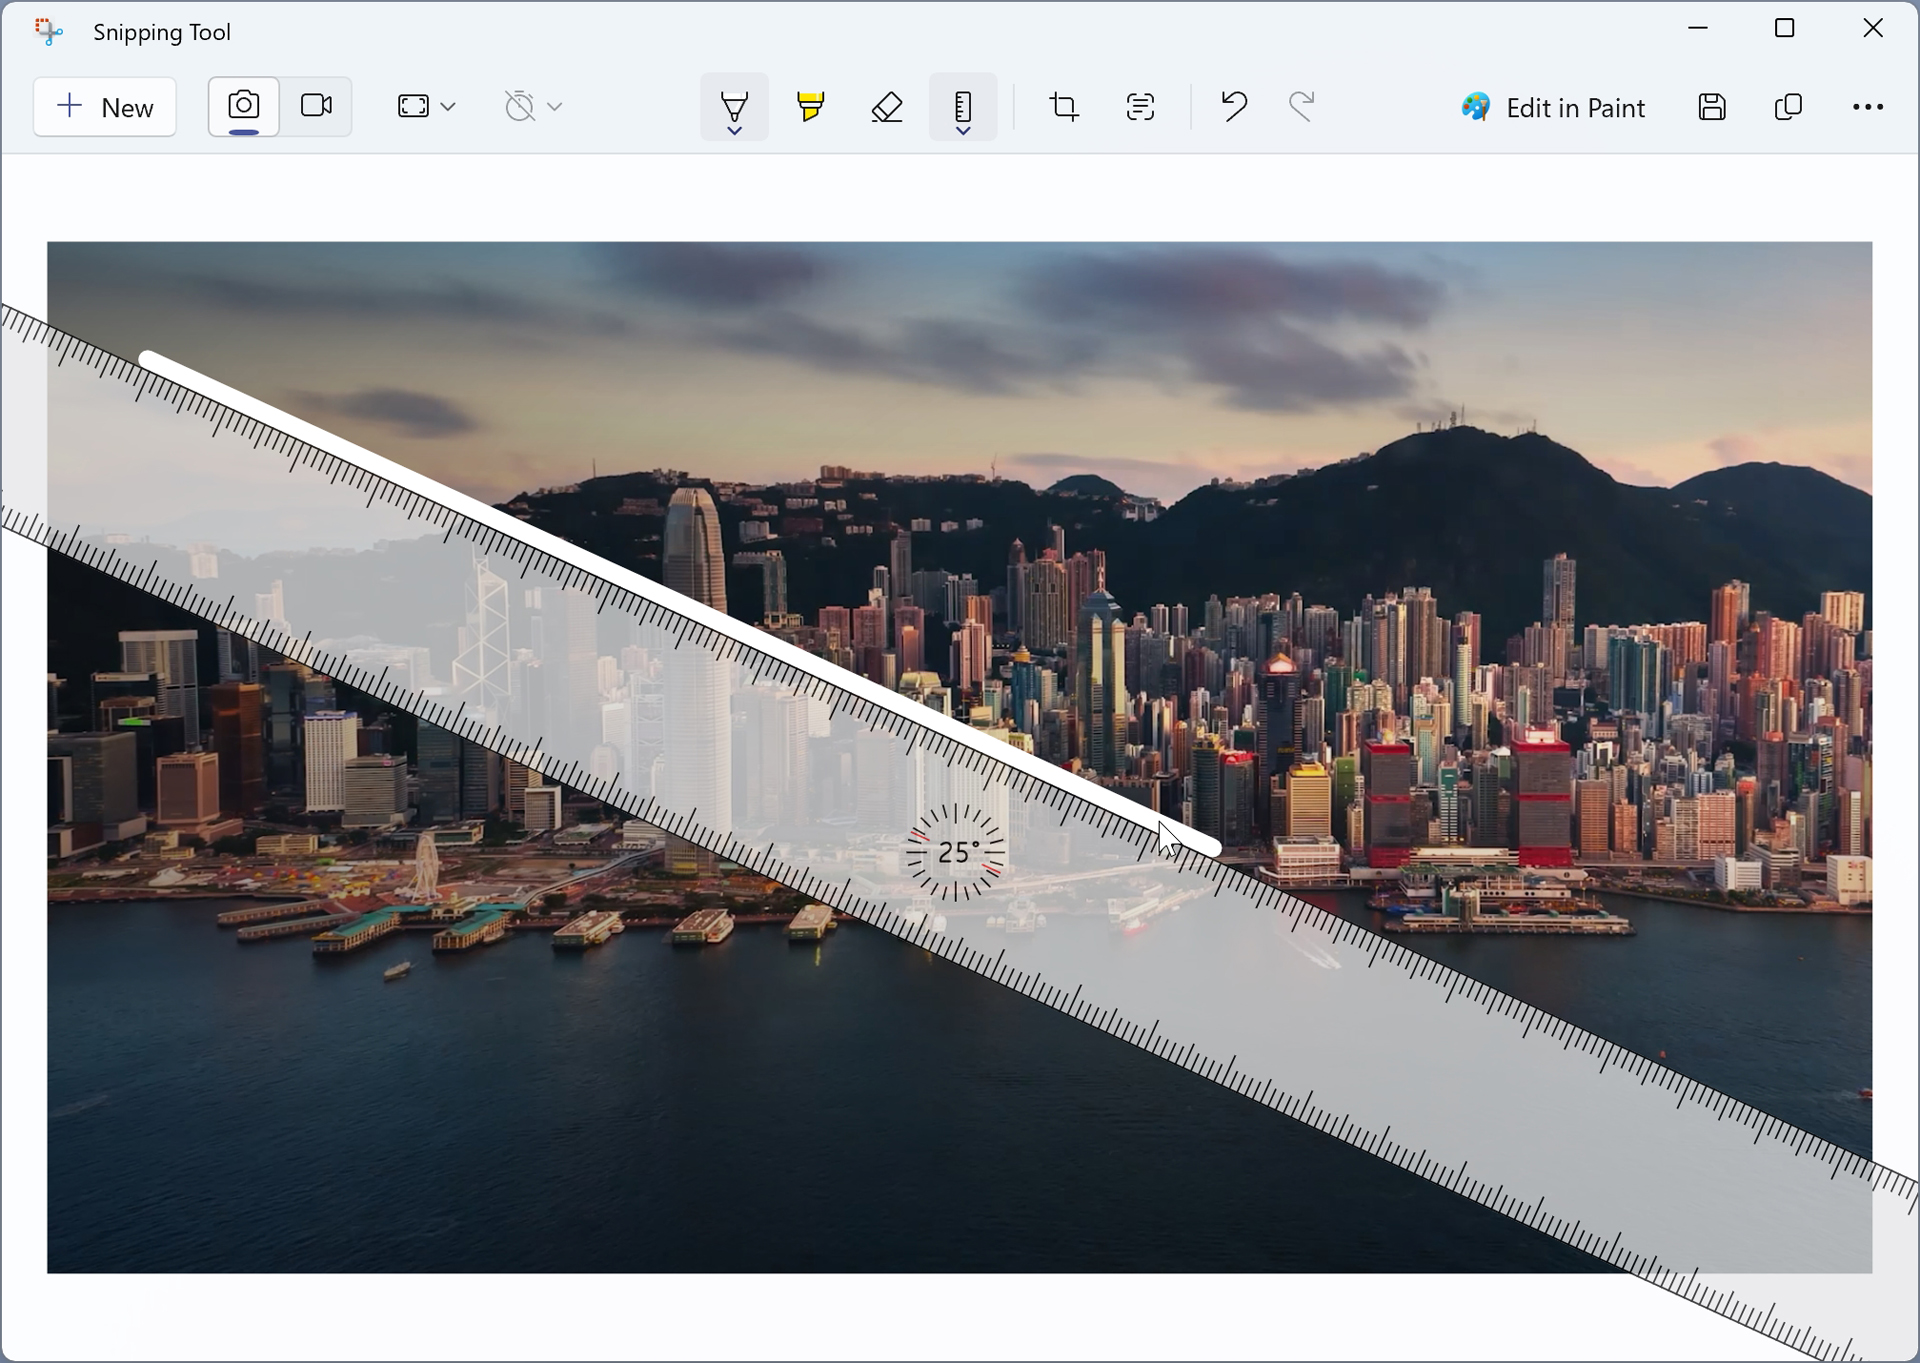
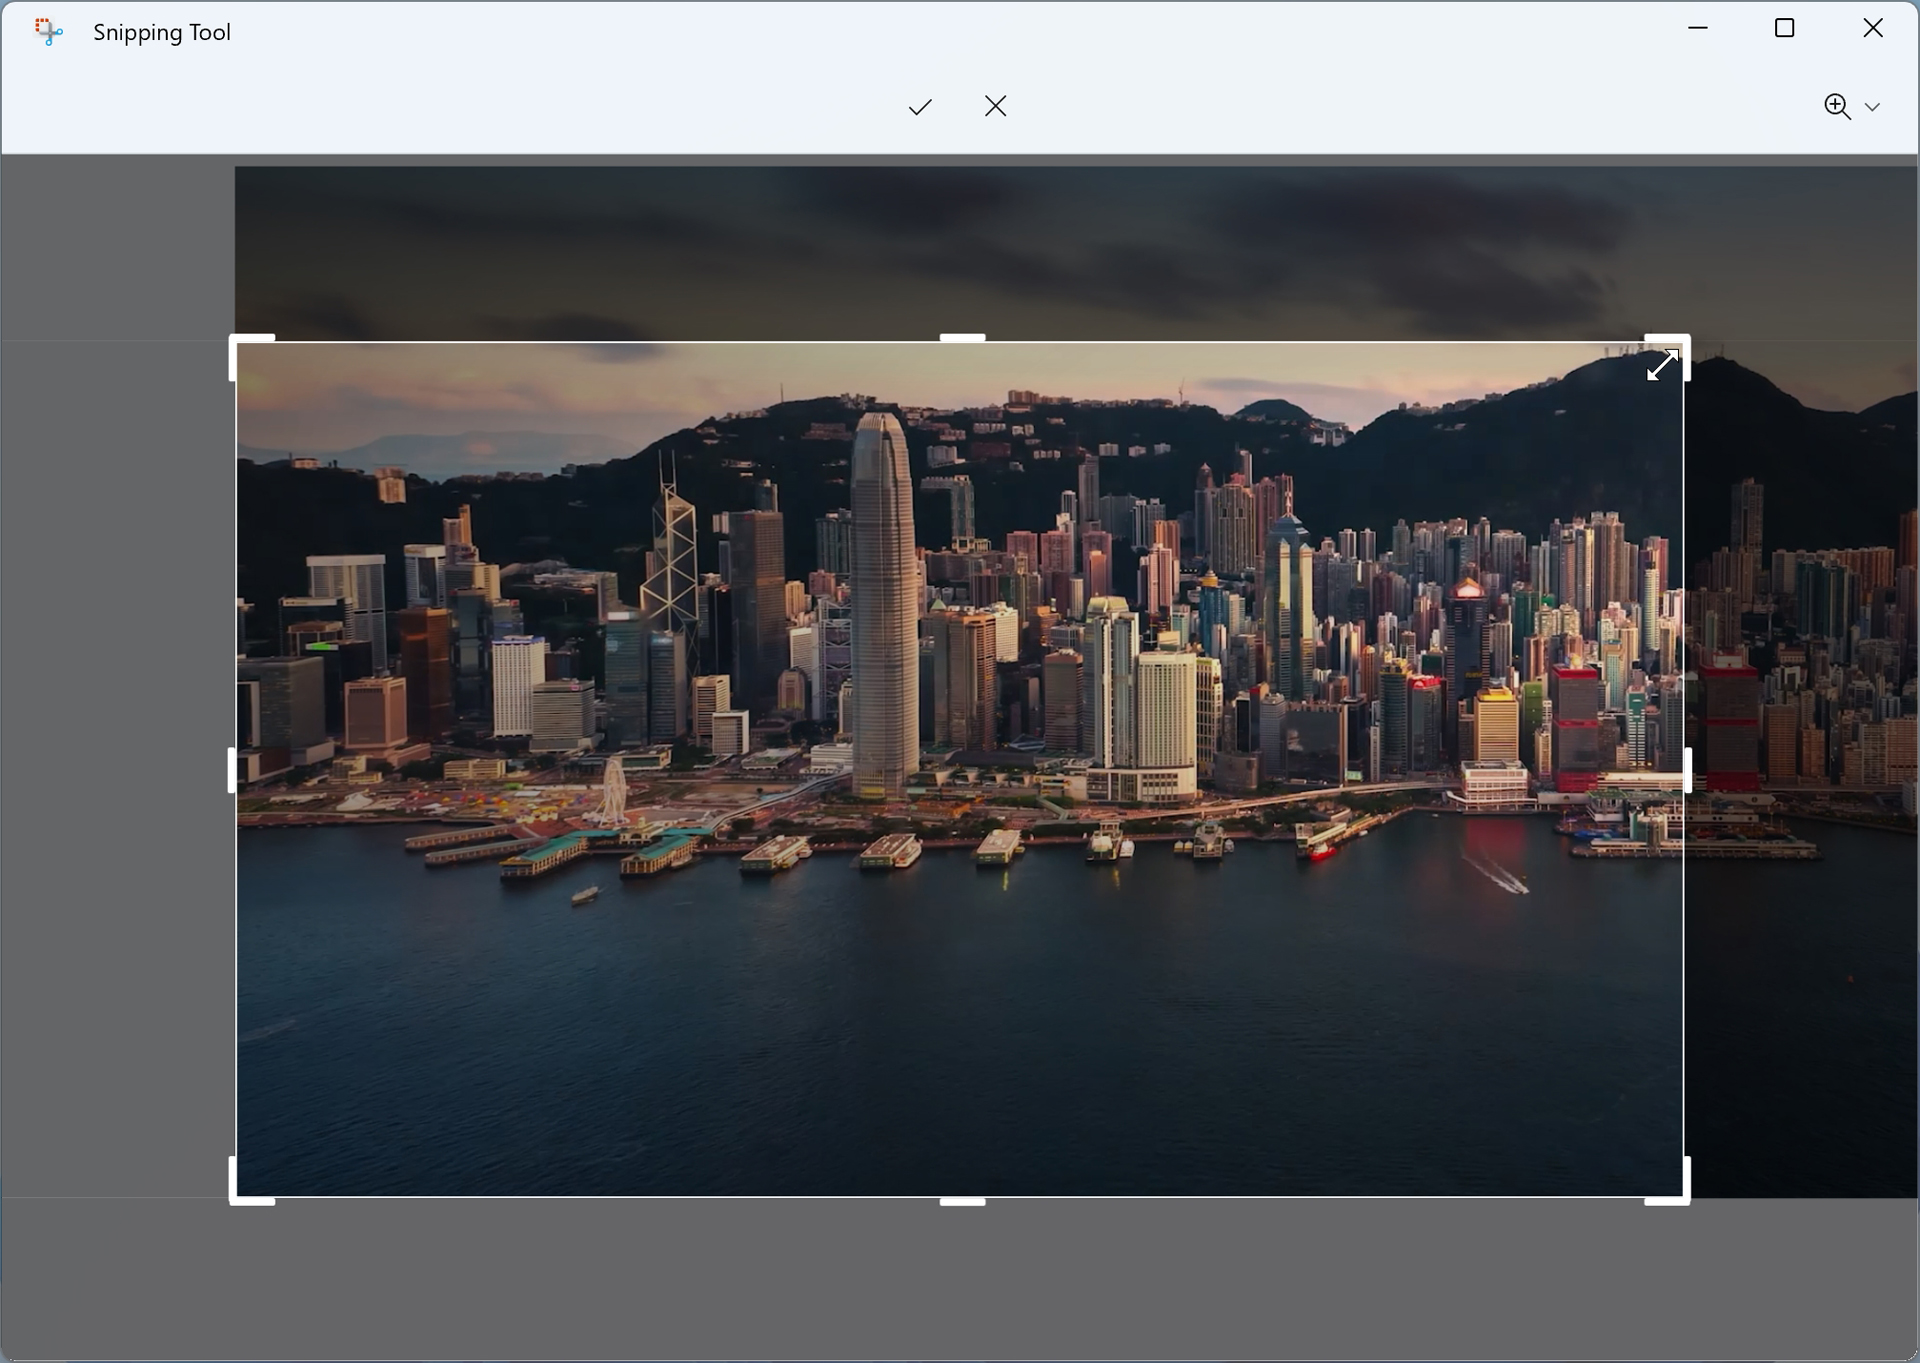
Image crop Use this tool–and the associated Zoom control that appears when it’s selected–to crop the image.
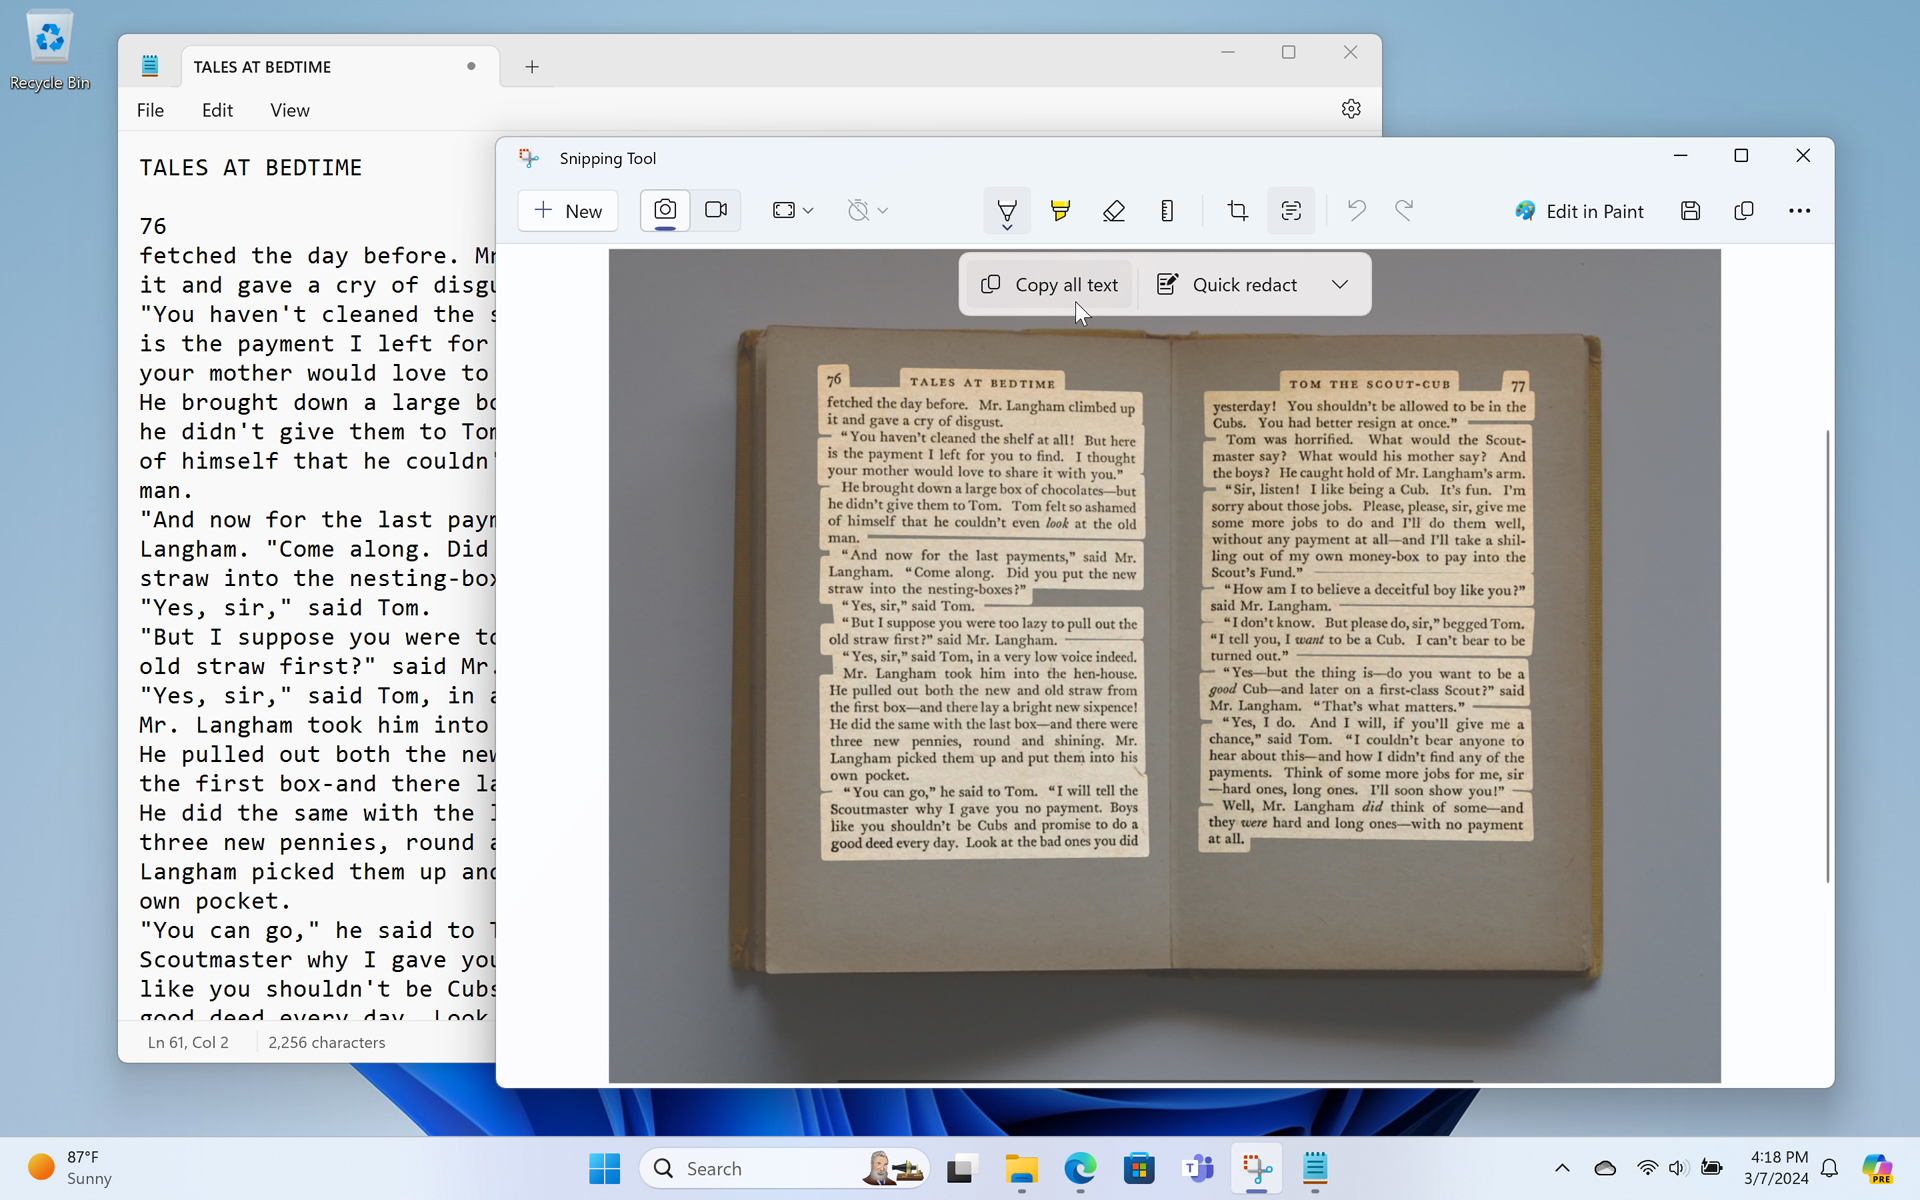
Text actions. New to Windows 11 version 23H2, Text actions uses AI to extract text from the displayed screenshot (or other image) so that you can copy it to the Clipboard and use it in other apps. You can also optionally use “Quick redact” to remove all email addresses and/or phone numbers from the copied text.

Undo. As you might expect, Snipping Tool offers multiple levels of Undo so that you can correct any editing mistakes you’ve made.
Redo. Likewise, Snipping Tool supports multiple levels of Redo as well.
In addition to these editing tools, Snipping Tool also displays three other commands in the upper-right of its app window when displaying a screenshot or other image. They are:
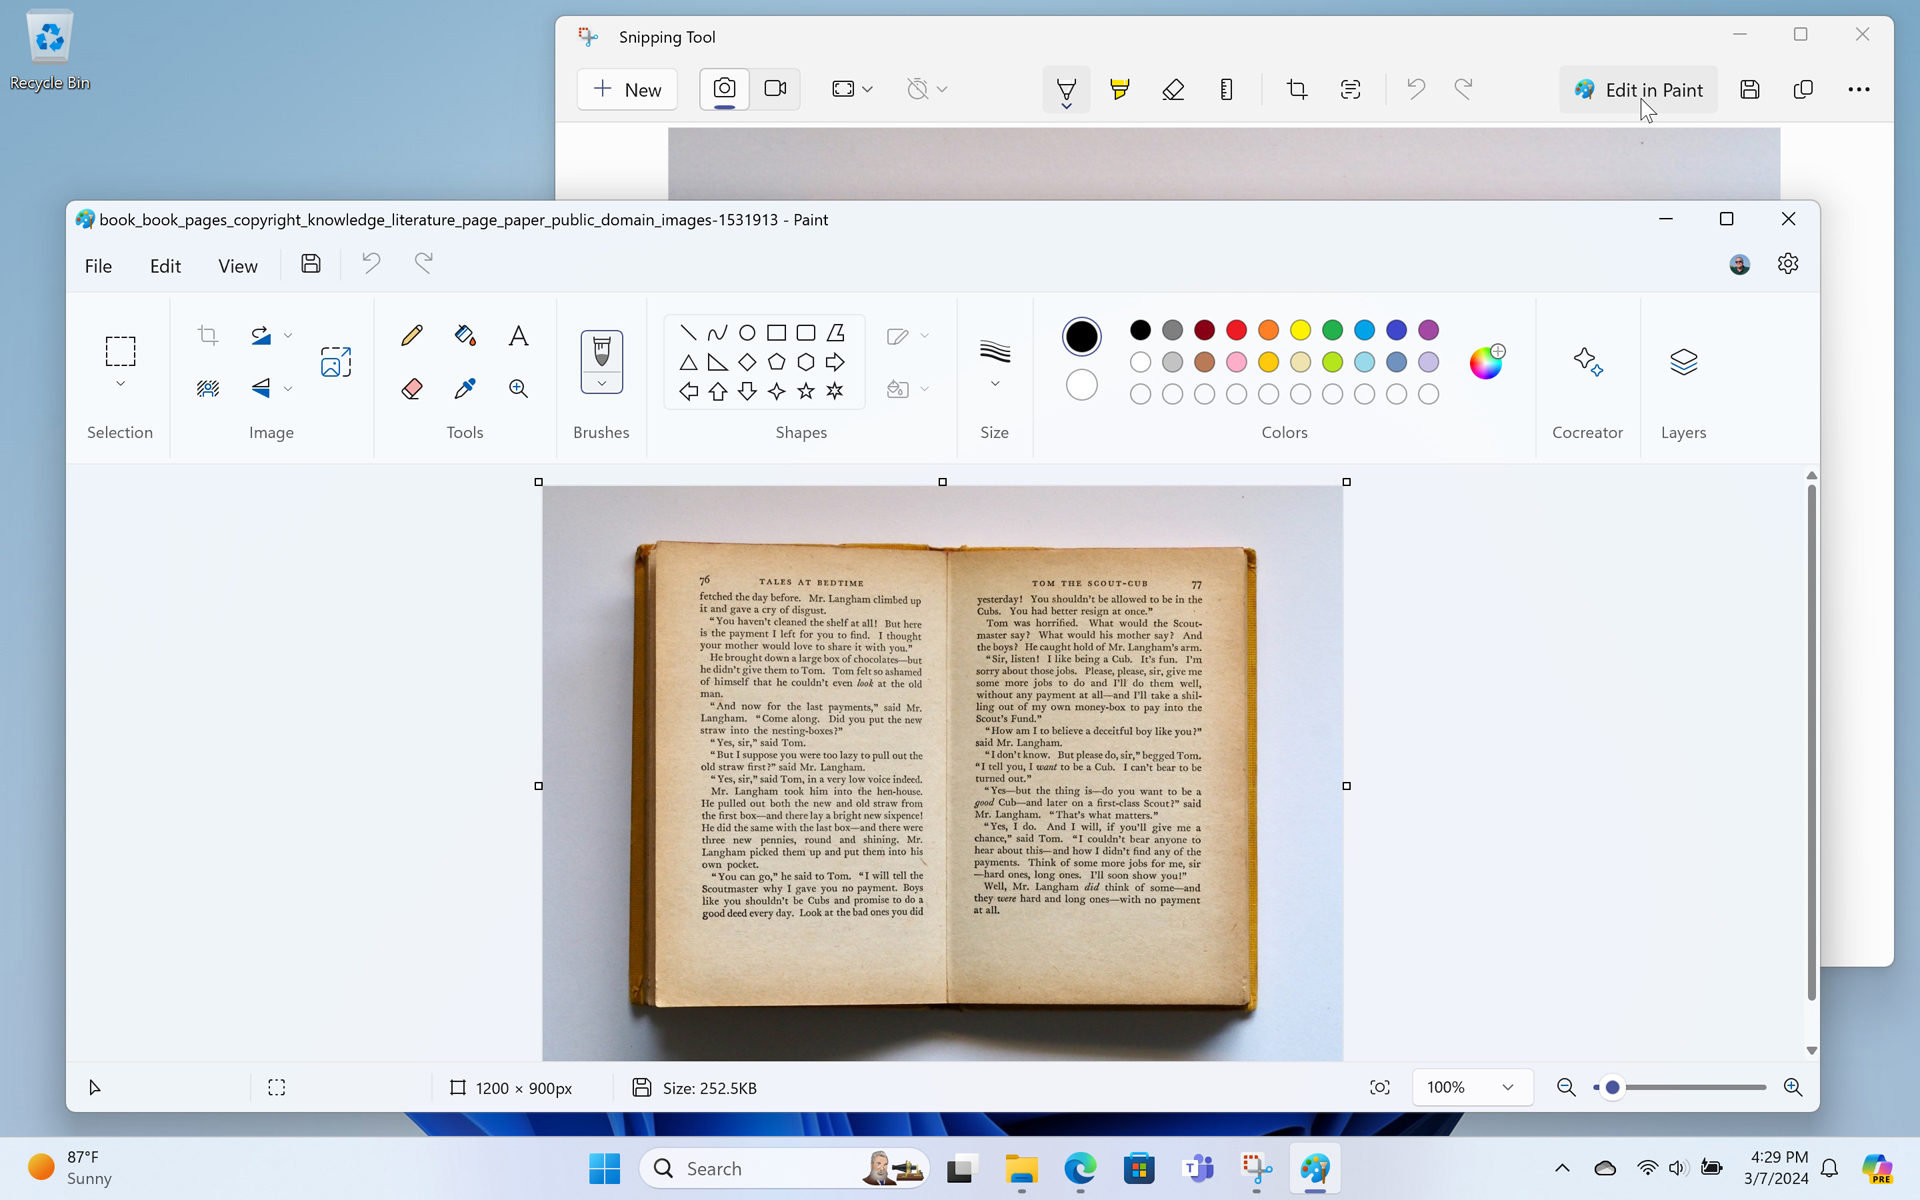
Edit in Paint. This is also new to Windows 11 version 23H2: Click it to open the current screenshot (or image) with Microsoft Paint, which offers more advanced editing tools.

Save as. Use this command to save a copy of an edited screenshot or other image, as opposed to simply overwriting the original.
You can also type CTRL + S to use Save As.
Copy. Use this command to copy the current screenshot or other image to the Clipboard so that you can then paste it into another app.
Or, type CTRL + C.
And, as noted, there are additional commands in the “See more” (“…”) menu too. They are:
Zoom. Not surprisingly, this items lets you zoom in, zoom out, zoom to 100 percent, or fit the image to the size of the Snipping Tool window. Each command is available via a sub-menu.
Type CTRL + Plus to zoom in, CTRL + Minus to zoom out, CTRL + 0 to zoom the image to 100 percent, and CTRL + 1 to fit the image to the size of the window.
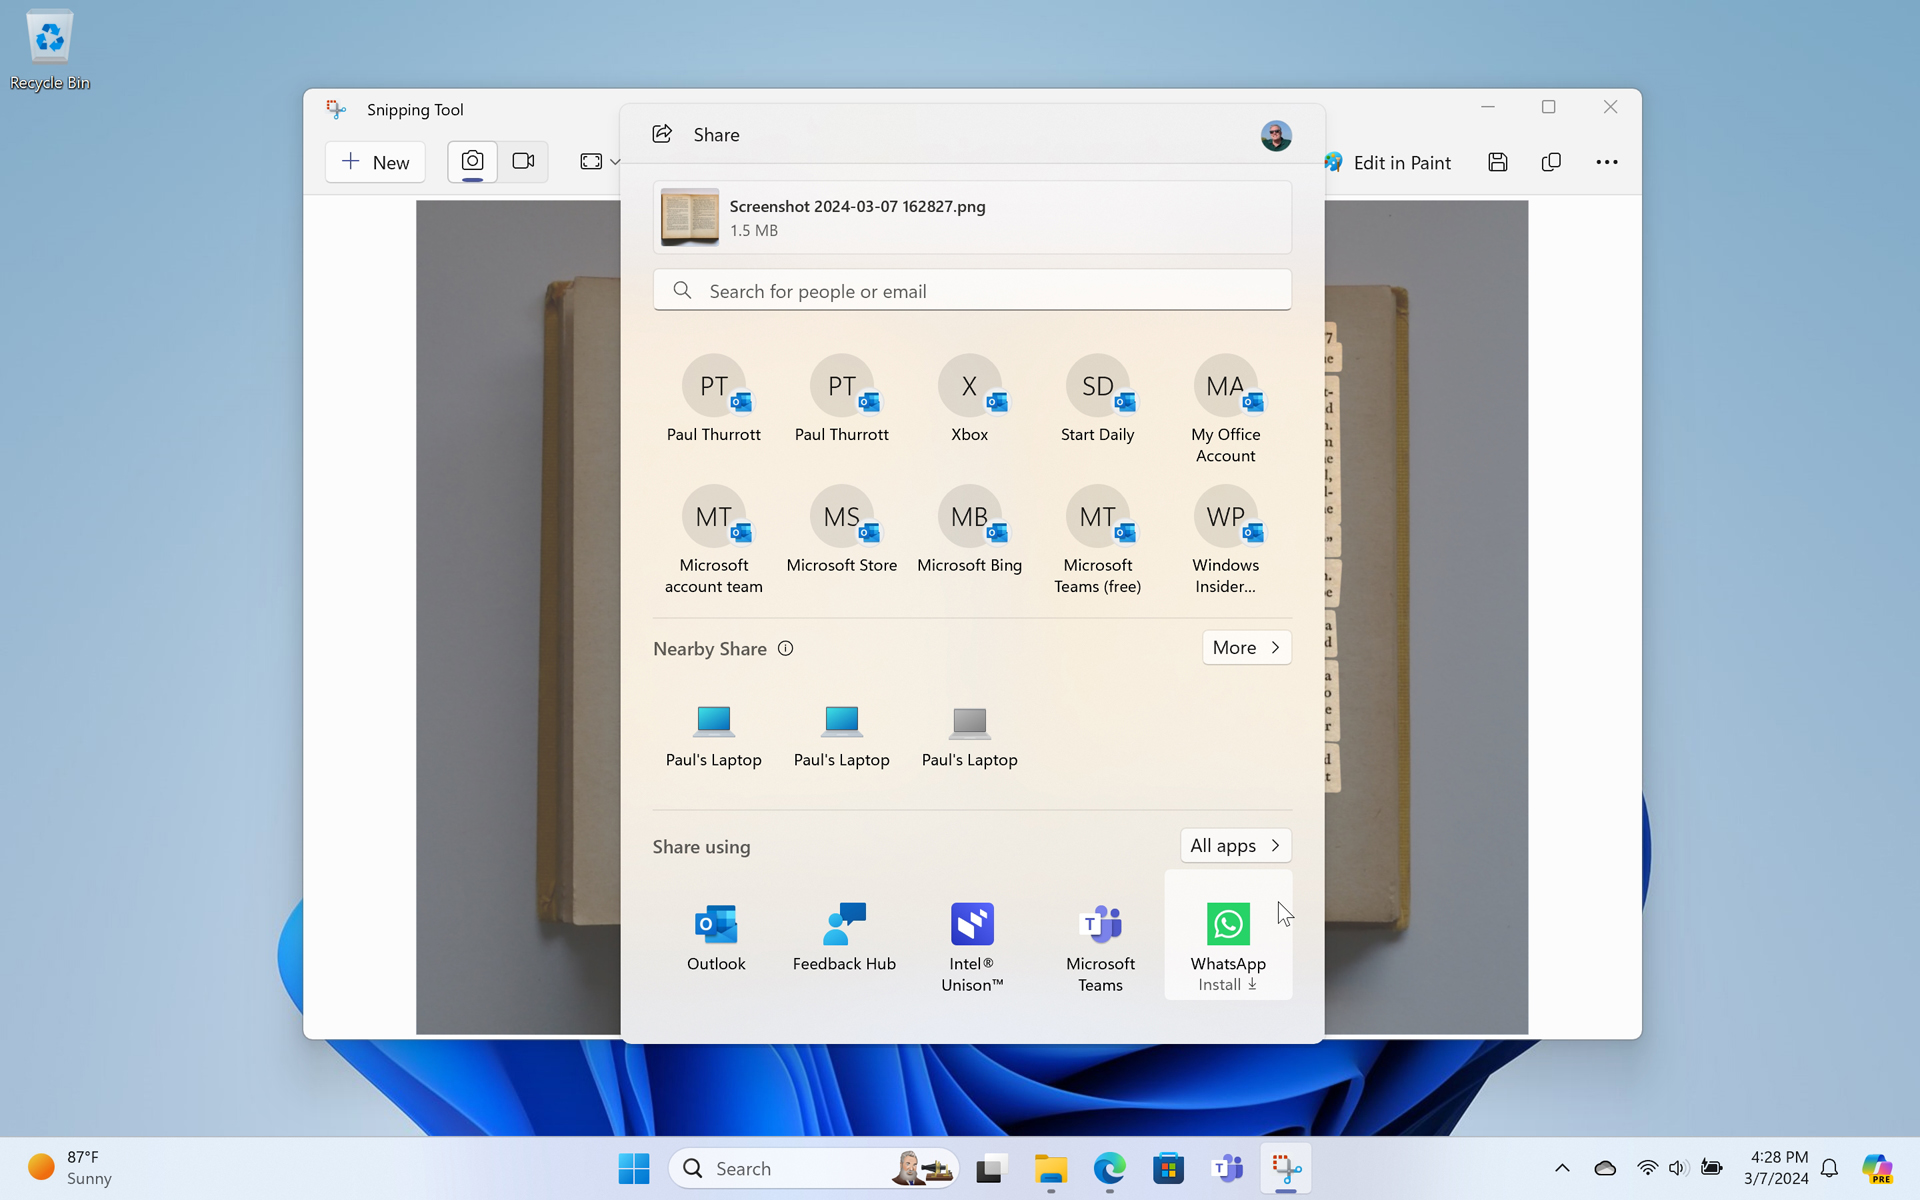
Share. Click this button to share the current image using the system Share functionality, which lets you share using email, Nearby Sharing, or compatible apps.
Open Screenshots folder. Click this to open your Screenshots folder with File Explorer.
Print. This item will launch the system Print window so that you can print the screenshot using a physical printer or Microsoft Print to PDF.
Use Snipping Tool to create a screen recording
In addition to taking screenshots, the Snipping Tool app can also be used to create screen recordings. There are fewer options for this type of operation–the recording will always be some rectangular area, which you can manually set to be full-screen–and there are, curiously, no settings related to recording quality or resolution that you can configure. Instead, what you get is a broadly compatible 30 fps MP4 file recorded at a high bitrate and at whatever resolution you select at record time.
A> If you haven’t yet, examine Snipping Tool settings and note that there are two options related to screen recordings: “Include microphone input by default when a screen recording starts,” which is “Off” by default, and “Include system audio by default when a screen recording starts,” which is “On” by default.
To get started, open Snipping Tool and change the “Snip/Record” toggle button to “Record.”
Then, click “New recording” (“+ New”).
Or, type CTRL + N.
When you do, the recording overlay appears and the mouse pointer turns into a plus sign “+” so that you can determine which area of the screen to record. To record the entire screen, move the mouse pointer to one corner of the screen, click and hold, then drag the mouse pointer to the far corner of the screen, and then let go of the mouse button.
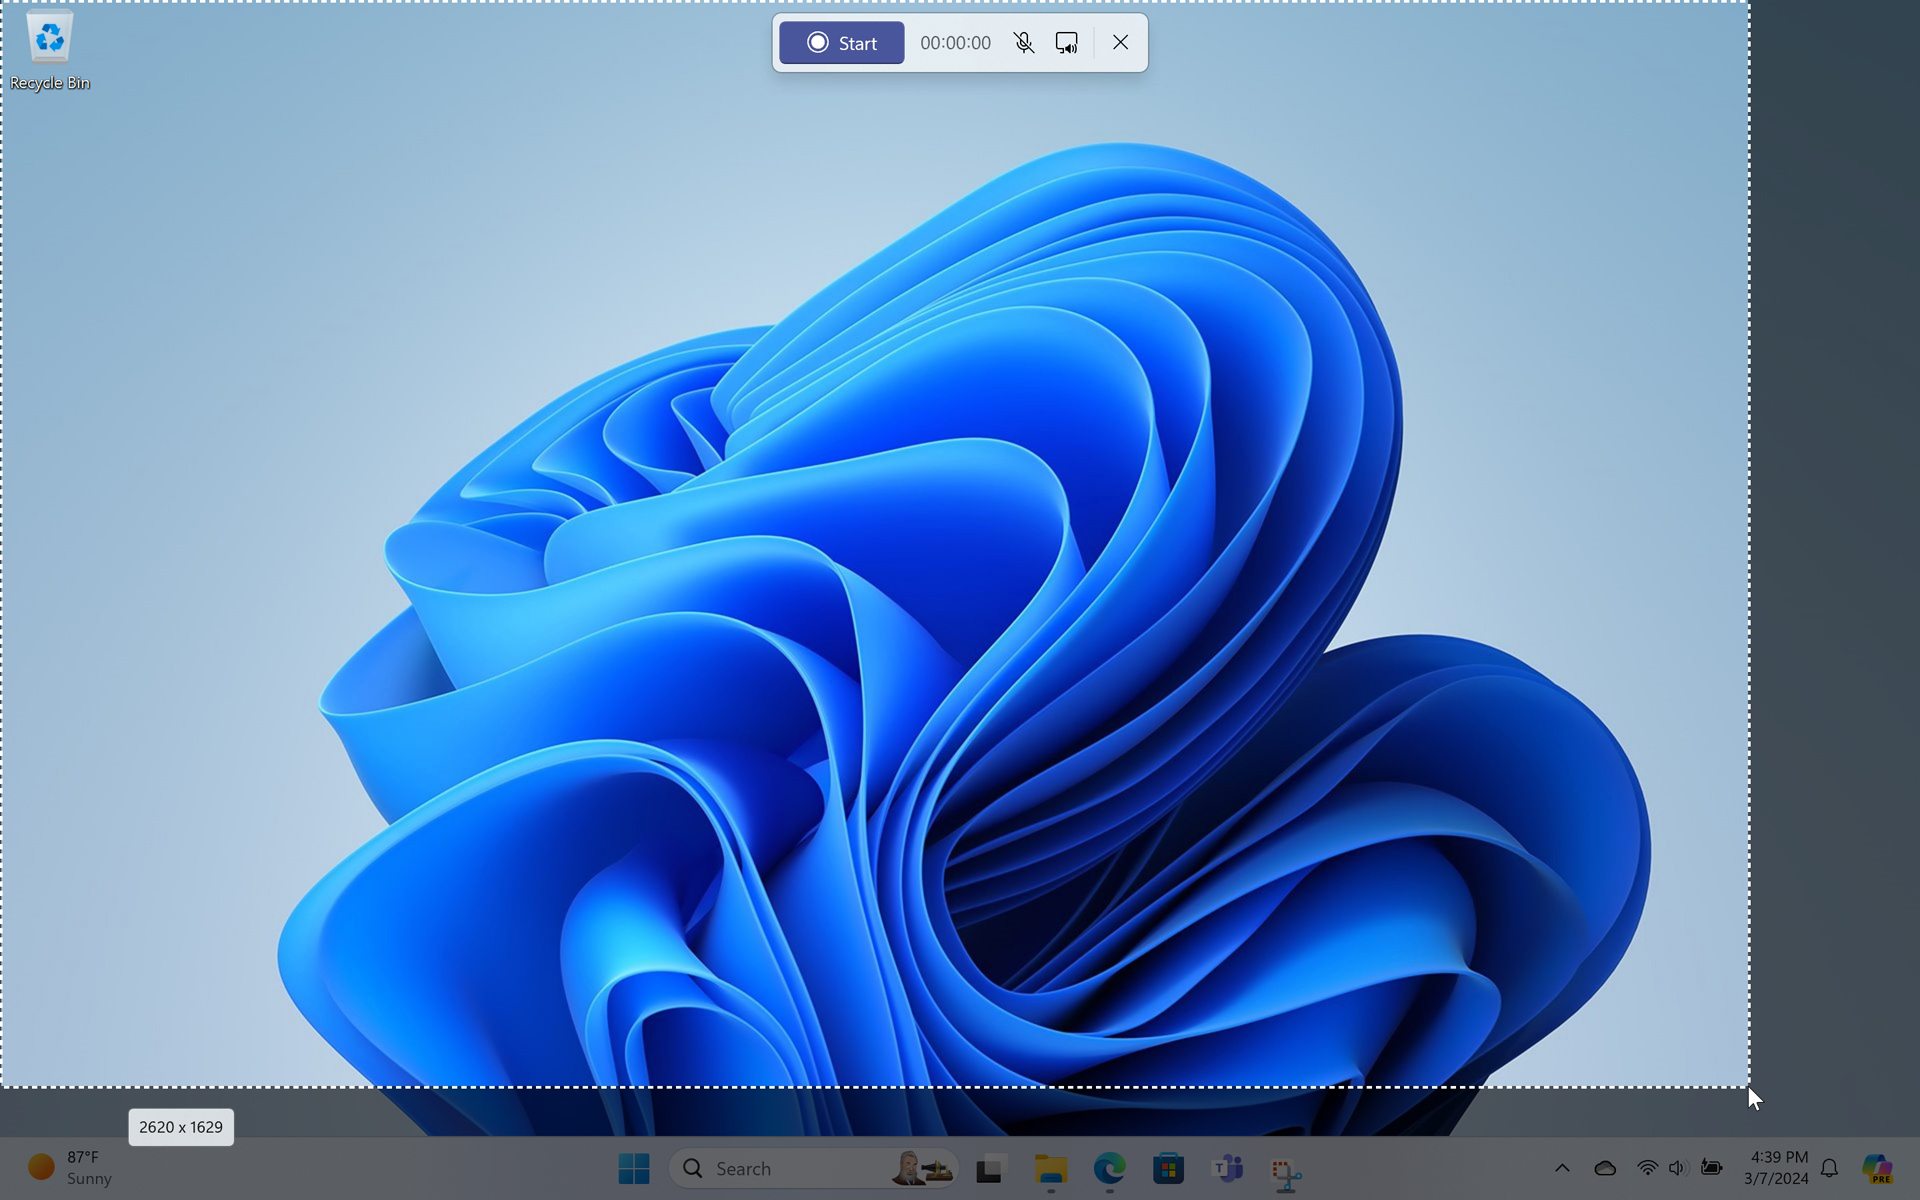

Now, you can optionally toggle “Mute/Unmute microphone” and/or “Mute/Unmute system” audio in the Snipping Tool overlay. Then, click the “Start” button to begin recording. A three-second countdown begins.

When the countdown concludes, the screen recording begins and the Snipping Tool overlay displays “Pause recording” and “Stop recording” buttons next to a counter that displays the length of the recording in real time. There’s also a trashcan-like “Discard recording” button if you want to give up and start over.

There is a red dotted rectangle around the area of the screen you are recording.
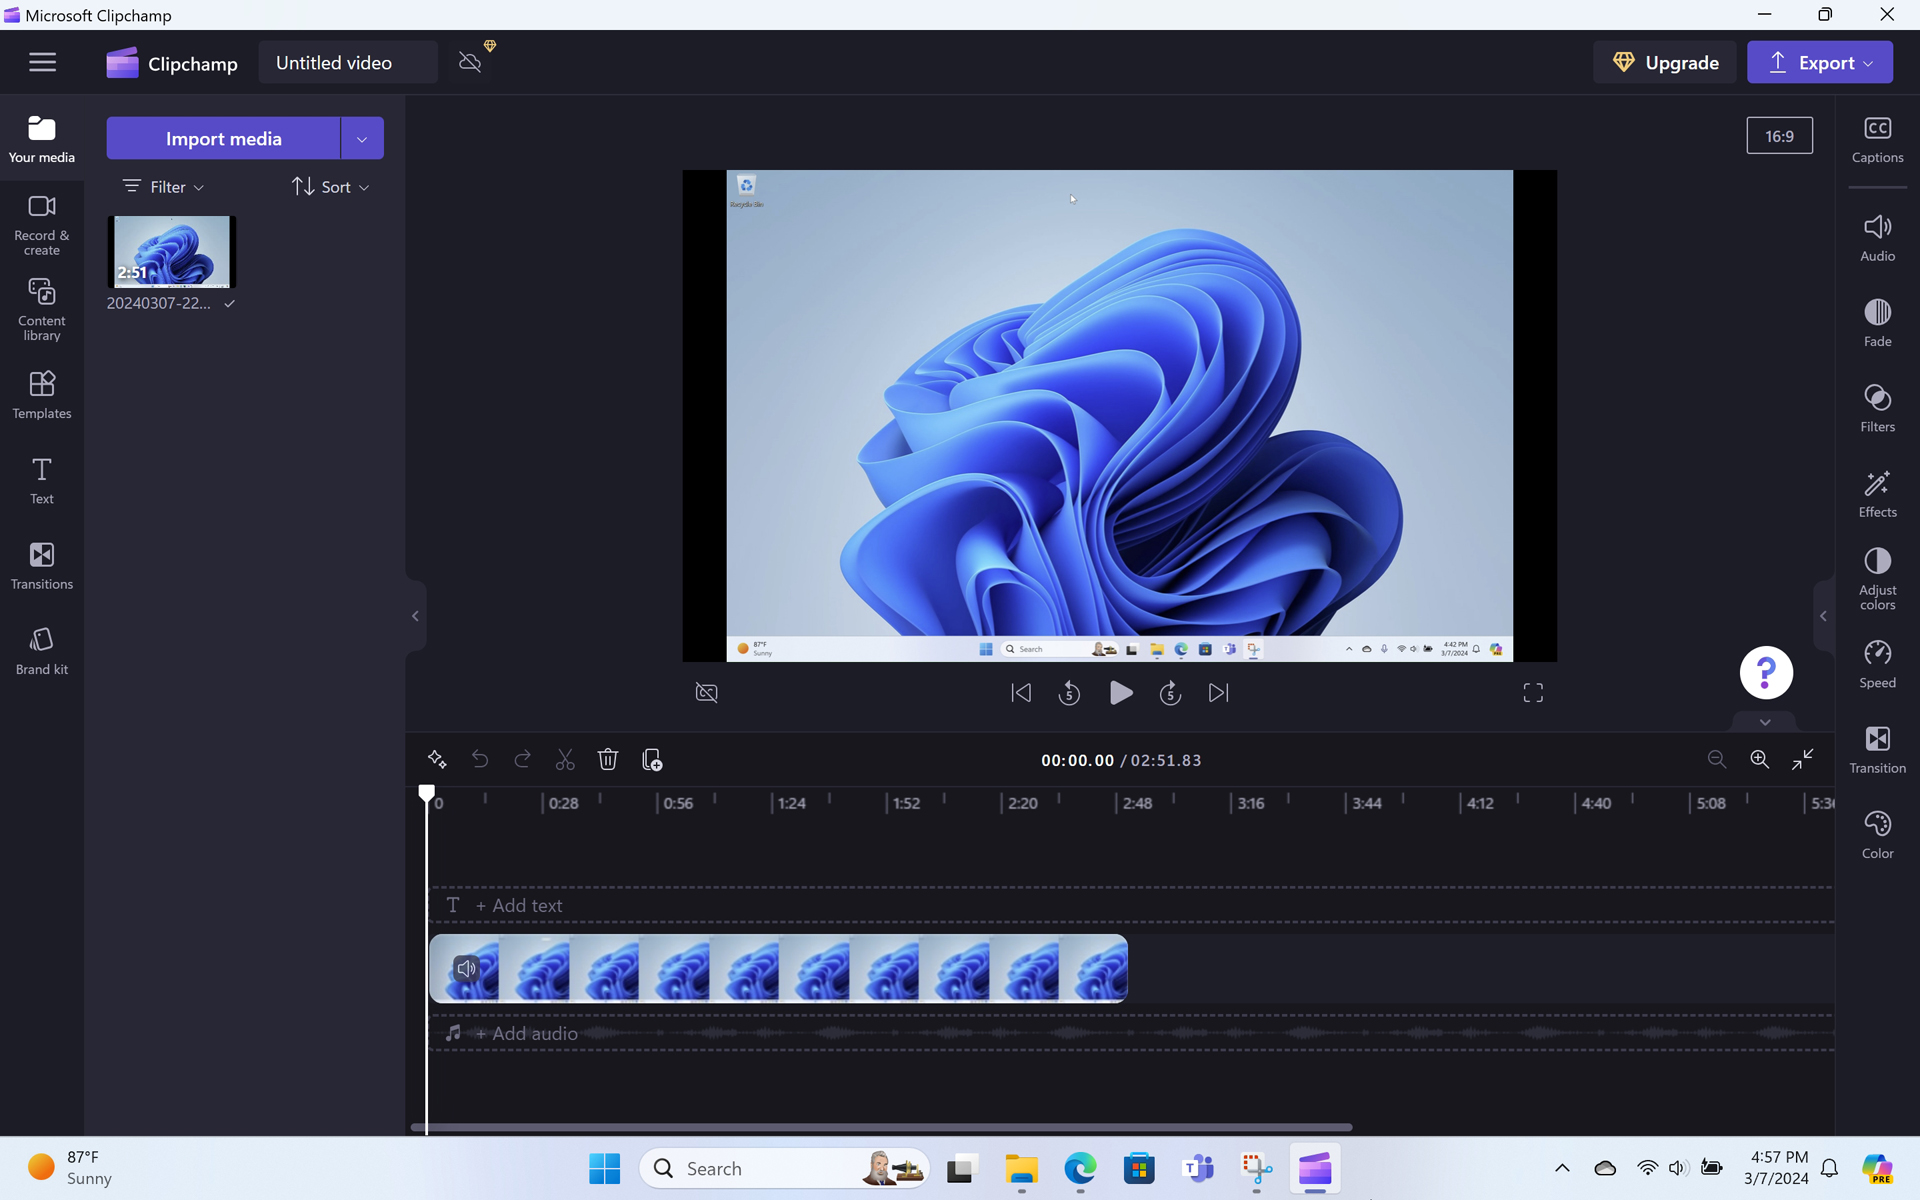
When you’re done recording, click the red “Stop recording” button in the Snipping Tool overlay. The Snipping Tool app window reappears and displays the recording you just created along with basic playback controls at the bottom and three additional commands in the upper-right of its app window. These commands–“Edit in Clipchamp,” “Save as,” and “Copy”–closely mirror the commands you see when Snipping Tool displays a screenshot or other image.
Oddly, there are no additional commands in the “See more” (“…”) menu.
To view the recording, click the “Play” button in the playback controls pane at the bottom of the window. This pane also lets you pause playback, scrub through the video, and configure the playback volume.


Unlike screenshots, screen recordings are not saved automatically. So you should click “Save as” to save the recording if you would like to keep it. Snipping Tool will provide a default name based on the date and time, and it will offer to save it to your Videos folder (though you can, of course, save it anywhere).
Snipping Tool doesn’t provide its own video editing tools, but you can click “Edit in Clipchamp” to edit it with Clipchamp, the excellent video editor that comes with Windows 11.
Clipchamp has its own built-in screen recording features, and they are significantly more powerful than what’s available in Snipping Tool. Unless your needs are quite basic, we recommend using Clipboard for screen recordings, not Snipping Tool. You can learn more about this functionality at the end of this chapter.
Capture a screenshot or screen recording using other methods
If Snipping Tool meets your needs, there’s no reason to look any further. But Windows 11 provides other ways to capture screenshots and screen recordings, and it’s possible that a different option may make more sense to you. And if you need to include the mouse cursor in your screenshots, there’s nothing in Windows 11 that can help: You’ll have to turn to a third-party solution instead.
Disconnect Print Screen from the Snipping Tool
Some long-time Windows users are familiar with other ways to take screenshots, including those that were included in Windows before Windows 11 version 23H2. And if you are part of that audience, you may be surprised to see Snipping Tool appear when you type PRINT SCREEN. We recommend giving it a chance–as you saw earlier in the chapter, Snipping Tool is a solid choice for screenshots, in particular–but if you’re not sold on it, you can return to the old PRINT SCREEN functionality or use a third-party screenshot tool instead. Either way, you will want to disconnect the PRINT SCREEN keyboard key from Snipping Tool.
To do so, open the Settings app and navigate to Accessibility > Keyboard (under “Interaction”) and scroll down to the section “On-screen keyboard, access keys, and Print screen.” There, you will find an option named “Use the Print screen key to open screen capture.”
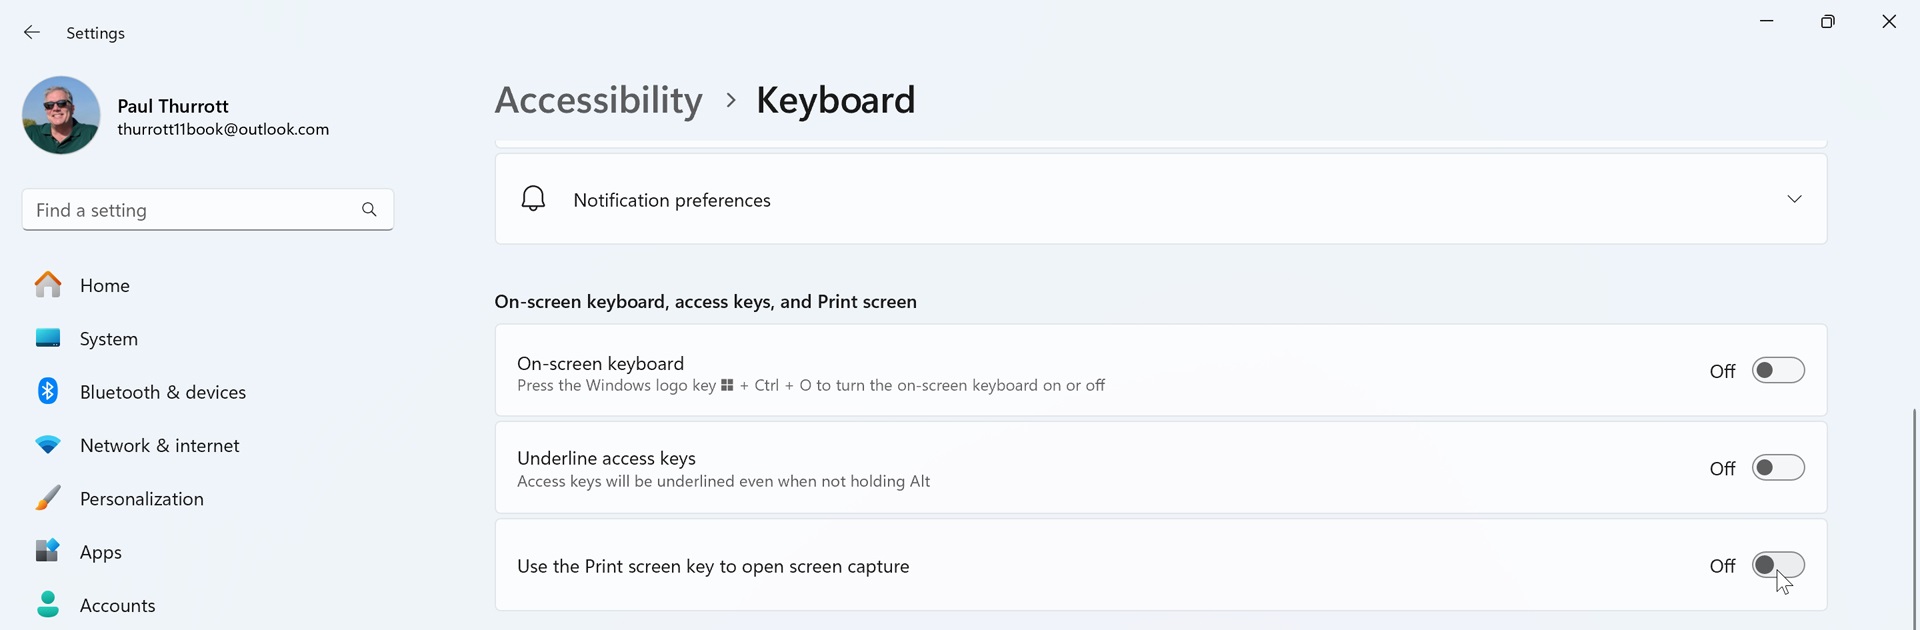
Configure it to “Off.”
There are faster ways to find this option. You could open Settings, type print in the “Find a setting” box, and then select “Use the Print screen key to open screen capture” from the pop-up search results to go right there. Or, open Start or Search, search for print screen, and then choose “Use the Print screen key to open screen capture.” under “Settings” in the search results to, wait for it, go right there.
Use Print Screen to copy the screen or a window to the Clipboard
After you’ve disconnected the Print Screen key from Snipping Tool, it will work as it has in Windows since the dawn of time: When you type PRINT SCREEN (meaning, when you press the Print Screen key), Windows 11 will copy a full-screen screenshot to the Windows Clipboard. From there, you can paste this image into Microsoft Paint or any other image editor or application that can accept image formats, and then save it to disk and share it with others.
You may be wondering why this key is called Print Screen. After all, it doesn’t print anything. But it used to: Print Screen dates back to the original IBM PC, which ran a text-only operating system called PC-DOS, which was made by Microsoft and sold by them as MS-DOS. In that pre-Windows era, Print Screen literally did print the text on-screen to whichever dot matrix printer was attached to its parallel port. But with the advent of graphical user interfaces like Windows, its usage changed so that it used to capture the screen as an image.
When you type PRINT SCREEN, the entire screen is copied to the Clipboard. But you can alternatively capture only the currently focused window. To do so, type ALT + PRINT SCREEN instead.
The first time you capture the screen or a window this way, OneDrive will display a notification asking if you would like to automatically save each screenshot that you take with Print Screen.
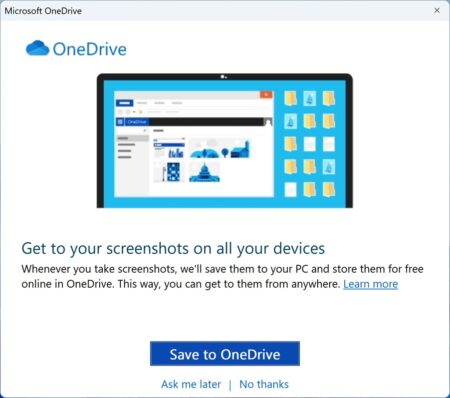
If you accept this offer, screenshots taken with Print Screen will no longer be ephemeral. Instead, each will be saved in PNG format to a new Screenshots folder found in your Pictures folder in OneDrive. These images will be available on the PC you’re using, as well as from the web and any other devices that are connected to your OneDrive.
A> If you deny this offer but later change your mind, you can configure OneDrive to automatically save screenshots by opening OneDrive settings and enabling the option “Save screenshots I capture to OneDrive” on the Sync and backup page. You can learn more in the OneDrive chapter.
If you use a single display, creating a screenshot is straightforward. But when you use a multi-display setup, things get a little strange. What does it look like when you take a screenshot and there are two or more desktops?
If you’re familiar with how multiple displays look in Display settings–as discussed in the Displays chapter–then you won’t be surprised to discover that screenshots mimic the display layout you see and can configure in that interface. That is, these screenshots include each of the Desktops from each display, and they are laid out as they are in Display settings (and, presumably, as they are in the real world.) In the shot below, for example, you can see two displays with the second (smaller) display being to the right of the first (primary) display.

Obviously, if you use ALT + PRINT SCREEN, you will still capture only the currently focused window, no matter which display it’s on.
Automatically save a screenshot as a file
Windows 11 also supports an alternate keyboard shortcut to Print Screen that provides two enhancements: It subtly flashes the screen to confirm that a screenshot was taken, and it automatically saves the resulting images to the Screenshots folder in your user account’s Pictures folder.
To use this method, type WINKEY + PRINT SCREEN.
As you can probably guess, you can also type WINKEY + ALT + PRINT SCREEN to capture just the currently focused window. However, this keyboard shortcut displays a Game Bar notification banner and, even more confusingly, saves the resulting screenshot in a different location, the Captures folder in your user account’s Videos folder. This is because the WINKEY + ALT + PRINT SCREEN keyboard shortcut is reserved by default by the Game Bar, which is yet another method for taking screenshots in Windows 11, albeit one designed for games.
You can learn more about this feature in the Game Bar chapter.
Use a third-party tool to include the mouse pointer when capturing a screenshot
The Snipping Tool and the other in-box methods for capturing screenshots are good at what they do, but they suffer from the same odd limitation: None offers a way to capture the mouse pointer when capturing a screenshot. To do so, you will need to use a third-party utility. Fortunately, there are some great choices out there, including some free options.
Yes, there is a legacy troubleshooting tool called Steps Recorder that does offer this functionality, but because this utility is deprecated by Microsoft and could be removed from Windows 11 at any time, we will ignore it.
Our personal favorites are:
Greenshot. Paul used this free and open-source screenshot utility to create every screenshot in this book, so it comes highly recommended.
ShareX. This is another free and open-source screenshot utility.
Use Clipchamp to capture a more impressive screen recording
Windows 11 includes a video editor called Clipchamp that can be used, among other things, to create screen recordings. This functionality is much more full-featured than that offered by Snipping Tool because you can optionally create a screen recording that simultaneously captures your webcam video and microphone audio for a neat picture-in-picture (PIP) effect like you see in professional webcasts. There is one limitation–screen recordings are limited to 30 minutes–but this won’t be an issue in most cases.
You should reference the Clipchamp chapter for a more complete description of how that app works. Here, we will focus solely on its screen recording capabilities.
To access this functionality, open Clipchamp and click “Create a new video.” Then click “Record & create” in the toolbar on the left of the video editor that appears.
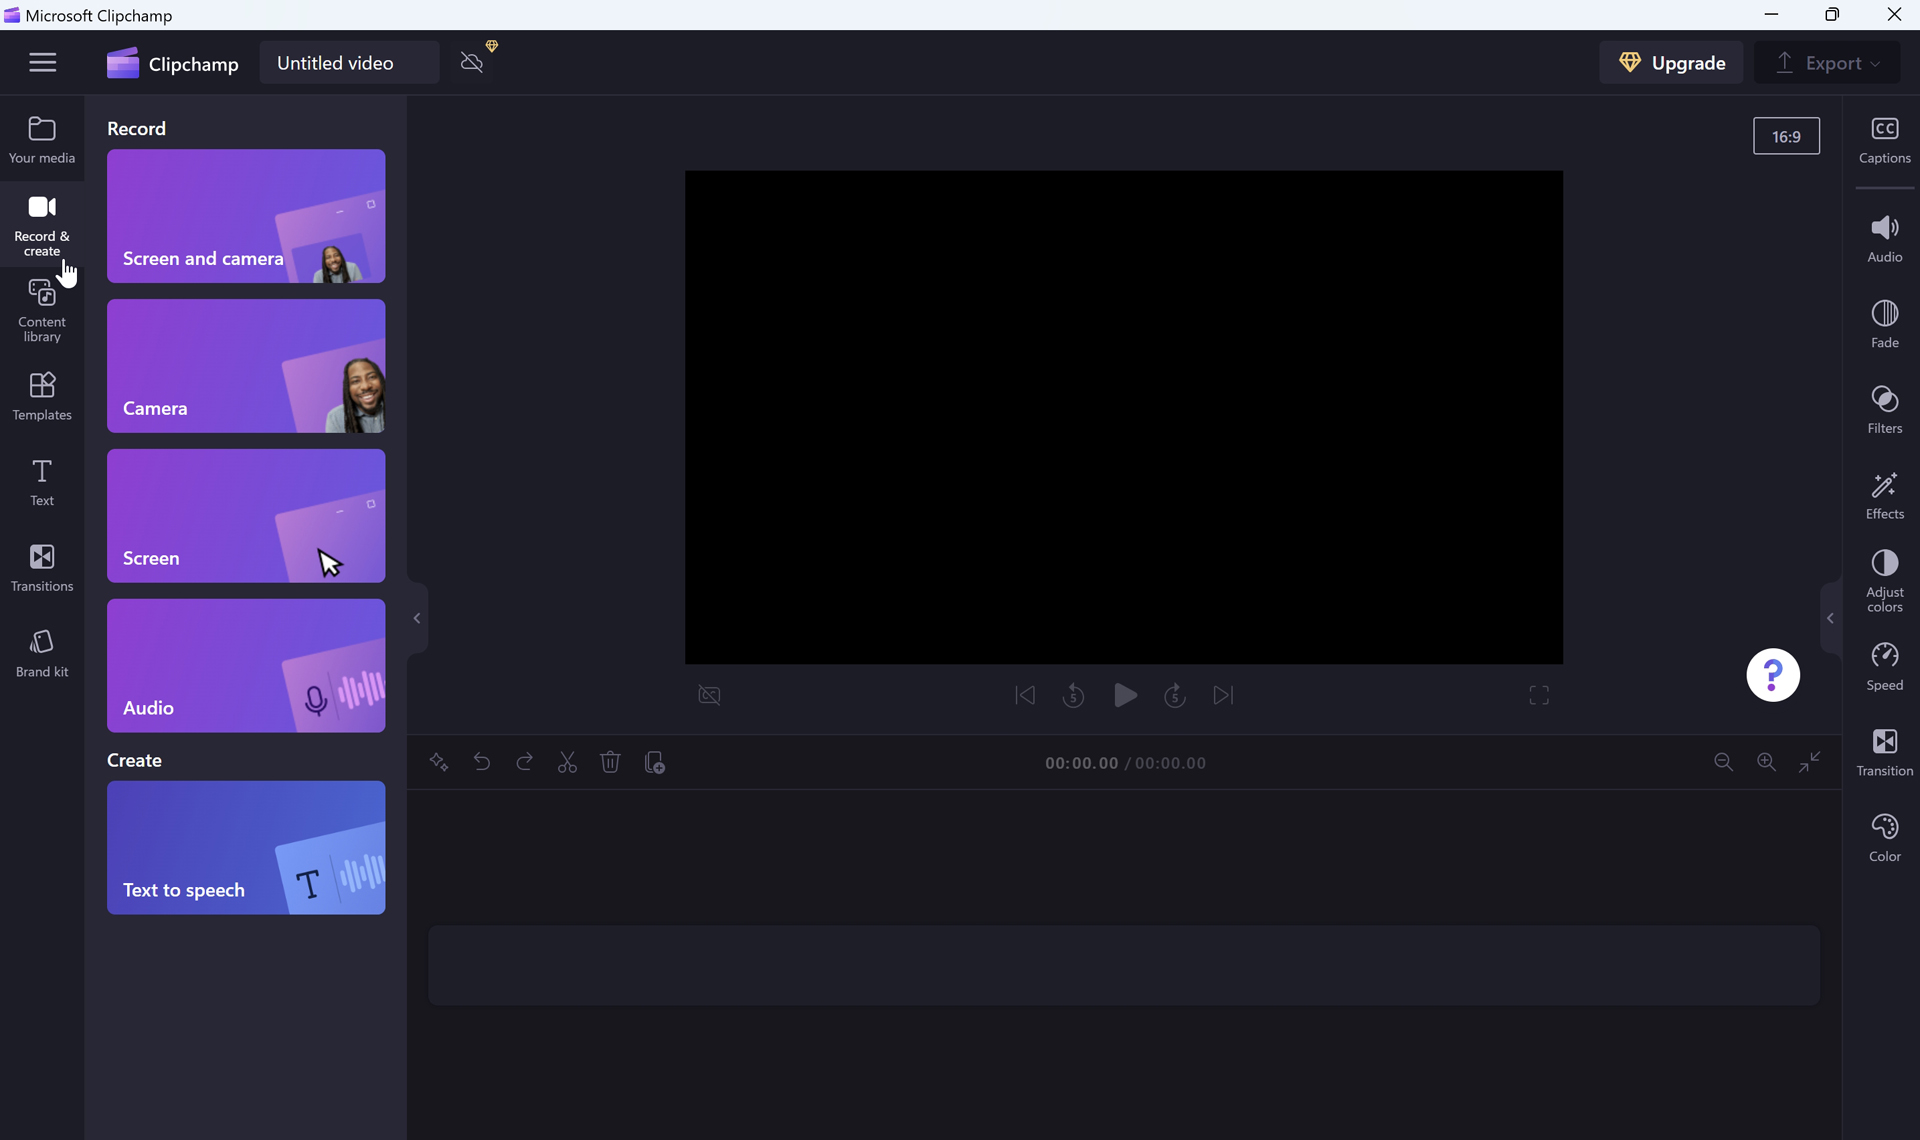

Here, you will see four options under “Record,” two of which–“Screen and camera” and “Screen”–offer screen recording capabilities. You should use “Screen and camera” if you wish to capture video from your webcam and audio from your microphone in addition to the screen. Or, use “Screen” to capture audio from your webcam and the screen.
You can change your microphone to “None” if you just want a screen capture with no audio.
Because it’s so unique and is a superset of the other relevant option, we will focus on “Screen and camera.” So click that item to continue. A “Ready to roll?” screen appears.
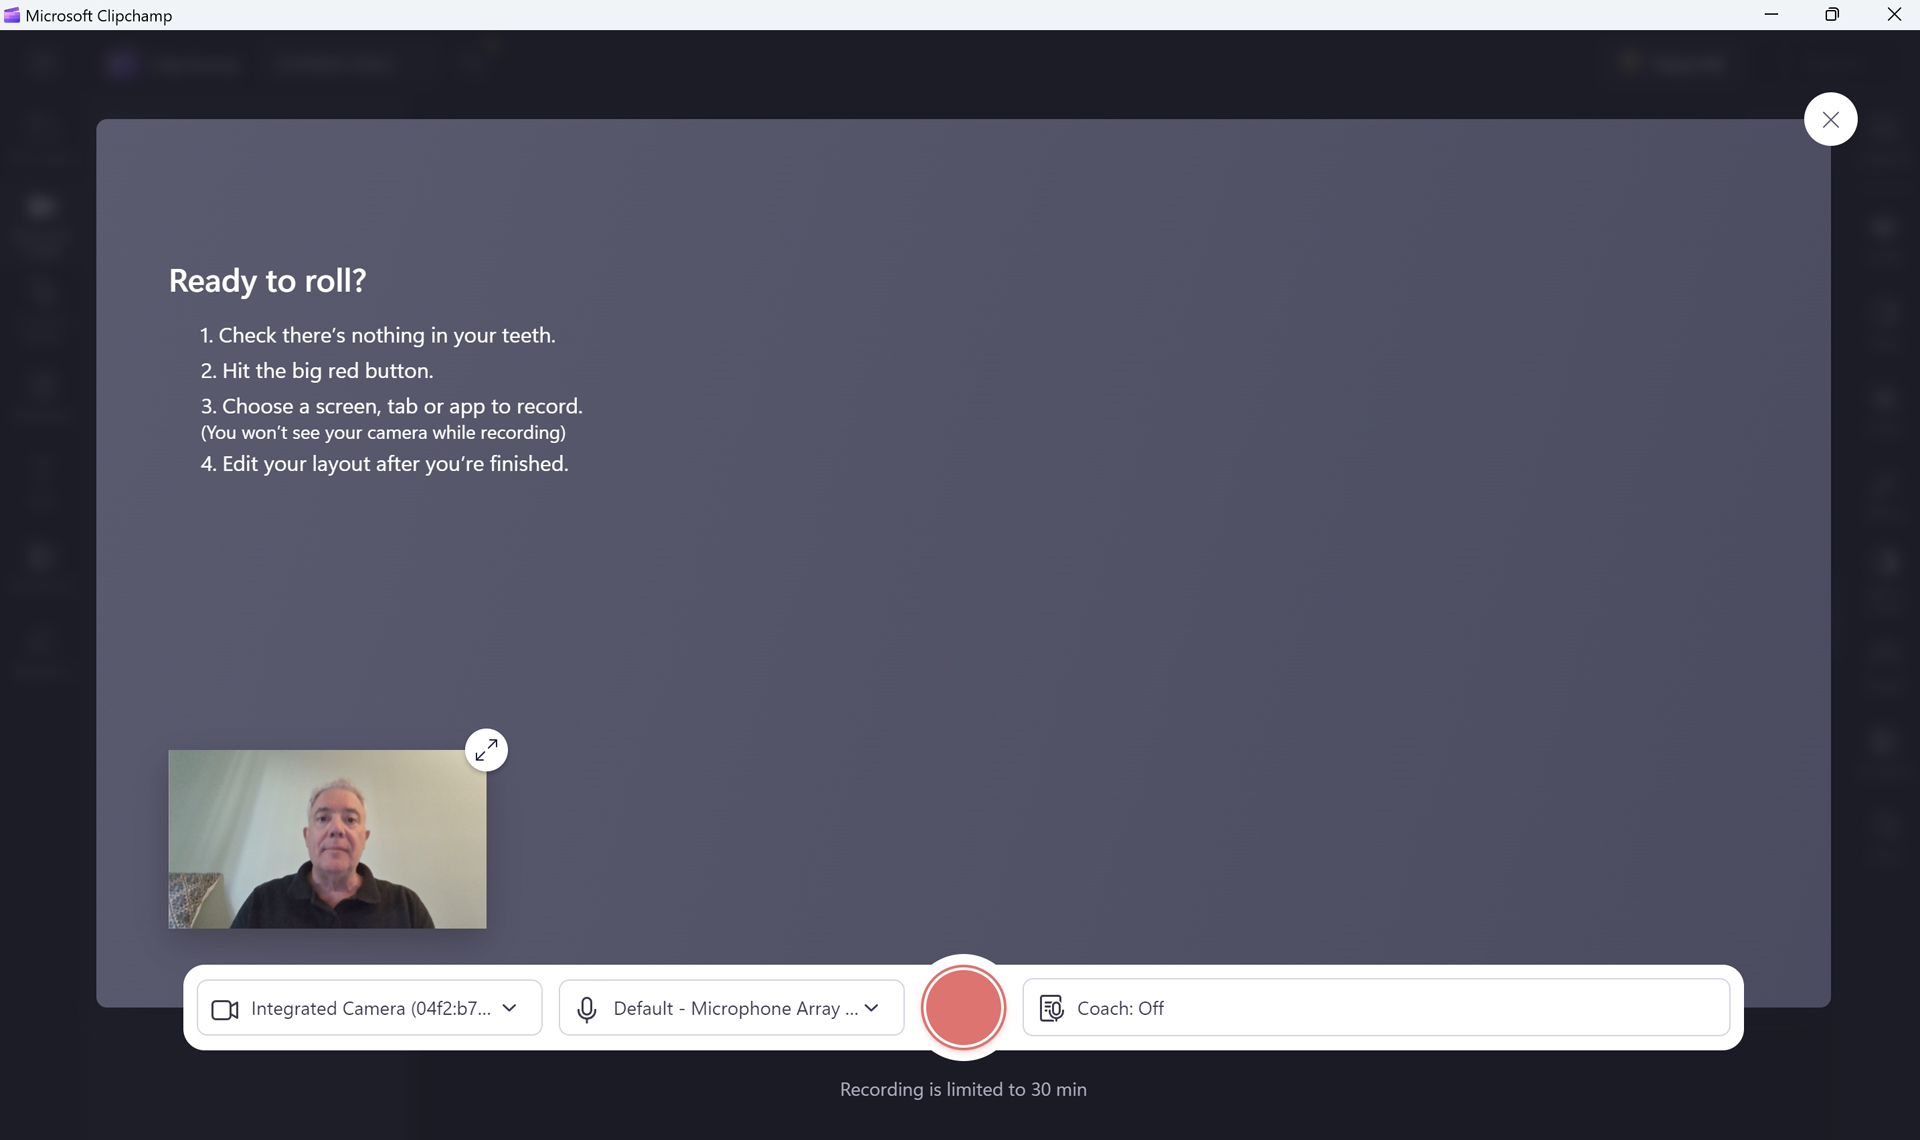
Here, you can choose your webcam and microphone and, optionally, enable Clipchamp’s terrific Speaker Coach feature, which analyzes your speaking pace, pitch, and use of filler words and provides you with feedback to help improve your speaking style.
You can also choose between two sizes for your PIP webcam view. You can’t move the PIP view, which may seem odd at first. But when you edit the resulting video, you’ll see that the webcam video and screen recording are separate video tracks, and that you can size and place the webcam video however you wish. Hold tight, this is pretty impressive.
When everything is the way you want it, click the big red “Record” button. Clipchamp will now let you choose between a window or the entire screen for the screen recording.
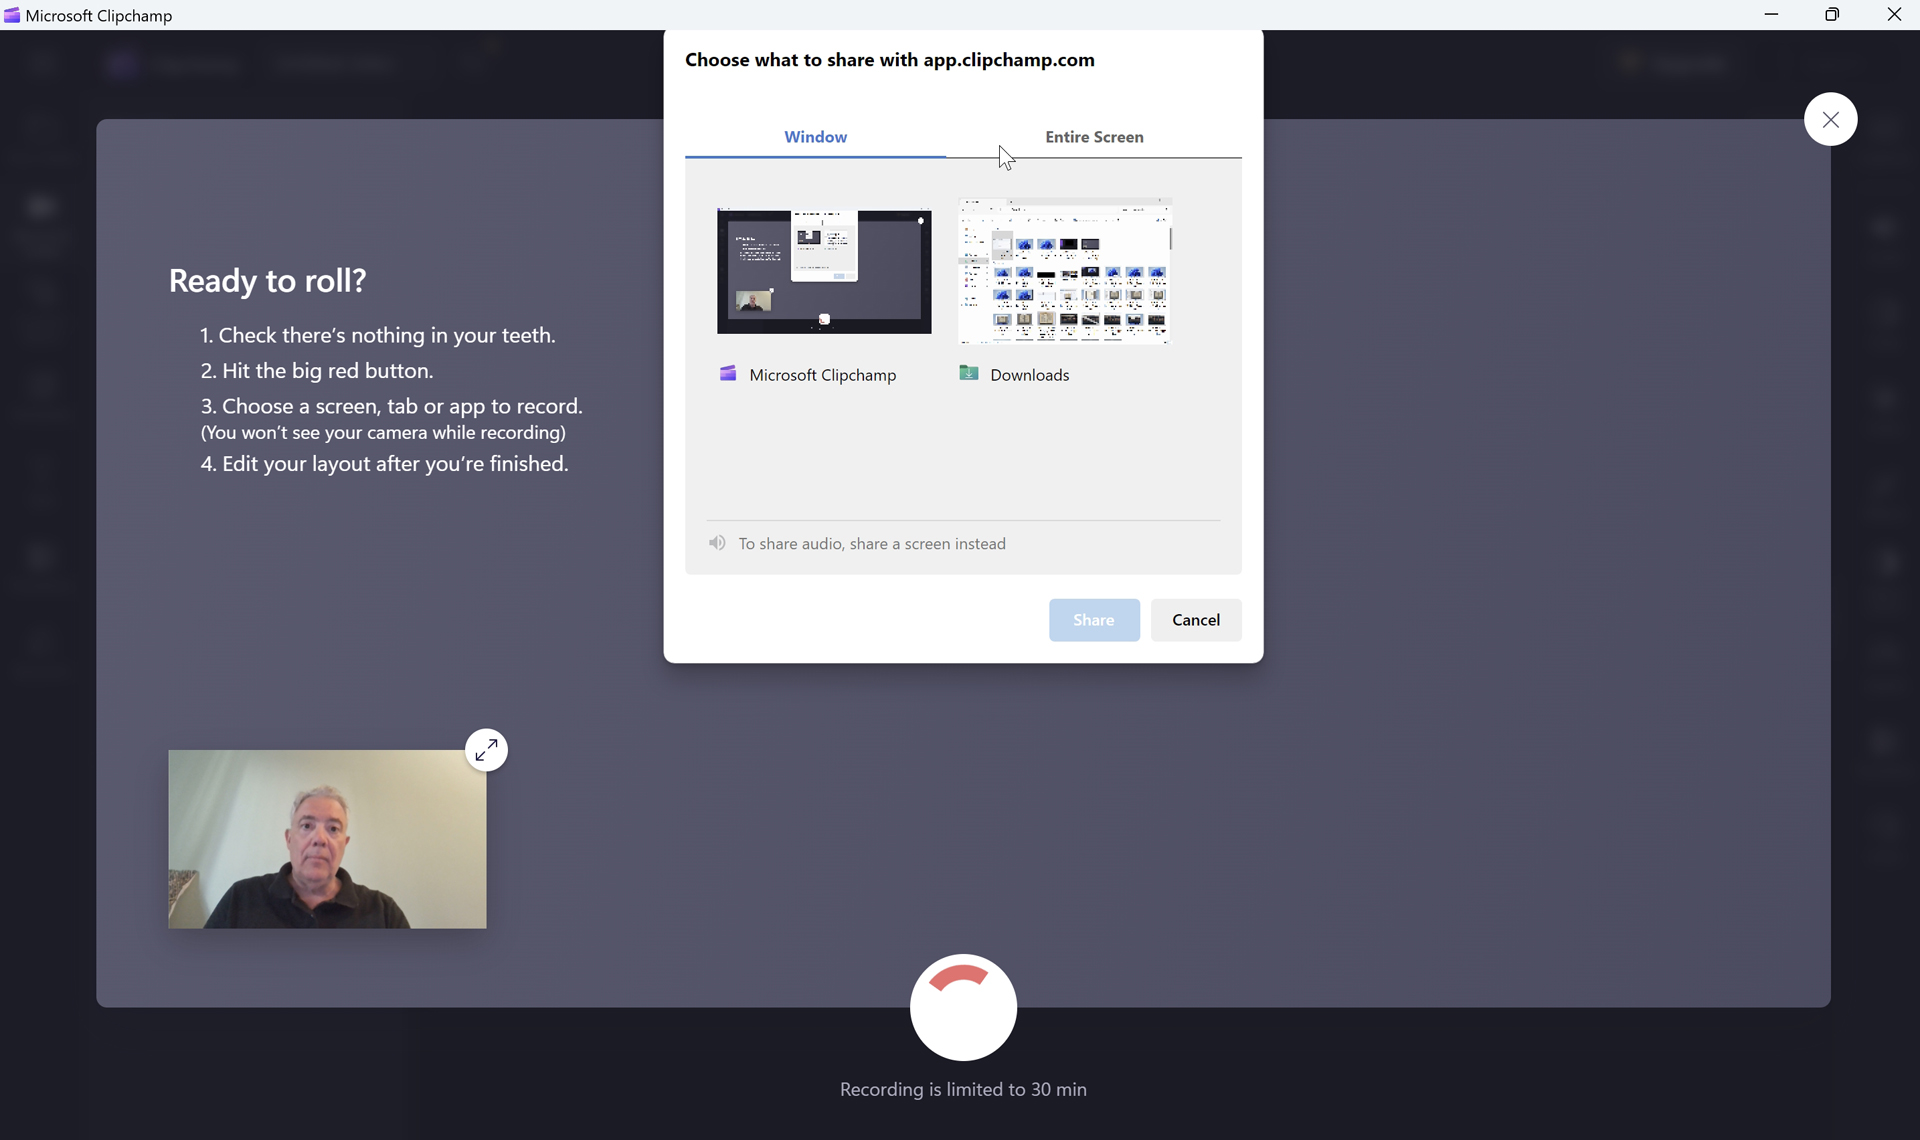
Choose accordingly, enable “Also share system audio” if desired, and then click “Share.” Then, create your screen recording, narrating as you go, as needed. Note that you will likely want to minimize Clipchamp because it will otherwise create a video tunnel effect: A Clipchamp recording pane at the bottom of the screen won’t appear in the resulting recording, but it provides you with an easy way to stop sharing when you’re done.
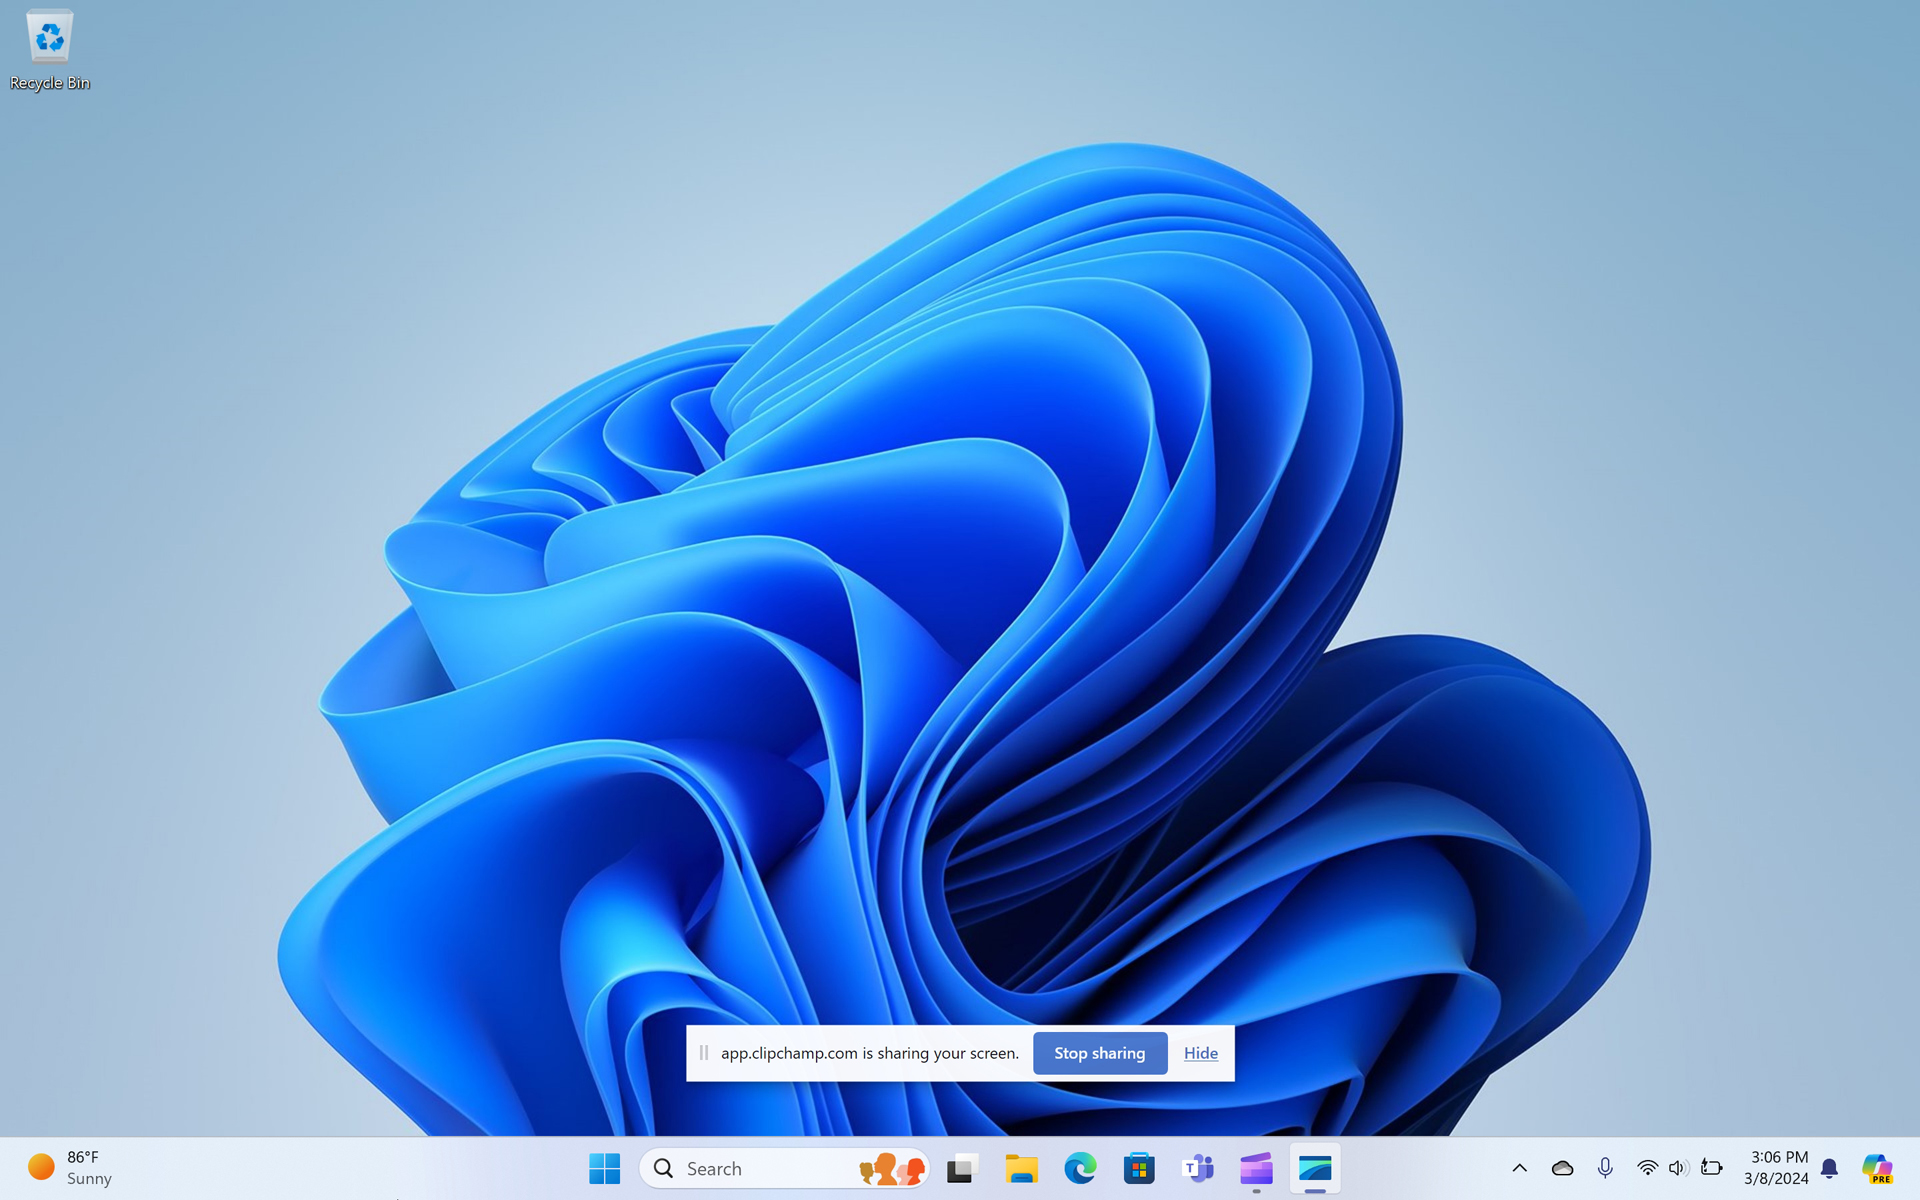
Once the recording is complete, click “Stop sharing” in the Clipchamp recording pane. Clipchamp previews the video you recorded and prompts you to “Retake recording,” “Save and edit,” and, if you enabled Speaker Coach, “Review Speech.”
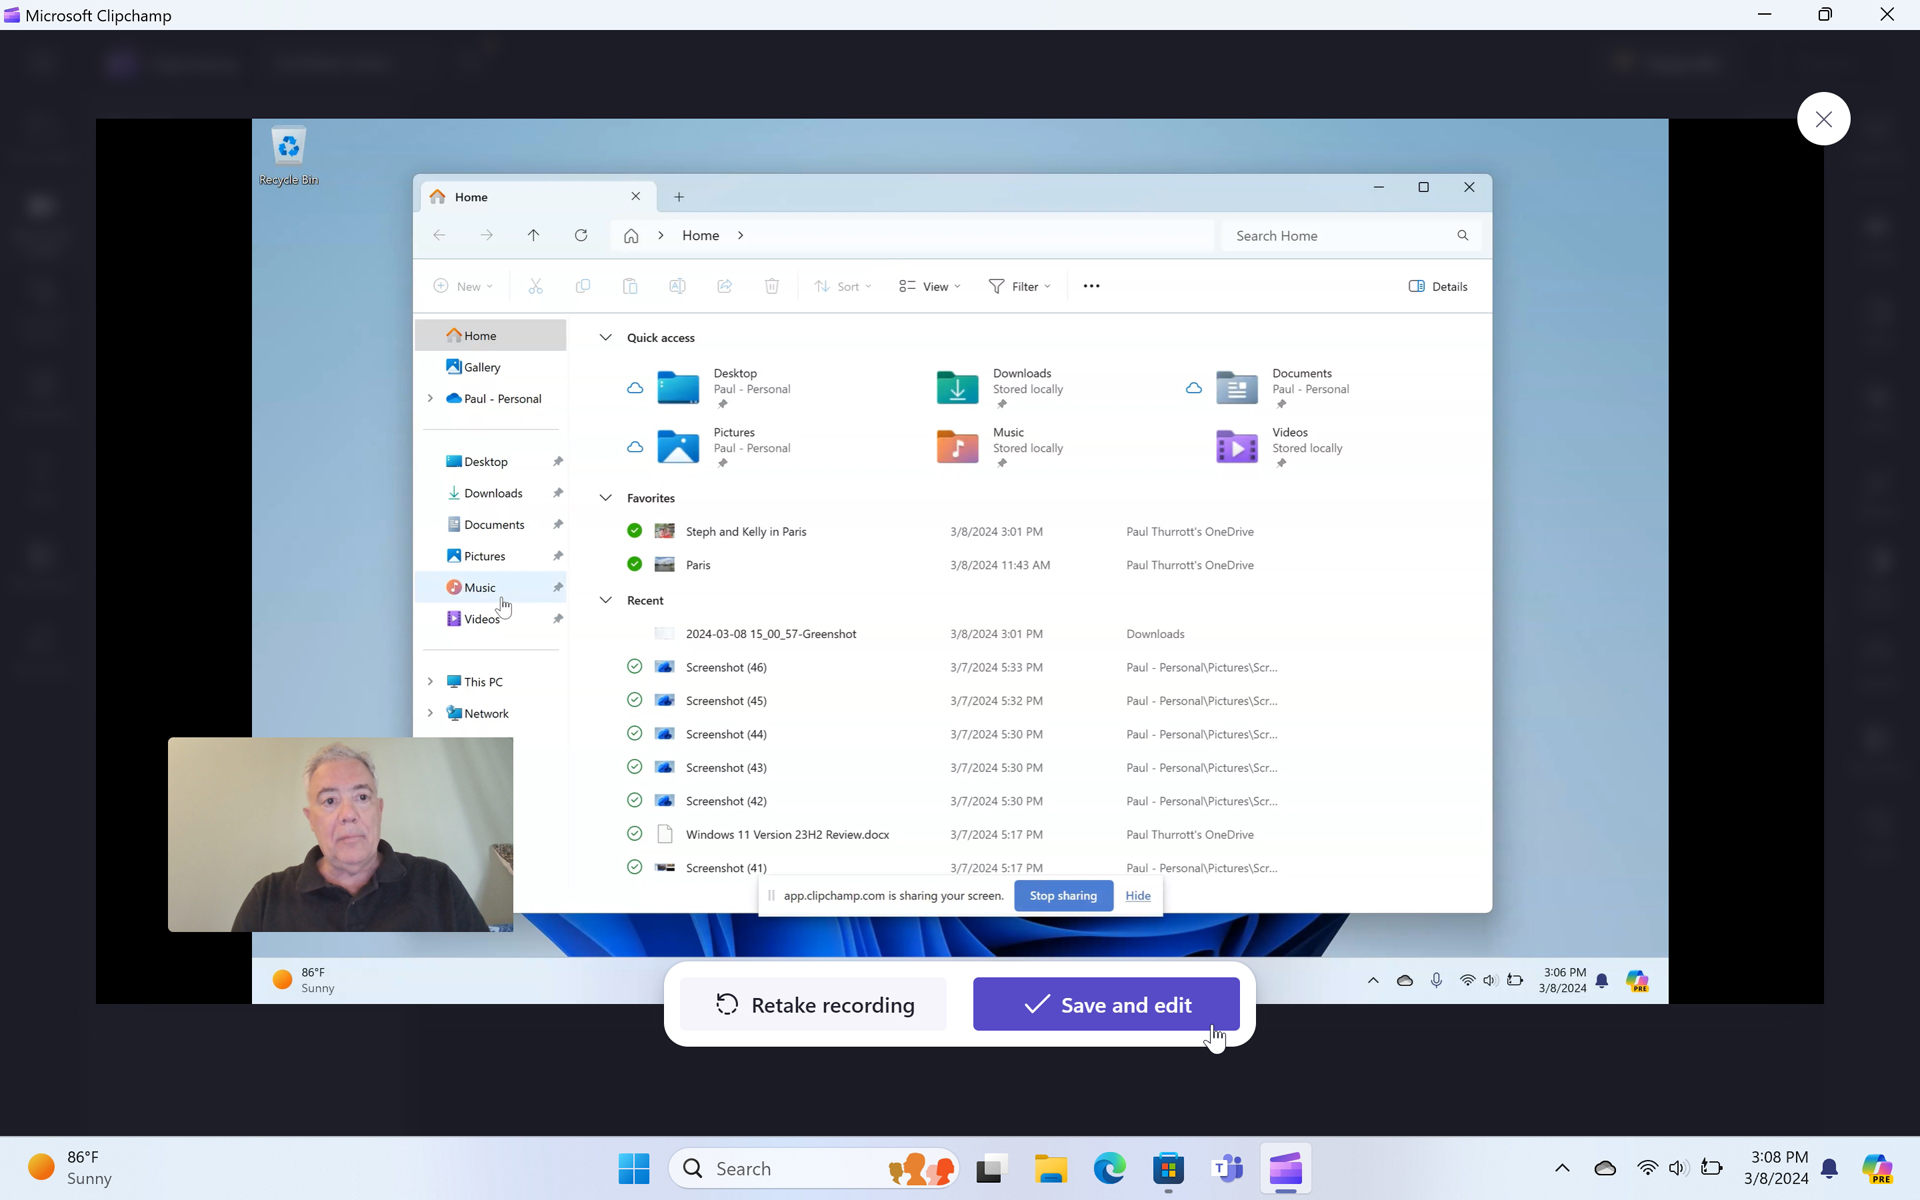
Assuming all is well, click “Save and edit.” Clipchamp will display its video editor view, process the recordings it made, and then let you edit them.
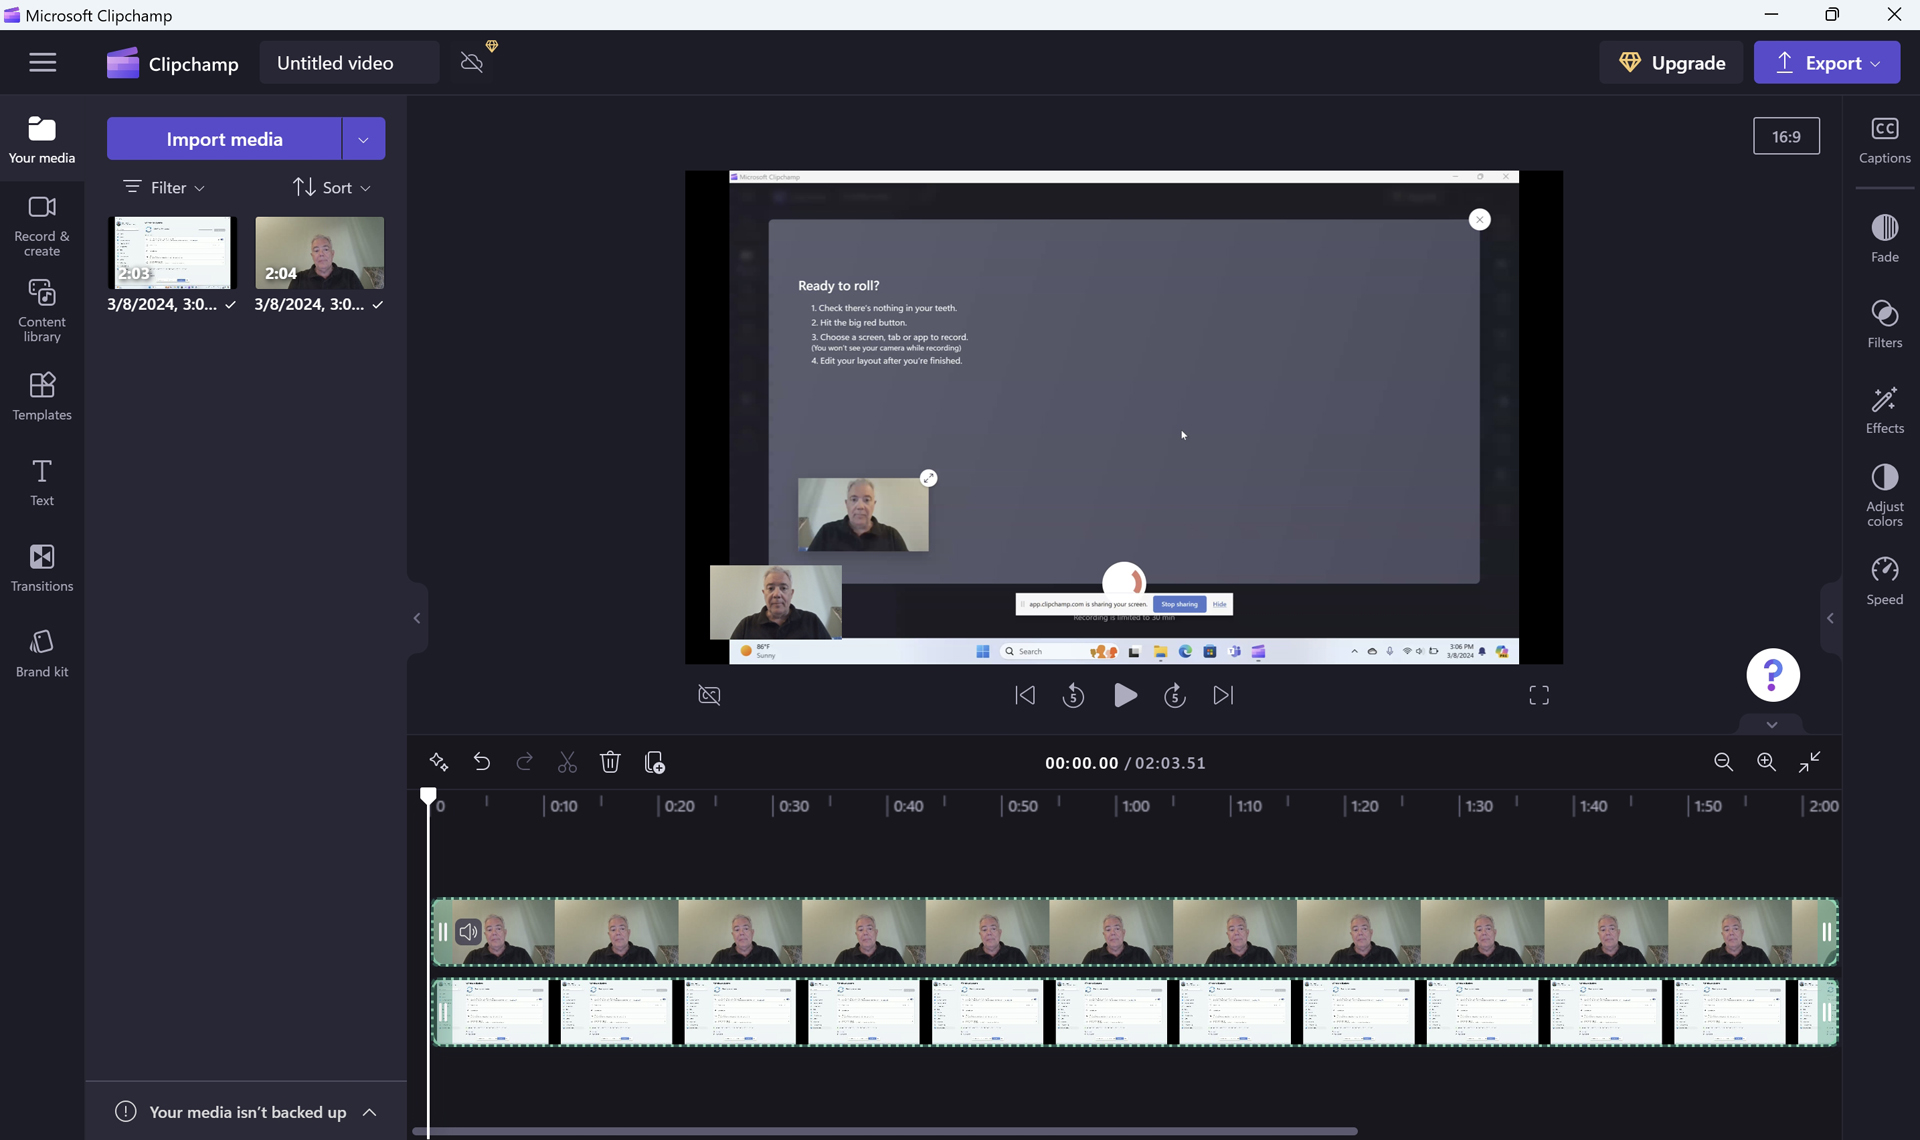
As you can see, there are two videos, the screen recording and the webcam video. Each has been added to the timeline, land the webcam video has been placed on top of the screen recording so that it appears above it visually, and has been sized into a floating PIP window in the bottom left of the video preview.
To resize or reposition this webcam video, select it in the video preview. You can do either manually, but the simpler approach is to click “More” (“…”) and then “Picture in picture.” Doing so reveals four preset positions: “Top left,” “Top right,” “Bottom left,” and “Bottom right.”
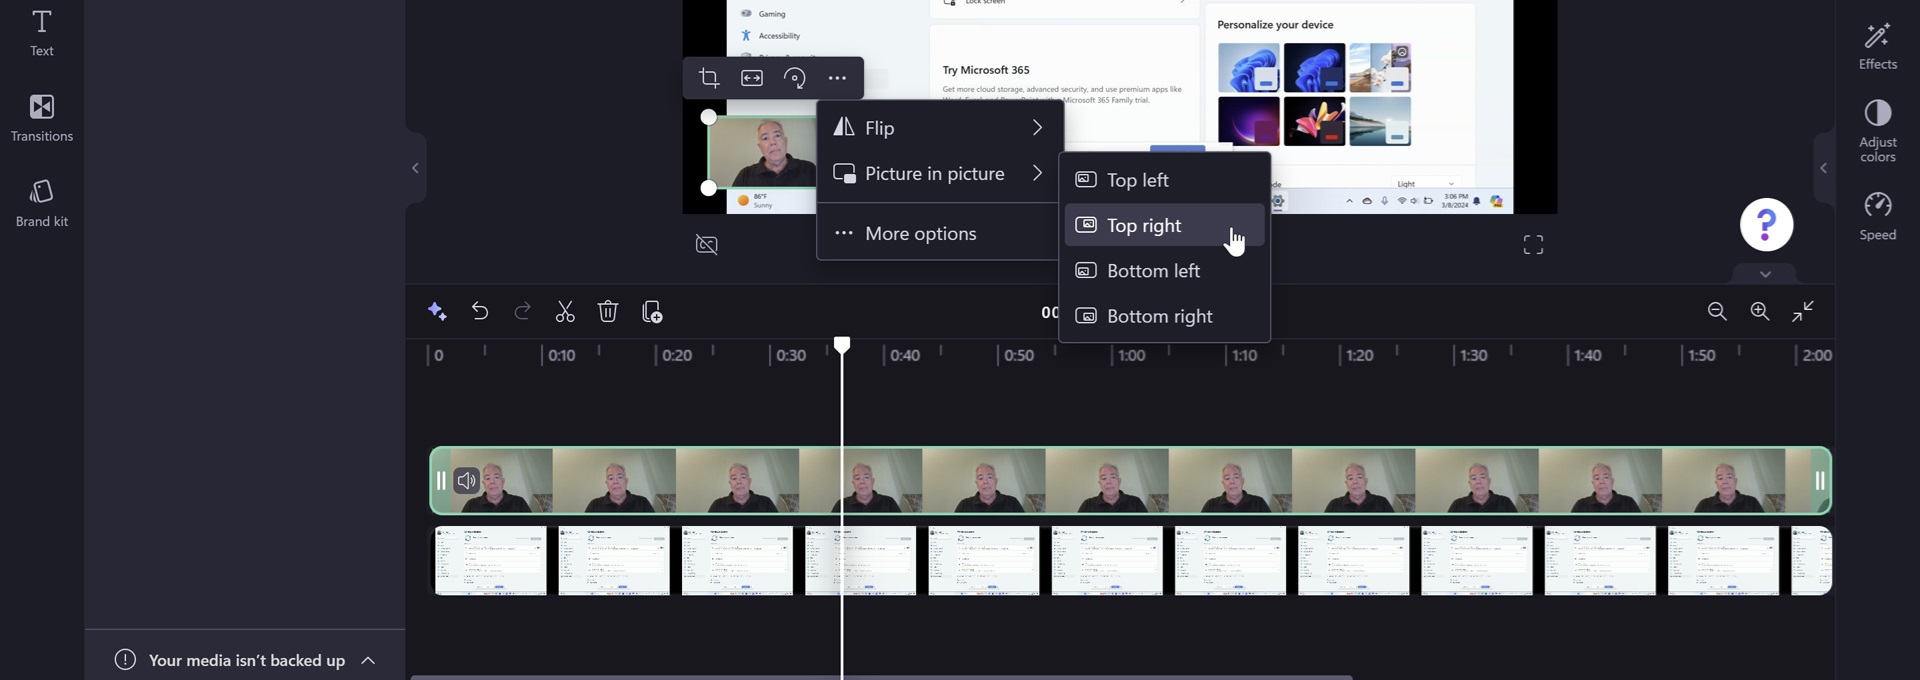

So, for example, if you’d like to move the PIP webcam video to the top right of the video, choose “Top right.”

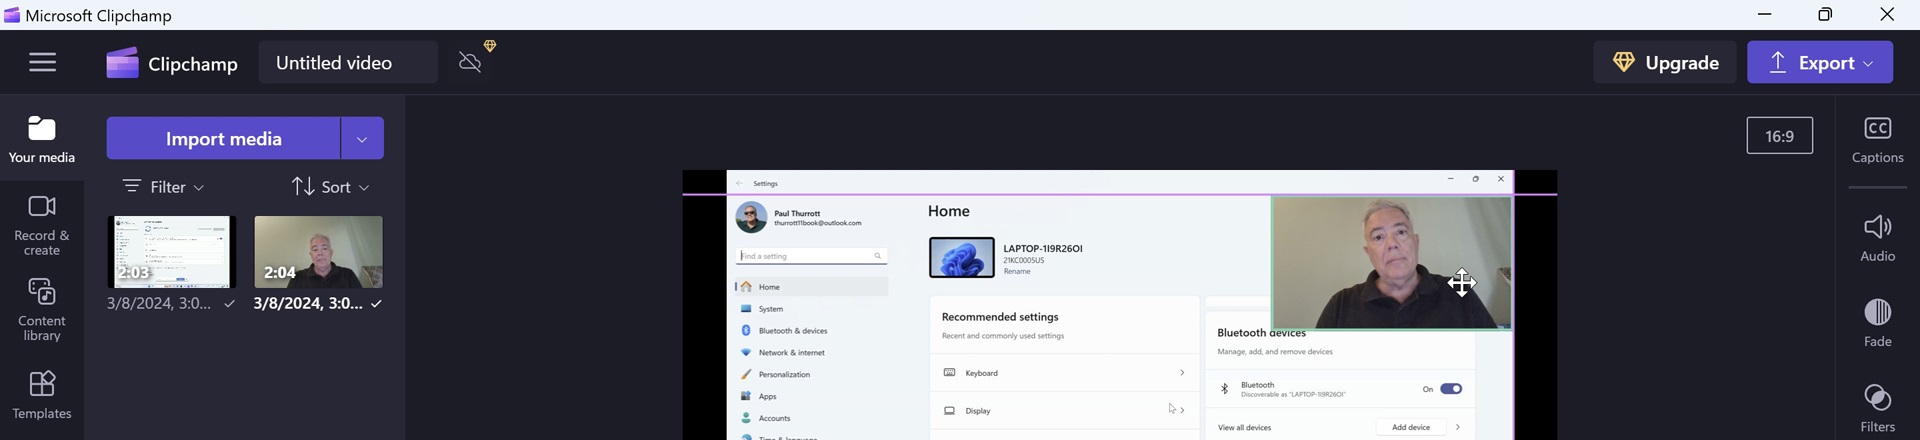
You can resize the PIP webcam video using the grab handles that appear when it’s selected. When you do so, you may have to manually reposition it using drag-and-drop, but Clipchamp provides guidelines so you can do so correctly.
From here, you can just edit the project–and its two videos–as usual. The result will be far more impressive than a bland screen recording.

Gain unlimited access to Premium articles.
With technology shaping our everyday lives, how could we not dig deeper?
Thurrott Premium delivers an honest and thorough perspective about the technologies we use and rely on everyday. Discover deeper content as a Premium member.