Wi-Fi (24H2)
- Paul Thurrott
- Jan 04, 2025
-
1
Wi-Fi
Windows 11 supports wireless Wi-Fi networks, allowing you to conveniently connect to the Internet, access connected PCs, printers, and other devices, and share your Internet connection with other PCs and devices.
Because Windows 11 requires you to be connected to the Internet when you first set up your PC, it’s likely that you have already configured your it to work with at least one Wi-Fi network. But if you own a laptop or other portable PC and use it in different locations, you will need to connect to, and potentially configure, Windows to use other Wi-Fi networks as well.
So let’s start there.
Find and connect to a Wi-Fi network
If you bring your PC to a hotel, airport, coffee shop, or another place with a Wi-Fi network for the first time, the Network icon in the notification area of the Taskbar will resemble a globe with a “no” symbol overlay.


You can find and connect to any available Wi-Fi networks with Quick settings, which is accessed by clicking the Network, Sound, or Battery icons in the notification area on the right side of the Taskbar.
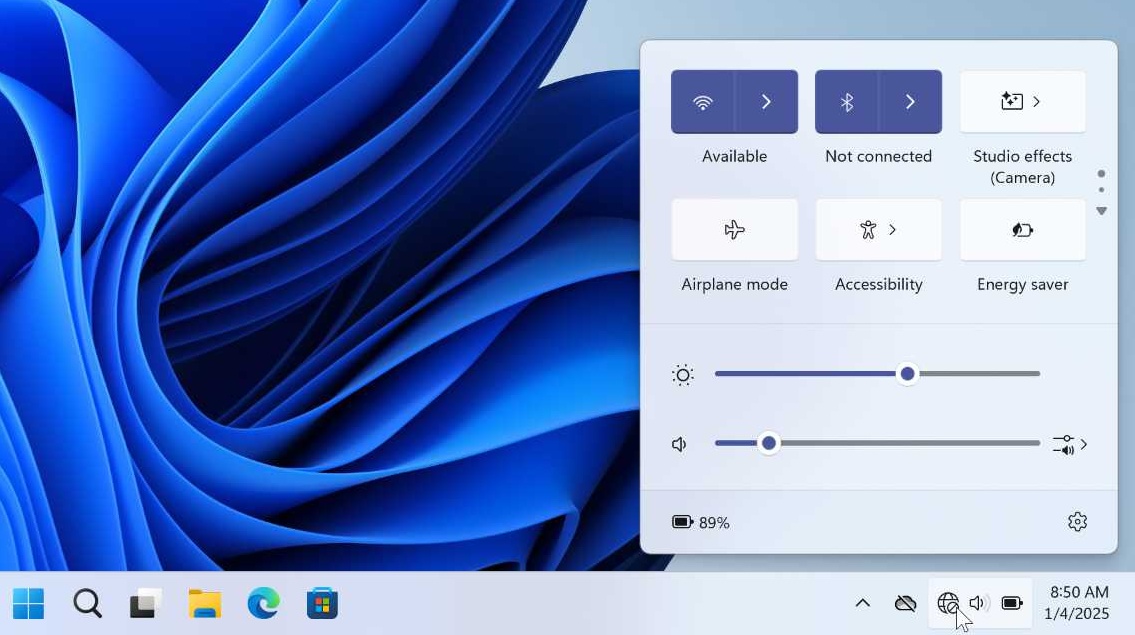
You can also access Quick settings by typing WINKEY + A.
If Wi-Fi is enabled, the Wi-Fi quick settings button will display in an enabled state (using your configured accent color) and will note that Wi-Fi networks are “Available.” To see which networks are in range, click “Manage Wi-Fi connections”–the right half of the Wi-Fi quick settings split button that’s marked with the “>” label–to display the list of available Wi-Fi networks.
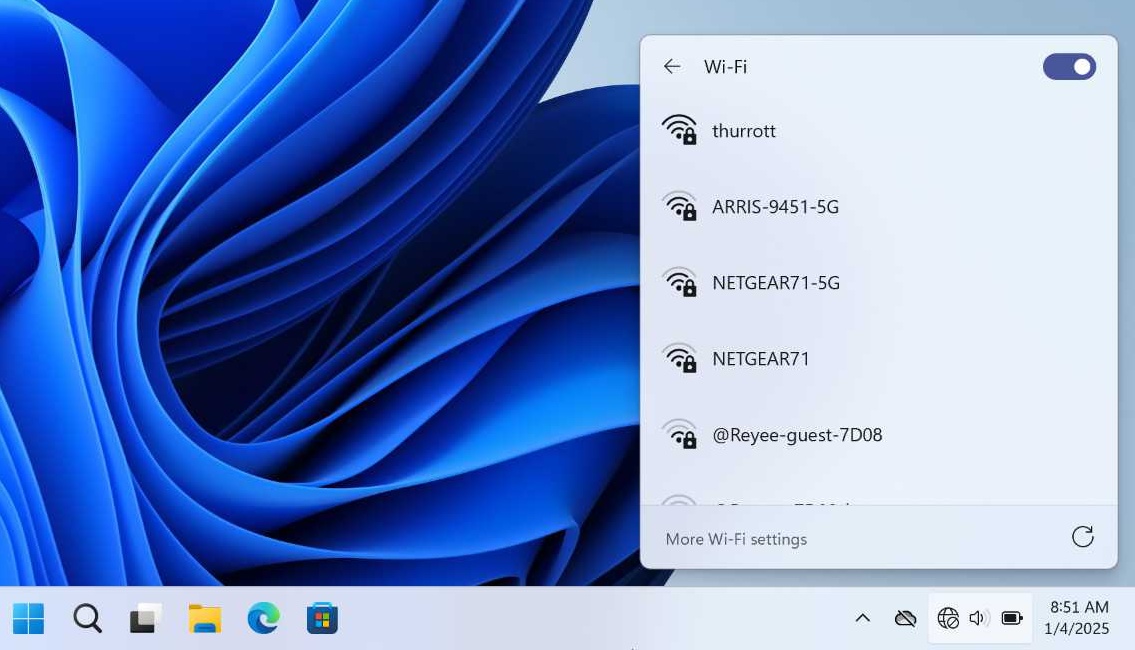
Private Wi-Fi networks, like those you might access at home or at work, display an icon with a lock overlay, indicating that you have to enter a password before you can connect. Public Wi-Fi networks, like those you might access at a hotel, airport, or coffee shop, will not have a lock overlay; these networks will still typically require you to authenticate somehow via a website after the connection is made but before you are connected to the Internet.
To connect to a Wi-Fi network, select it in the list. It will expand to display a “Connect automatically” option and a “Connect” button.
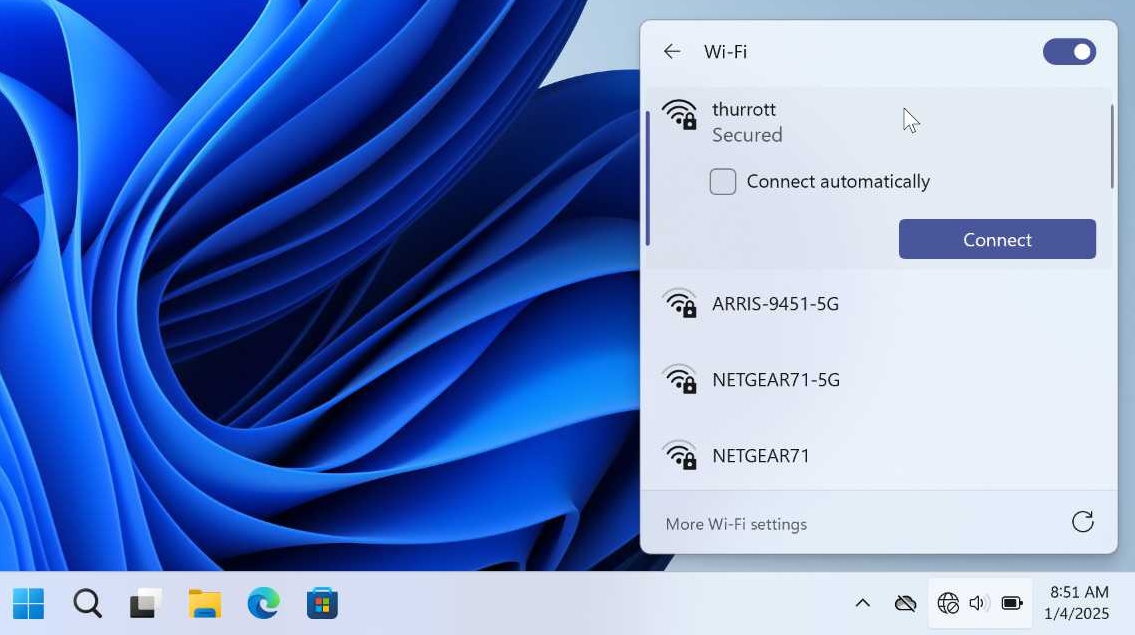
Click “Connect automatically” if this is a trusted Wi-Fi network that you use regularly. (Do not select this option at a hotel, airport, or another public place you visit infrequently or are perhaps doing so for the only time.) Then, click Connect.
If this network is private, you will now be prompted to enter its password and then click “Next” to complete the connection.
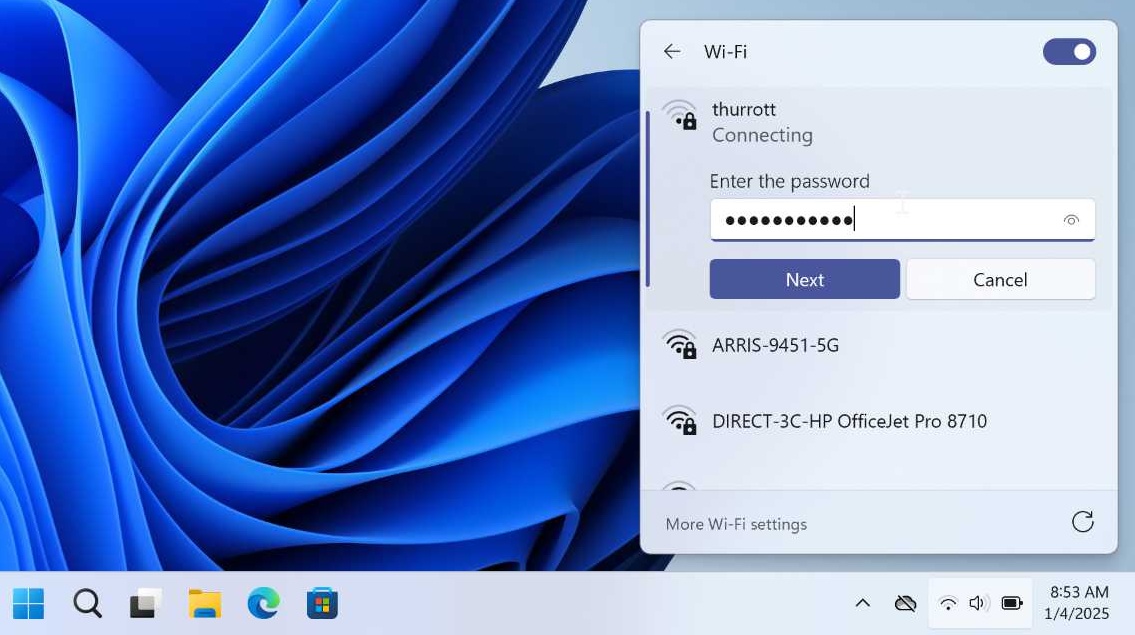
The Network icon in the notification area will change to a Wi-Fi symbol that indicates the strength of the network when you’ve successfully connected.
![]()
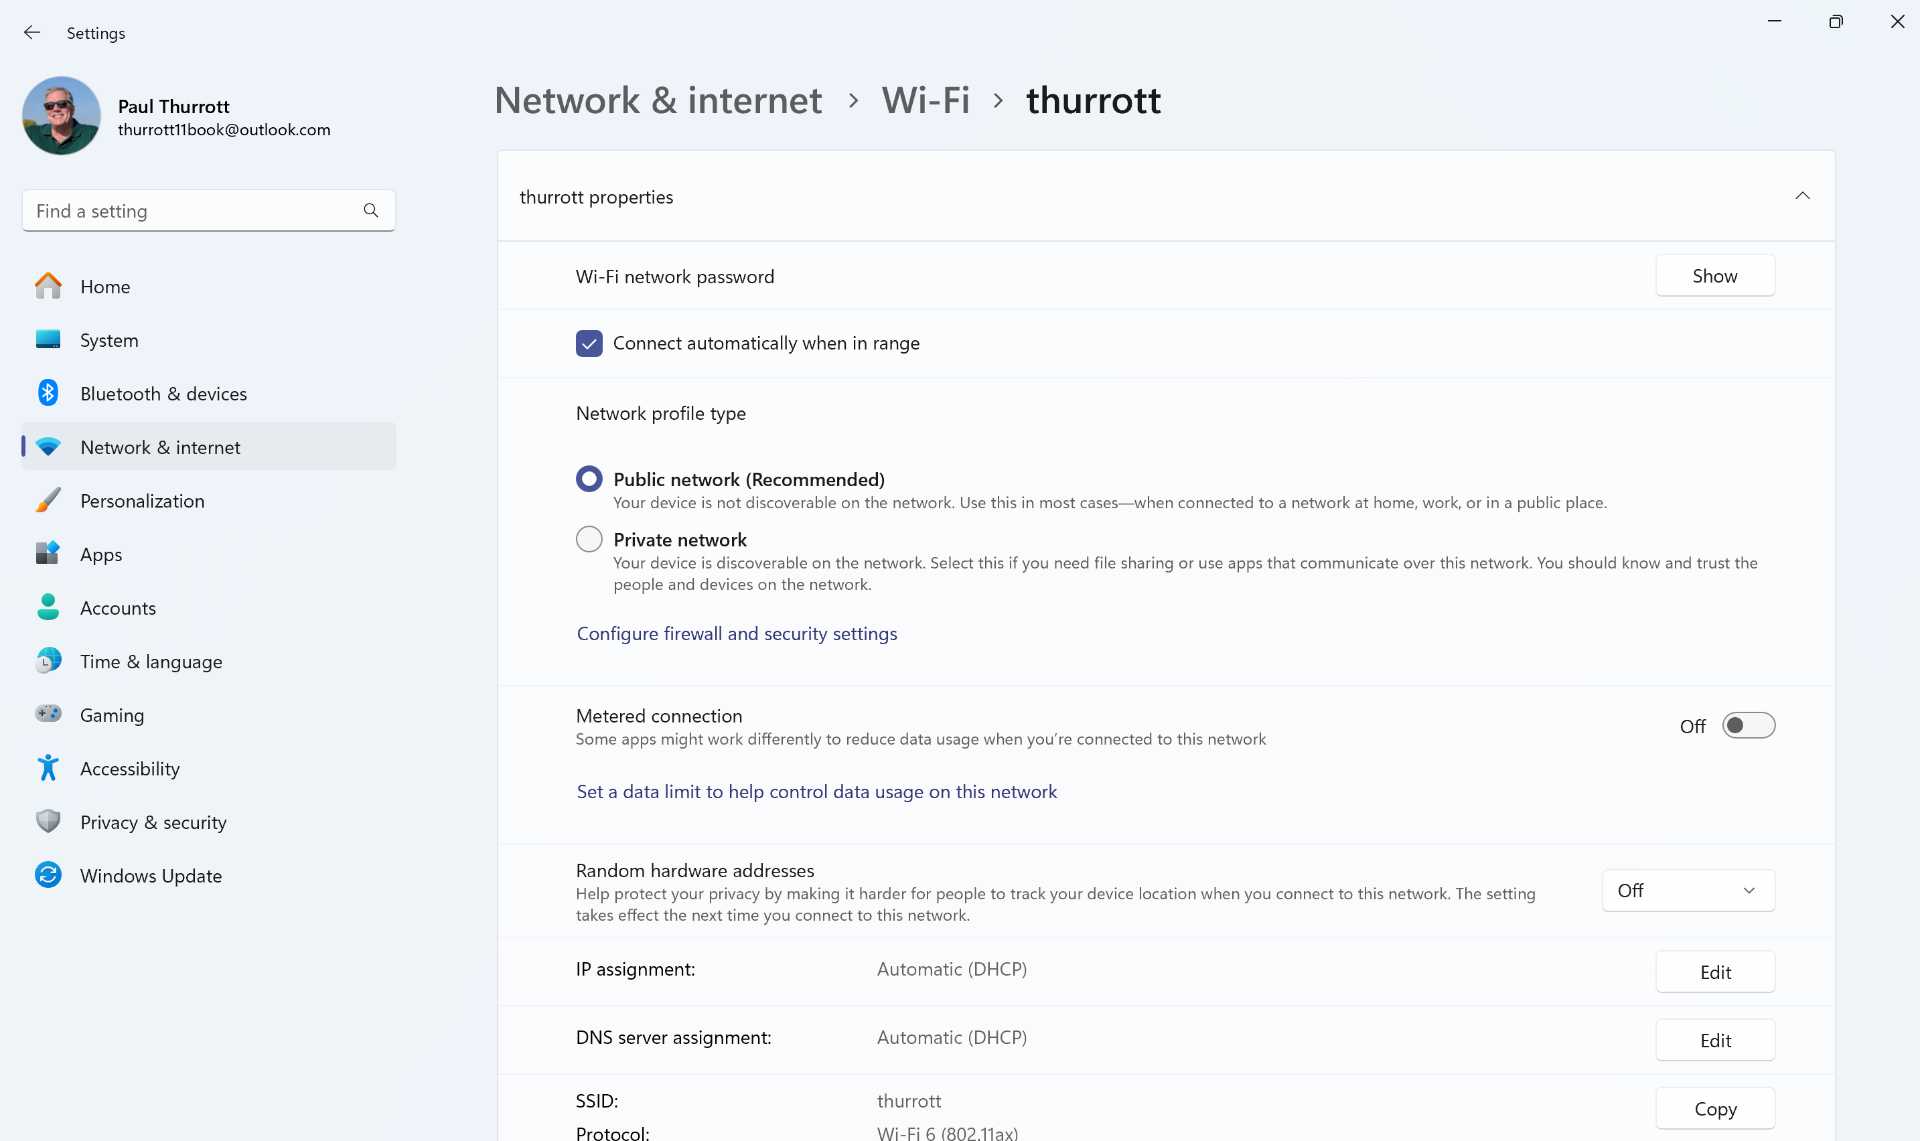
Configure a Wi-Fi network
By default, Windows 11 configures all Wi-Fi networks with a public network profile that prevents your PC from being discovered by other devices–and their potentially malicious owners–remotely. Despite its name, a public network is typically the right choice, even if you’re using a trusted network at home, work, or elsewhere. But you can configure a Wi-Fi network as a private network if you wish to share files or connected printers with others on the same network.
Do not confuse public and private Wi-Fi networks with public and private network profiles. The former are types of Wi-Fi networks that you, as a user, cannot change. The latter is a Windows 11 networking term that refers to whether your PC is discoverable over that network. Put simply, they are two different things that confusingly use the same terminology.
To configure the current Wi-Fi network, open the Settings app and navigate to Network & internet > Wi-Fi. Then, select “[Wi-Fi name] properties” to display the [Wi-Fi name] properties page.
Alternatively, open Quick Settings, click “Manage Wi-Fi connections,” and then click “More Wi-Fi settings.” Then, click the “[Wi-Fi name] properties” item.
The following options are of interest.
Wi-Fi network password. Click the “Show” button to see the password for the current Wi-Fi network.
This option is discussed a bit more in the next section.
Connect automatically when in range. When you first connected to this Wi-Fi network, you were presented with a “Connect automatically” choice. This option will be configured according to the choice you made at the time, but you can reconfigure it here.
Network profile type. Here, you can choose between configuring this connection as a public or private network for discoverability and sharing purposes. Unless you have specific needs, this should be configured as “Public network (Recommended).”
Metered connection. Most Wi-Fi networks are not metered–meaning they do not have a data cap and are potentially expensive–so this option is usually set to “Off” by default. However, if you are using Windows 11’s mobile hotspot feature or tethering your smartphone to share its Internet connection, this should be configured to “On.” If not, change it now to minimize data usage.
You can learn more about this feature in the Mobile Hotspot chapter.
Random hardware addresses. This privacy protection feature is curiously disabled by default. When enabled, it will present a random hardware address to any devices that connect to your PC over the network, making it seem like a different device each time. You can optionally configure this feature to change the hardware address every day for additional security.
If you do enable “Random hardware addresses,” you will need to disconnect from the Wi-Fi network and then reconnect for it to take effect.
P and DNS server assignment. You will also see options for IP and DNS server assignment, and a listing of all the configuration details for the PC’s Wi-Fi adapter. Most users won’t need to change the default IP and DNS server configurations. But if your ISP, workplace, or other trusted organization that manages the network instructs you to make changes, this is where you can do so.
Advanced Wi-Fi network properties. Click this button to display the legacy Wireless Network Properties control panel, which is rarely needed. This interface allows you to manually configure the security features your Wi-Fi adapter uses, but this is automatically configured optimally by Windows 11.

Find the password for a previously connected Wi-Fi network
One of the less obvious things you may need to do with a Wi-Fi network is finding its password so you can share it with others or use it to sign in on another device. Previously, the only way to do this was using the Command Prompt command line environment. But with Windows 11, Microsoft now finally offers a way to do this from the graphical user interface. And it works for the current Wi-Fi network or any Wi-Fi network to which you’ve previously connected.
We explain how to find this information with the command line in the Command Prompt chapter.
To find a previously saved Wi-Fi network password, start by opening the Settings app and navigate to Network & internet > Wi-Fi.
For the current network, choose the “[Wi-Fi name] properties” item at the top and click “Show” next to “Wi-Fi network password.”
To find the password for a previously saved Wi-Fi network, choose “Manage known networks” and then the network you wish to access. Then, click “Show” next to “Wi-Fi network password.”
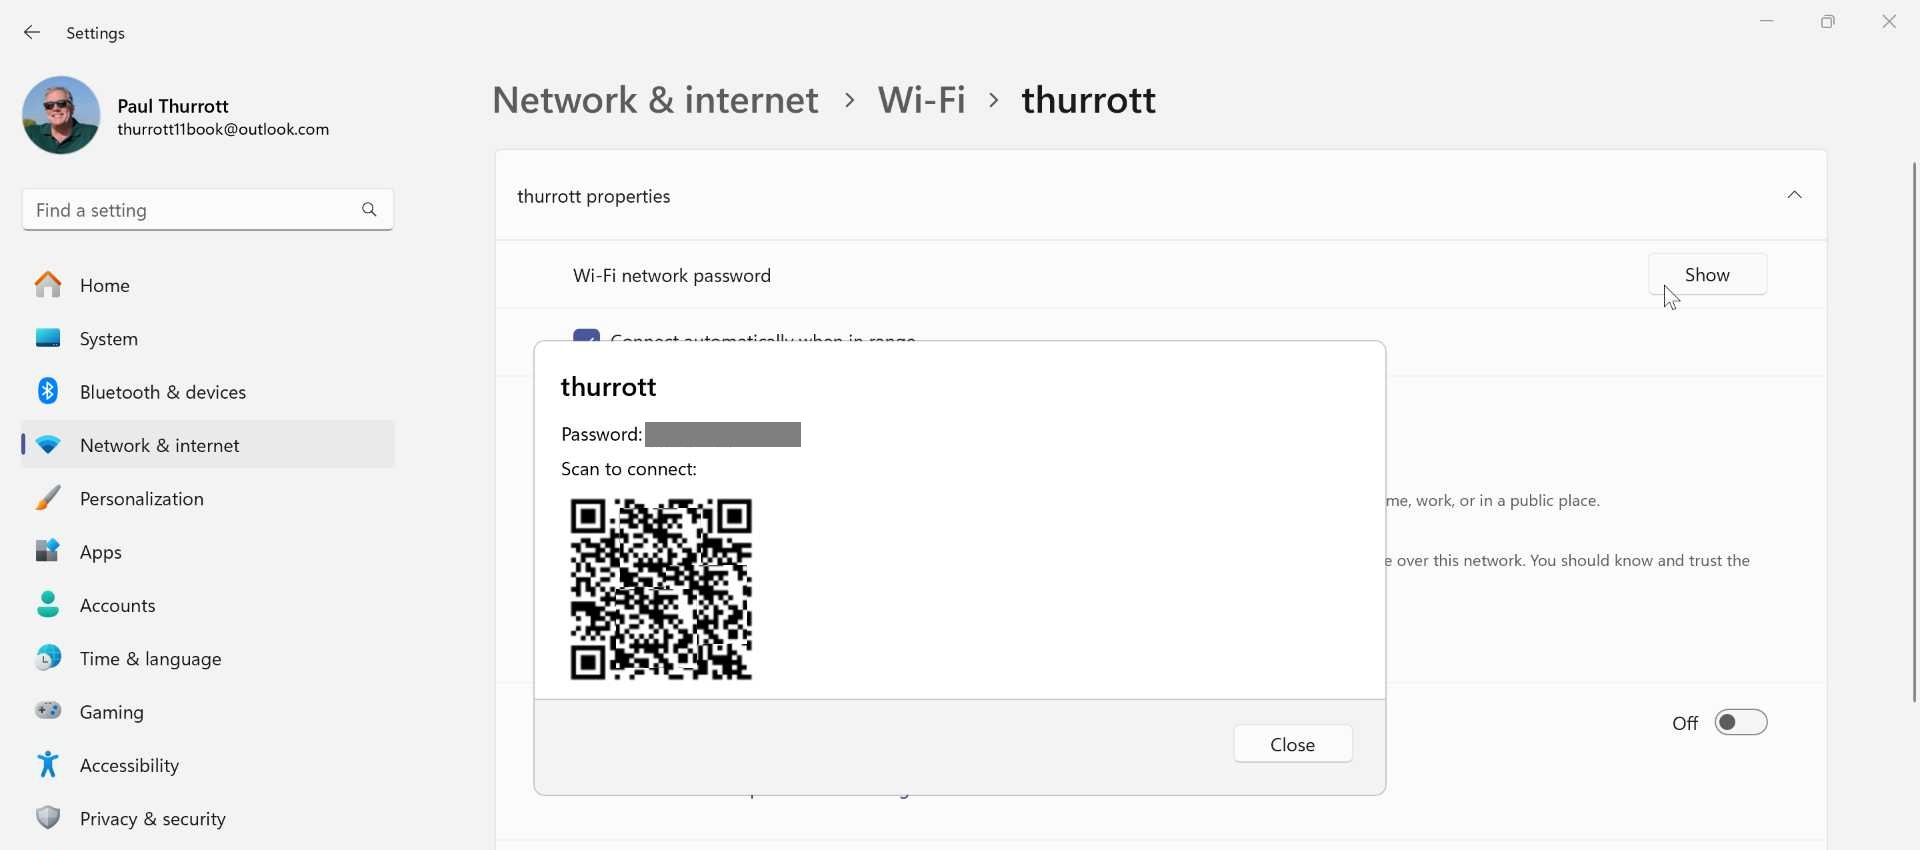
You can use the QR code to add this Wi-Fi network to your phone: Just scan the code with your phone’s camera.
Disconnect from or forget a Wi-Fi network
Windows 11 stores the name and password of all the Wi-Fi networks you connect to so that you can seamlessly connect to them again if you return or use another PC. However, you may sometimes connect to the wrong Wi-Fi network or wish to manually disconnect from it without disabling your PC’s Wi-Fi radio.
If you sign in to Windows 11 with a Microsoft account, this Wi-Fi network data is also synced to your account so it’s available on any PC you use.
You can do both from Quick settings: Click “Manage Wi-Fi connections”–again, the right half of the Wi-Fi quick settings split button–to display the list of available Wi-Fi networks. Then, right-click the Wi-Fi network you wish to change to display a context menu.
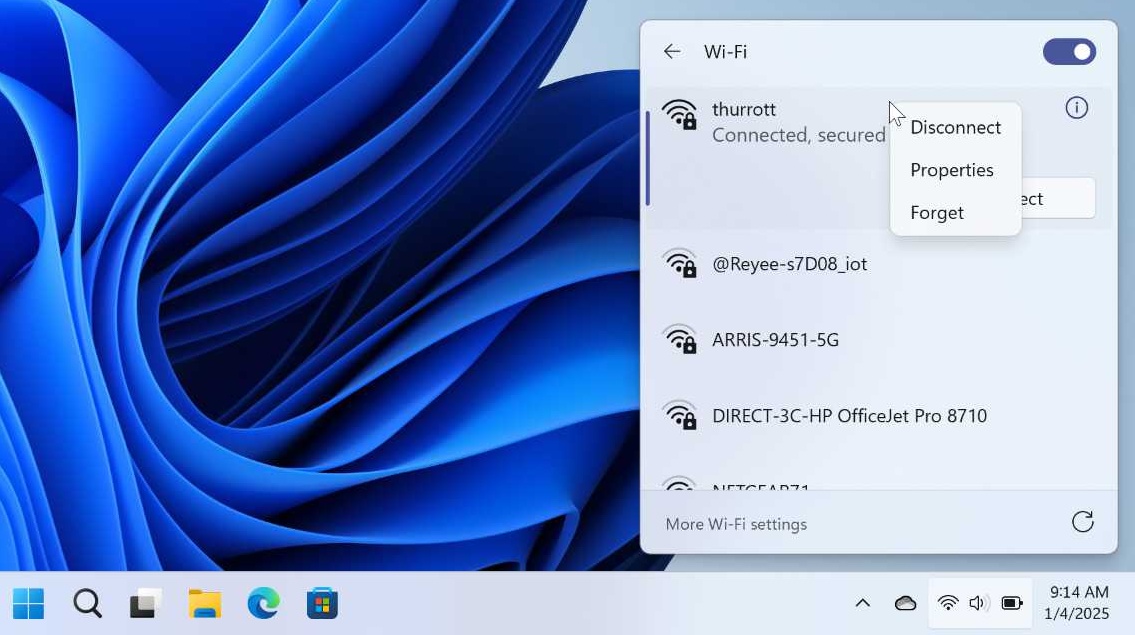
There are three options:
Disconnect/Connect. Choose this to disconnect (or connect) to the selected Wi-Fi network.
Properties. Select this to display the properties page for the selected Wi-Fi network in the Settings app as described in the previous section.
Forget. Click this to remove the name and password of this Wi-Fi network from Windows 11 and your Microsoft account.

Gain unlimited access to Premium articles.
With technology shaping our everyday lives, how could we not dig deeper?
Thurrott Premium delivers an honest and thorough perspective about the technologies we use and rely on everyday. Discover deeper content as a Premium member.