Step-By-Step: Windows 11 Setup Out-of-Box Experience (24H2)
- Paul Thurrott
- Oct 10, 2024
-
0
The Windows 11 Out of Box Experience (OOBE) is part of Windows 11 Setup, and it’s the first thing you will see when you purchase a new Windows 11-based PC and turn it on for the first time.
Those who perform a clean install of Windows 11 will step through the Windows 11 Setup first-boot experience before being presented with the OOBE.

The Windows 11 OOBE is similar to that from Windows 10, but it has been visually refreshed to match the Windows 11 look and feel. And it has been updated several times since the initial release of Windows 11. What you see here will vary a bit from PC to PC, but here’s a quick rundown of the most common interfaces.
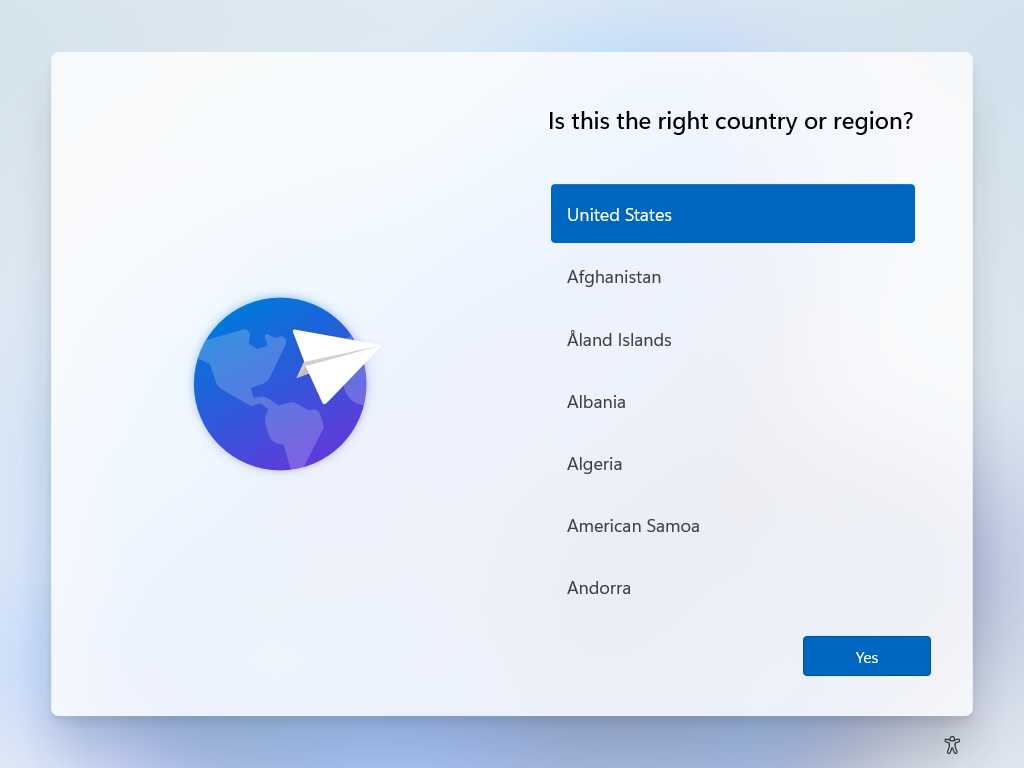
Is this the right country or region? Choose the country you’re in if required, and then click the “Yes” button.
Is this the right keyboard layout or input method? By default, the OOBE will select the correct keyboard layout based on your previous choice. But if you need a different keyboard layout or input method, you can select it there. Then, click the “Yes” button.
Want to add a second keyboard layout? Windows 11 supports multiple languages, which can be useful for those who are multilingual or need to work in multiple languages. But you don’t need to install a language pack if all you need to do is enter text in other languages. Instead, you can choose a second keyboard language here, or later when you’re using Windows 11. Most people will not have to add a second keyboard layout. If you do not, just click “Skip.”
Let’s connect you to a network. If you are not connected to the network with a wired (Ethernet) cable, the OOBE will prompt you to connect to a Wi-Fi network. Select the correct Wi-Fi network, sign in as prompted, and then click “Next.”
Please review the License Agreement. After checking for updates, the OOBE will present the Windows 11 End User License Agreement, which you will of course read in its entirety. Click “Accept” to continue.
Let’s name your device. New to Windows 11, the OOBE once again allows you to give your PC a name before continuing. Note that doing so will require your PC to reboot before you can continue. If you don’t care about the name, click “Skip for now.”
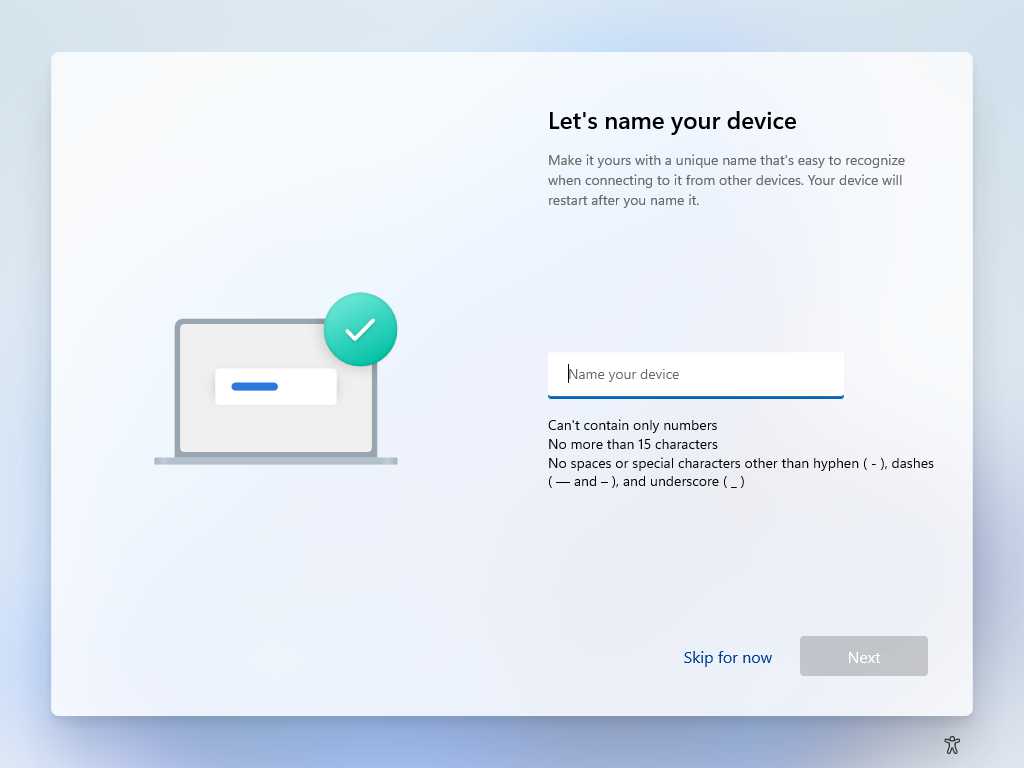

You can rename your PC later if you wish, but you will have to reboot whenever you do so. To rename your PC while running Windows 11, open Settings (WINKEY + I) and navigate to System > About, and click “Rename this PC.”
How would you like to set up this device? This screen will only appear if you are installing Windows 11 Pro. You are given two choices, “Set up for personal use” and “Set up for work or school.” Here, we will assume you are using a Microsoft account, so choose “Set up for personal use.”
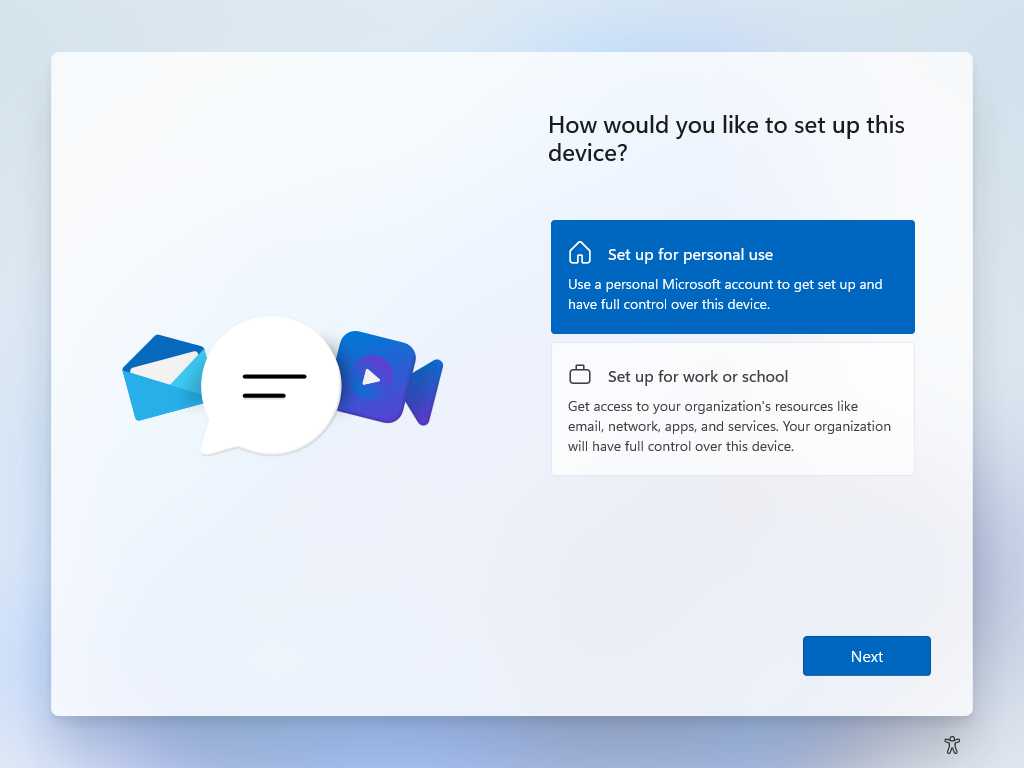
With Windows 11 Home, a Microsoft account is your only sign-in choice, so this step is unnecessary and does not appear.
If you’re using a Work or School account, a special kind of Microsoft account for businesses and educational institutions, choose the second option. You can learn more about Work and School accounts in the Work and School Accounts chapter.
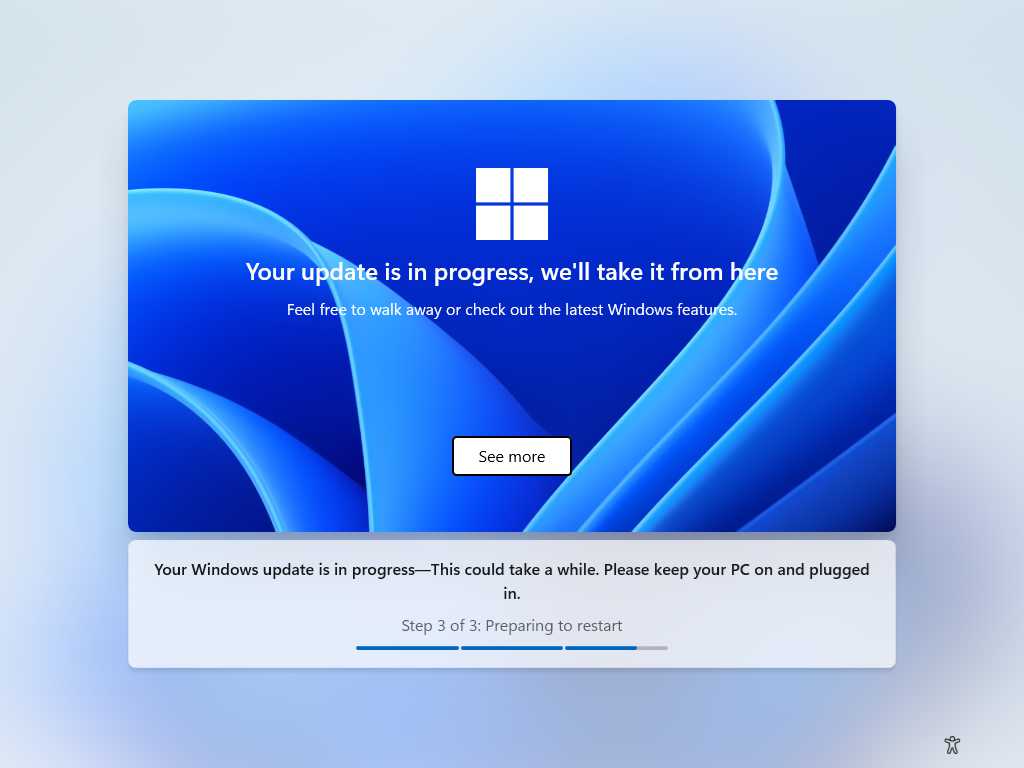
Windows Update in progress. New to Windows 11 version 24H2, the OOBE may be interrupted at this point so that Windows Setup can install a Windows Update. Whether you see this or not depends on when you install Windows 11 and how up-to-date the installation media is. If you do experience this, it could take quite a while, and the PC will reboot before the OOBE can continue normally.
Unlock your Microsoft experience. Here, Microsoft explains how signing in with a Microsoft account improves the experience of using Windows 11. Click the “Sign in” button to continue.
Let’s add your Microsoft account. Type your Microsoft account email address in the Email, phone, or Skype field and then select the Next button. You will need to verify your identity next, but how you do so will depend on how you’ve secured your account. For example, if you enabled two-step verification as we suggest, you will need to verify the sign in using an authenticator app on your smartphone.
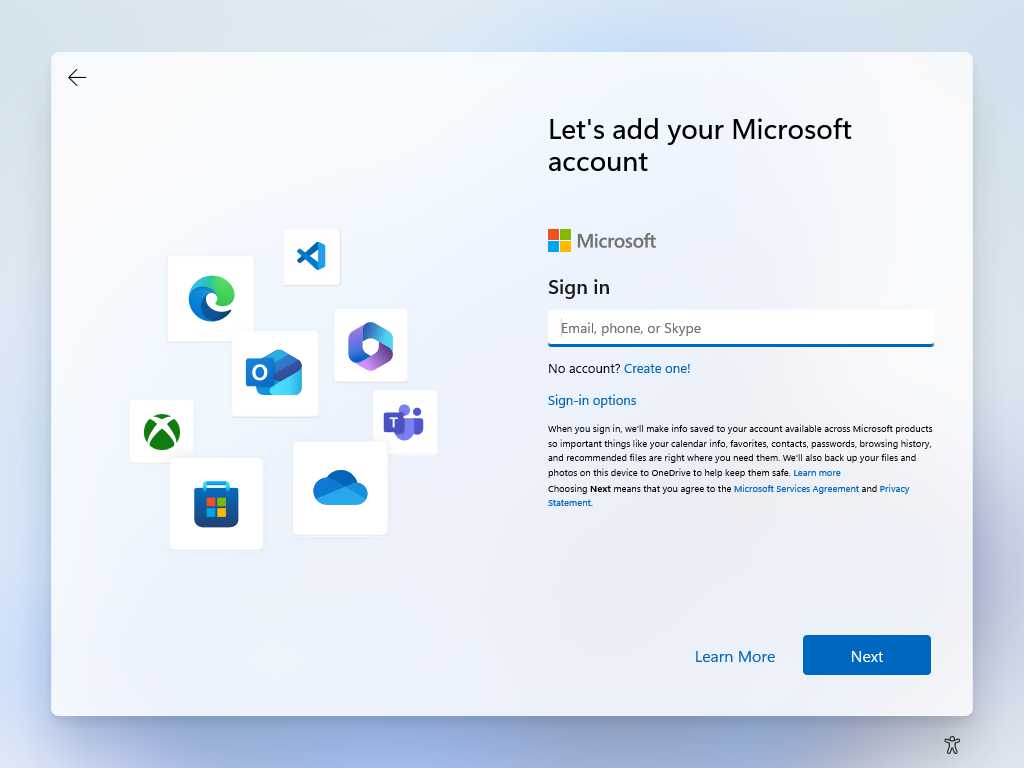
Microsoft now requires individuals to sign in to Windows 11 with a Microsoft account. And for the most part, this book assumes you do so.
If you’re a power user who wishes to use a local account instead, you can follow the instructions in the Overcome Windows 11 Setup Annoyances chapter to bypass the Microsoft account requirement.
Want to use your face/finger to sign in faster and more securely? If your PC supports Windows Hello facial and/or fingerprint recognition, the OOBE will prompt you to configure one of those authentication methods here. But it’s easy enough to configure this later. If you see this screen, push forward to the next step by clicking “Skip for now.”
We discuss authenticating with facial and fingerprint recognition in the Windows Hello, Presence Sensing, and Dynamic Lock chapter.
Create a PIN. When you sign in to Windows 11 with a Microsoft account (or any account type with a password), you have to create a PIN (personal identification number), which is similar to the code you use to access your bank accounts with a debit card. This PIN will make it easier to sign in to the PC later. Click “Create PIN” to continue.
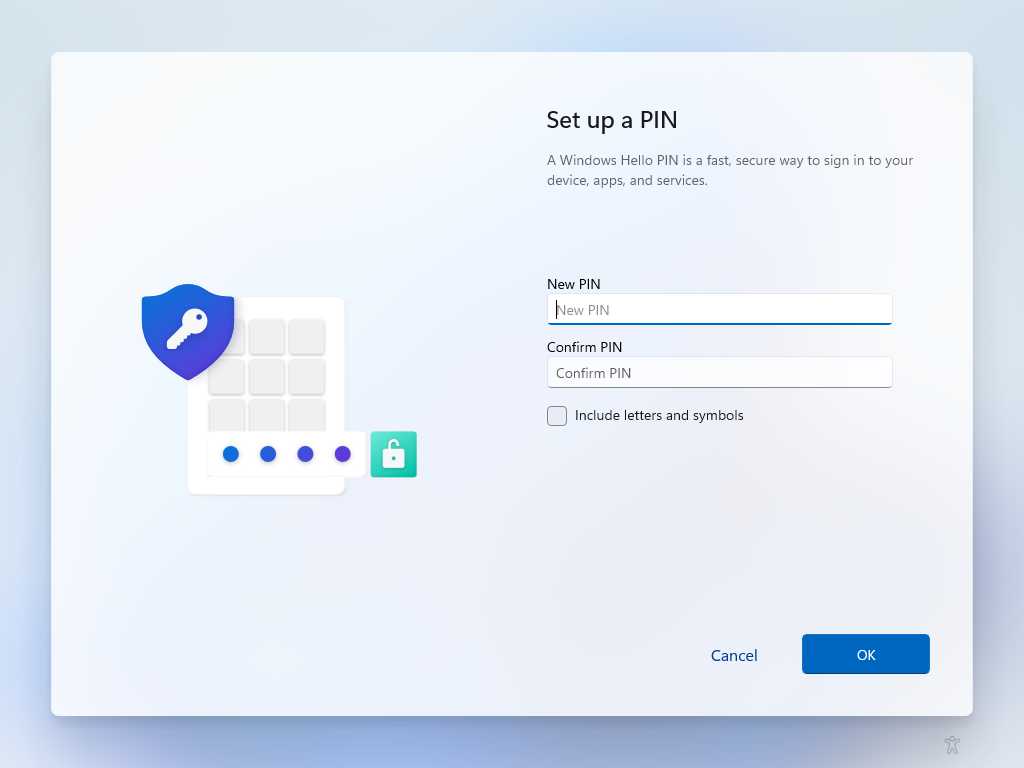
Set up a PIN. Here, you enter and confirm a four-digit PIN, which will consist of numbers only by default. Click “OK” when you’re done.
Select the “Include letters and symbols” checkbox if you would like to use other characters for your PIN too.
Choose privacy settings for your device. Here, you are asked to examine and configure several high-level privacy settings: Location, Find my device, (optional) Diagnostic data, Inking & typing, Tailored experiences, Advertising ID, and, if your PC supports it, Presence. If you care about your privacy, and you should, you should configure each of these options–except for Location and Find my device–to “Off.” When you’re done, click “Accept.”
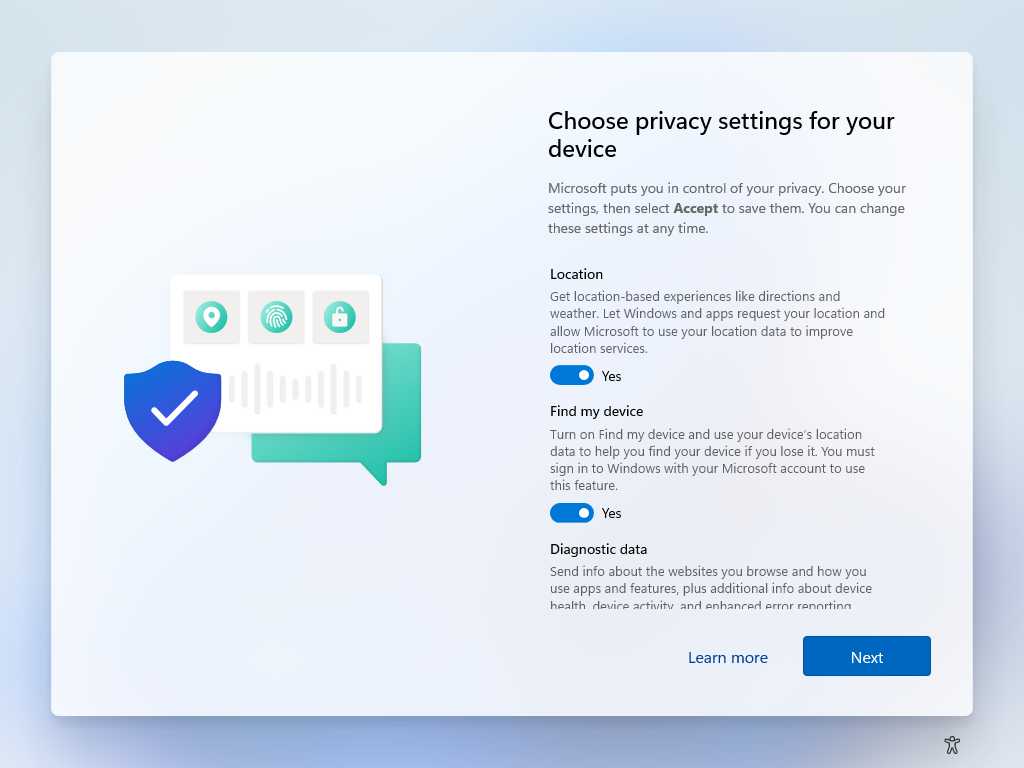

While you can–and maybe should–review the Windows 11 privacy settings at a much more granular level using the Privacy settings interface in the Settings app, the configuration we recommend here is correct for most people, given how few meaningful privacy features you can customize in the first place.
We describe Windows 11’s Privacy settings and our recommendations for further customization in the Customize Your Privacy Settings chapter.
Welcome back! If you signed in to the PC using a Microsoft account you’ve used in the past, you will be prompted to restore from a previous backup or choose “More options,” the latter of which offers a list of other backups from which to choose plus a “Set up as a new PC” link. The difference between restoring from a backup and setting up this PC as a new PC is more subtle than it should be, and there are some downsides to restoring from a backup. But choose the recommended backup, a different backup (via the “More options” link), or “Set up as a new PC” (also via “More options”) as you prefer to continue.

You can learn more about Windows Backup–and why restoring from a PC backup may or may not make sense for you–in the Windows Backup chapter.
Let’s customize your experience. This odd screen lets you select one or more ways in which you plan to use the PC, with choices like Development, Entertainment, Gaming, School, Creativity, Business, and Family. This may seem helpful, but these options are really about violating your privacy and pushing personalized tips, advertisements, and recommendations to you. And so we don’t recommend clicking any of these choices. Instead, select the “Skip” link to skip to the next step.
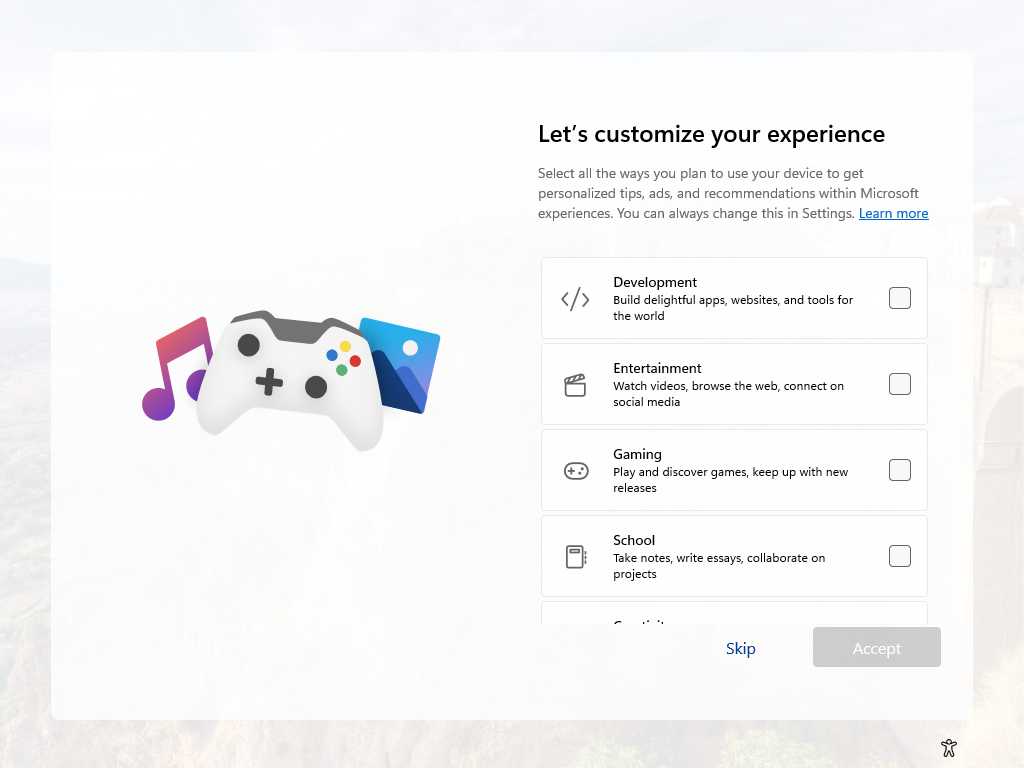
You can enable (or disable) this configuration later in Settings–navigate to Personalization > Device usage.
Use your phone from your PC. Windows 11 includes an app called Phone Link that lets you integrate features from your Android smartphone or iPhone–like phone calls, messages, contacts, and notifications–with your PC. This is better configured later, however, so just click “Skip” to move on.
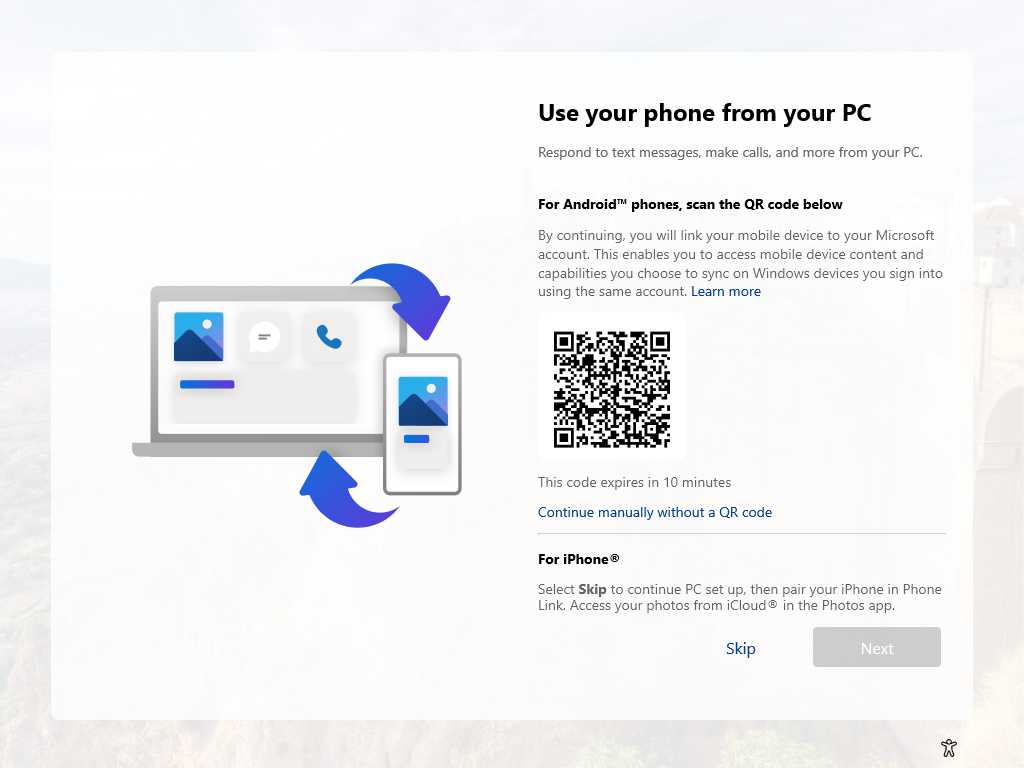

Because of Apple’s lock-in strategies, Phone Link is more useful for those with Android handsets and it offers far more complete integration with additional features.
You can learn more about this functionality in the Phone Link chapter.
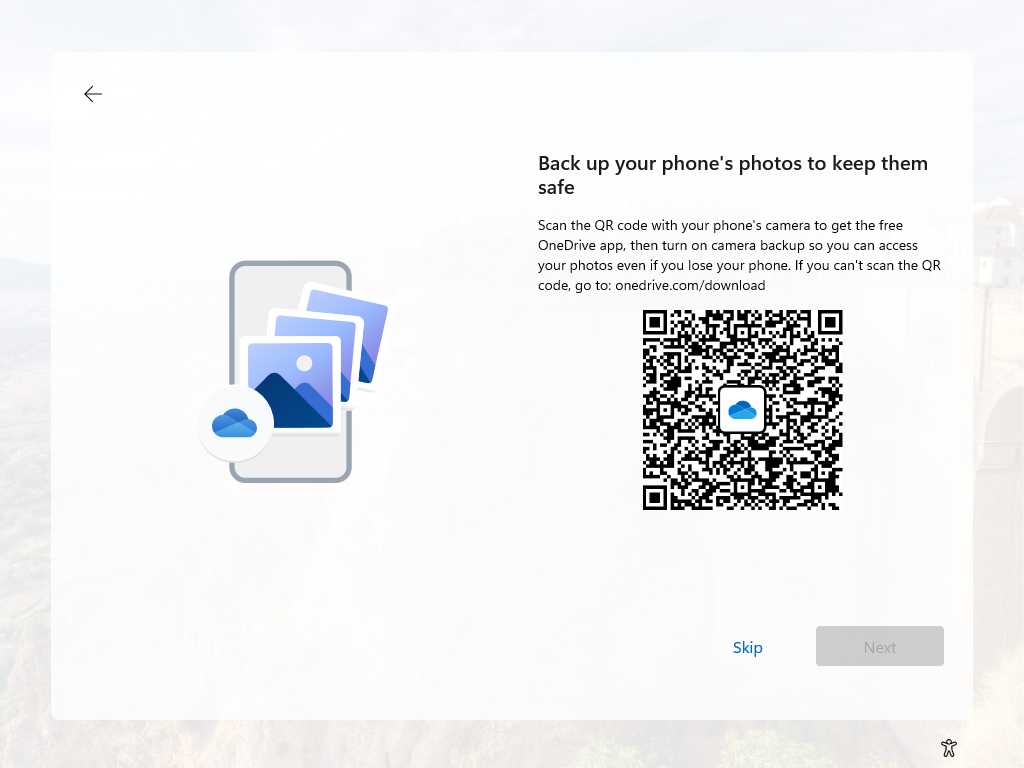
Back up your phone’s photos to keep them safe. This screen displays a QR code you can scan with your phone’s camera to install the OneDrive mobile app. If you use OneDrive to protect your photos–and pay for additional OneDrive storage via a Microsoft 365 subscription, this is a terrific idea. You’re welcome to scan the code with your phone if you’re not already using OneDrive this way, and then click “Next” to continue. If you’re already using OneDrive or aren’t interested, click the “Skip” link.
Always have access to your recent browsing data. This screen is related to a dubious new feature in Microsoft Edge that will automatically import browser data from other web browsers–though it only seems to work with Google Chrome in our experience–every time you launch Edge. It is highly unlikely you want this behavior–few people use both browsers actively and would benefit from a continuous, one-way data transfer–and so we recommend clicking “Not now.”
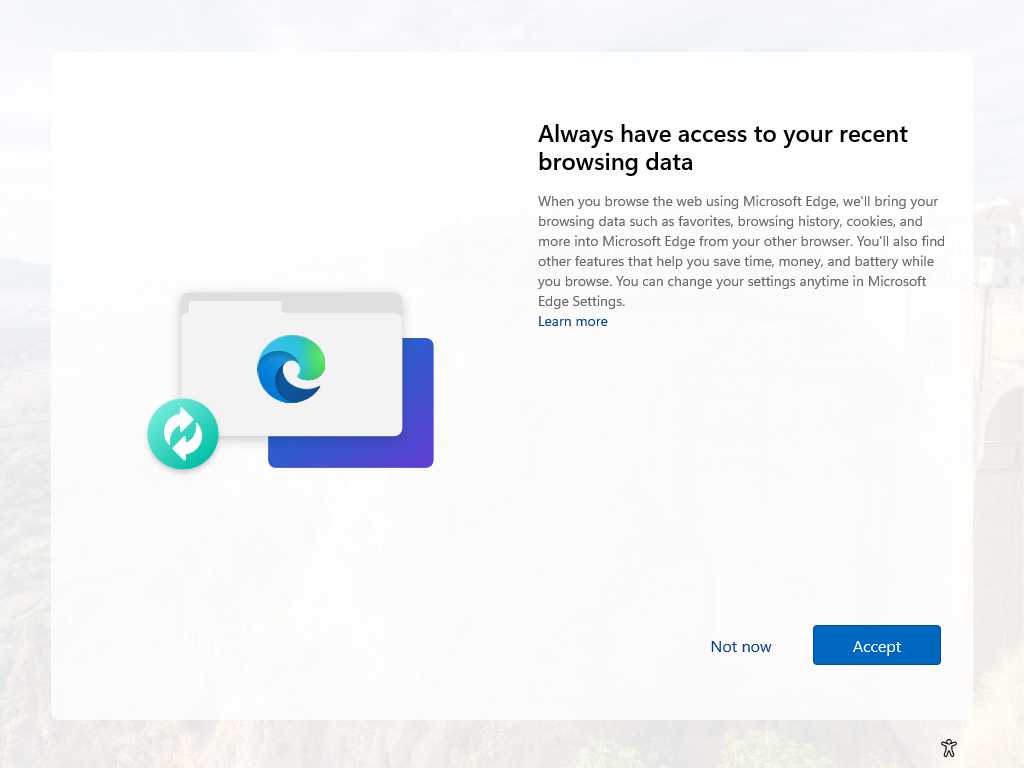
If you use Microsoft Edge, you can further configure this behavior in Edge settings at any time. This interface provides options for importing browsing data from other browsers and password managers. The feature noted above can be found by clicking “Import browsing data at each browser launch.” If the button on the resulting page is set to “Off,” you’re all set. Otherwise,disable this feature.
Microsoft Edge presents this choice during its initial setup too, as described in the Set Up Microsoft Edge Correctly … Whether You Use It Or Not chapter. Microsoft really wants access to all your data.
Back up your files with OneDrive. In many cases, Windows 11 automatically enables a OneDrive feature called Folder backup that syncs your local Desktop, Document, and Pictures folder with its cloud storage. If you are using Windows 11 Home, you’re not given this choice during OOBE. But you may see it if you’re installing Windows 11 Pro: Sometimes it appears, sometimes it doesn’t. Confusing? Yes.
To configure or disable OneDrive Folder backup at any time, open OneDrive settings, navigate to Sync and backup, and click the “Manage backup” button.
If you’re not given this choice during OOBE and you wish to disable OneDrive Folder backup, you should do so immediately after completing Setup. You can learn how in the Windows 11 Version Personalization First Steps chapter.
If you disable this feature, Windows 11 will periodically harass you with pop-up notification banners and other messages that ask you to enable Folder backup. And then it will silently enable it in many cases, regardless.
You can learn more about this feature and its bad behaviors in the OneDrive chapter.
Access granted: We’re giving you a free trial of Microsoft 365. If you don’t subscribe to Microsoft 365 Family or Personal, Microsoft might offer you a free one-month trial to Microsoft 365 Family. After the month is over, you will pay $9.99 per month for this subscription. Here, we will assume that you are declining this offer, so click “Decline” to continue.
Play over 100 high-quality PC games with PC Game Pass. If you don’t subscribe to Xbox Game Pass Ultimate or PC Game Pass, Microsoft will offer you one month of PC Game Pass for $1. After the free month is over, you will pay $11.99 per month for this subscription. Here, we will assume that you are declining this offer, so select “Skip for now” and continue.
Just a moment. Depending on whether it installed updates previously, the OOBE might into a final phase during which it displays a series of messages–“Hi,” “Getting things ready for you,” “This might take a few minutes,” and so on–before finally displaying the Windows 11 Desktop for the first time. If not, you will go immediately to the Desktop.

From here, you should move on to some additional configuration. If this was a clean install or the first time you’ve booted into a new PC, we recommended checking out Windows 11 Personalization First Steps next. Either way, be sure to check out the Personalize section for more personalization options to consider.

Gain unlimited access to Premium articles.
With technology shaping our everyday lives, how could we not dig deeper?
Thurrott Premium delivers an honest and thorough perspective about the technologies we use and rely on everyday. Discover deeper content as a Premium member.