Windows 11 Personalization First Steps
- Paul Thurrott
- Oct 02, 2022
-
4
After you complete a clean install or have signed into a new Windows 11 PC for the first time, you should make sure that everything is working properly and prepare your PC for the future.
Here are a few post-install tasks to perform.
You should try to perform these tasks in the listed order, and reboot as directed before continuing.
Lower the volume
Microsoft inexplicably configures Windows 11 to output sound at a very high volume. So, be sure to lower the system volume now using the Volume icon in the system tray or, if your PC supports it, via the PC’s Volume keys or buttons.
Delete superfluous Microsoft Edge shortcuts
Microsoft really wants you to use its new web browser, called Microsoft Edge. And you can tell because it creates shortcuts to it on the Taskbar, in the Start menu, and on the Desktop. That’s probably two too many shortcuts, even if you plan to use Microsoft Edge. We recommend at least deleting the Desktop shortcut. And, if you intend to use another web browser, the Taskbar shortcut as well.
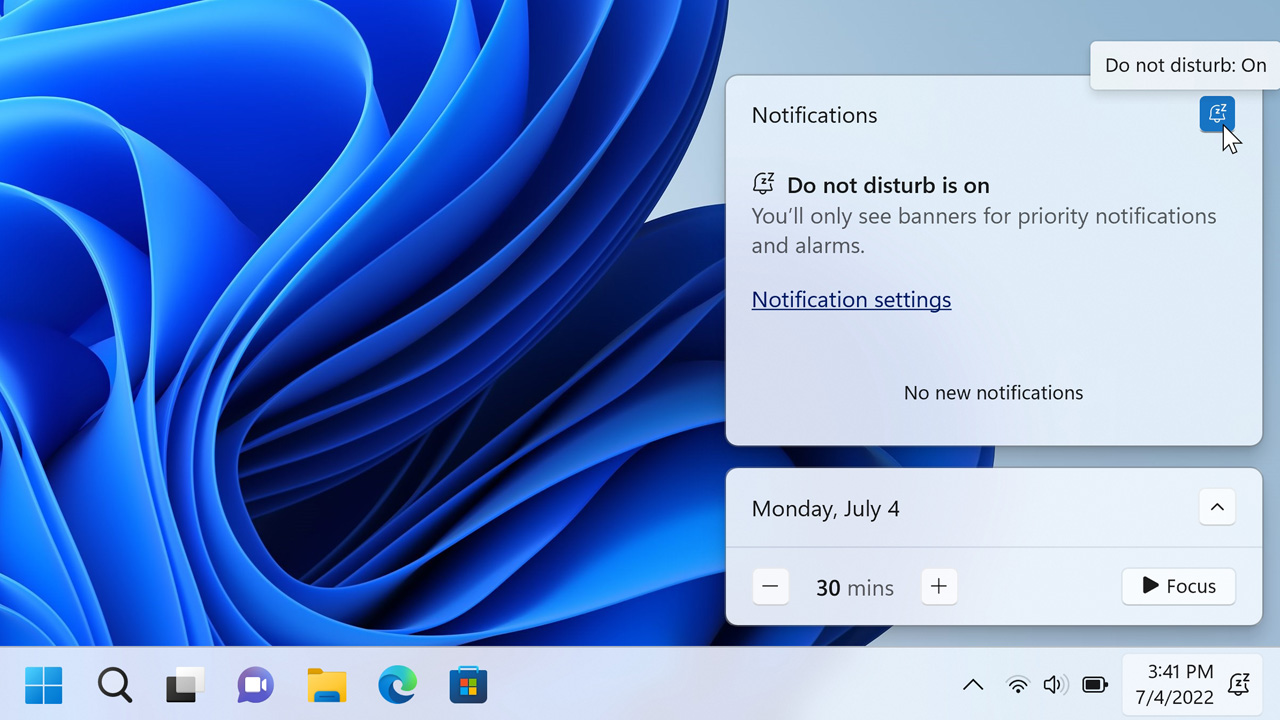
Turn off Do not disturb (Optional)
New to Windows 11, Microsoft now enables a feature called Do not disturb the first time you boot into your new Desktop. It’s not clear why it made this change, but you will not receive most notifications until you disable Do not disturb.
To do so, select the date/time display in the far right of the Taskbar to display the Notifications and Calendar panes.
Configure the Desktop theme (Optional)
In addition to supporting Dark and light modes like Windows 10, Windows 11 also sees the return of themes, where each theme is a combination of a background, an accent color, a sound scheme, and a mouse cursor. The default Windows 11 theme displays in Light mode and includes a pleasant “bloom”-inspired background, a medium blue accent color, mellow sounds, and the default mouse cursor. But you can change any or all of it as you like, and there’s no time like the present.
To change the theme, or any other aspect of the default Desktop display, open the Settings app and navigate to Personalization. In that view, you will find a set of theme thumbnails and options related to the background, colors, and themes.

Alternatively, you can right-click the Desktop and choose “Personalize” from the context menu that appears to navigate directly to this interface.
Configure File Explorer
While many will find that File Explorer works fine in its default configuration, others may wish to make a few changes based on their needs. Key among these changes are configuring which view File Explorer displays when first run and determining whether the app displays recently-accessed files and folders.
These and other File Explorer features are configured using the Folder Options dialog. To display this dialog, open File Explorer and then select See more (“…”) and then Options.

You can also open File Explorer by typing WINKEY + E.
To configure the default view, select the drop-down next to “Open File Explorer to:”. There are three choices:
Home. This default view displays your Quick access folders (Desktop, Downloads, Documents, Pictures, Music, and Videos by default, though this can be configured), plus favorite and recently-accessed files and folders.
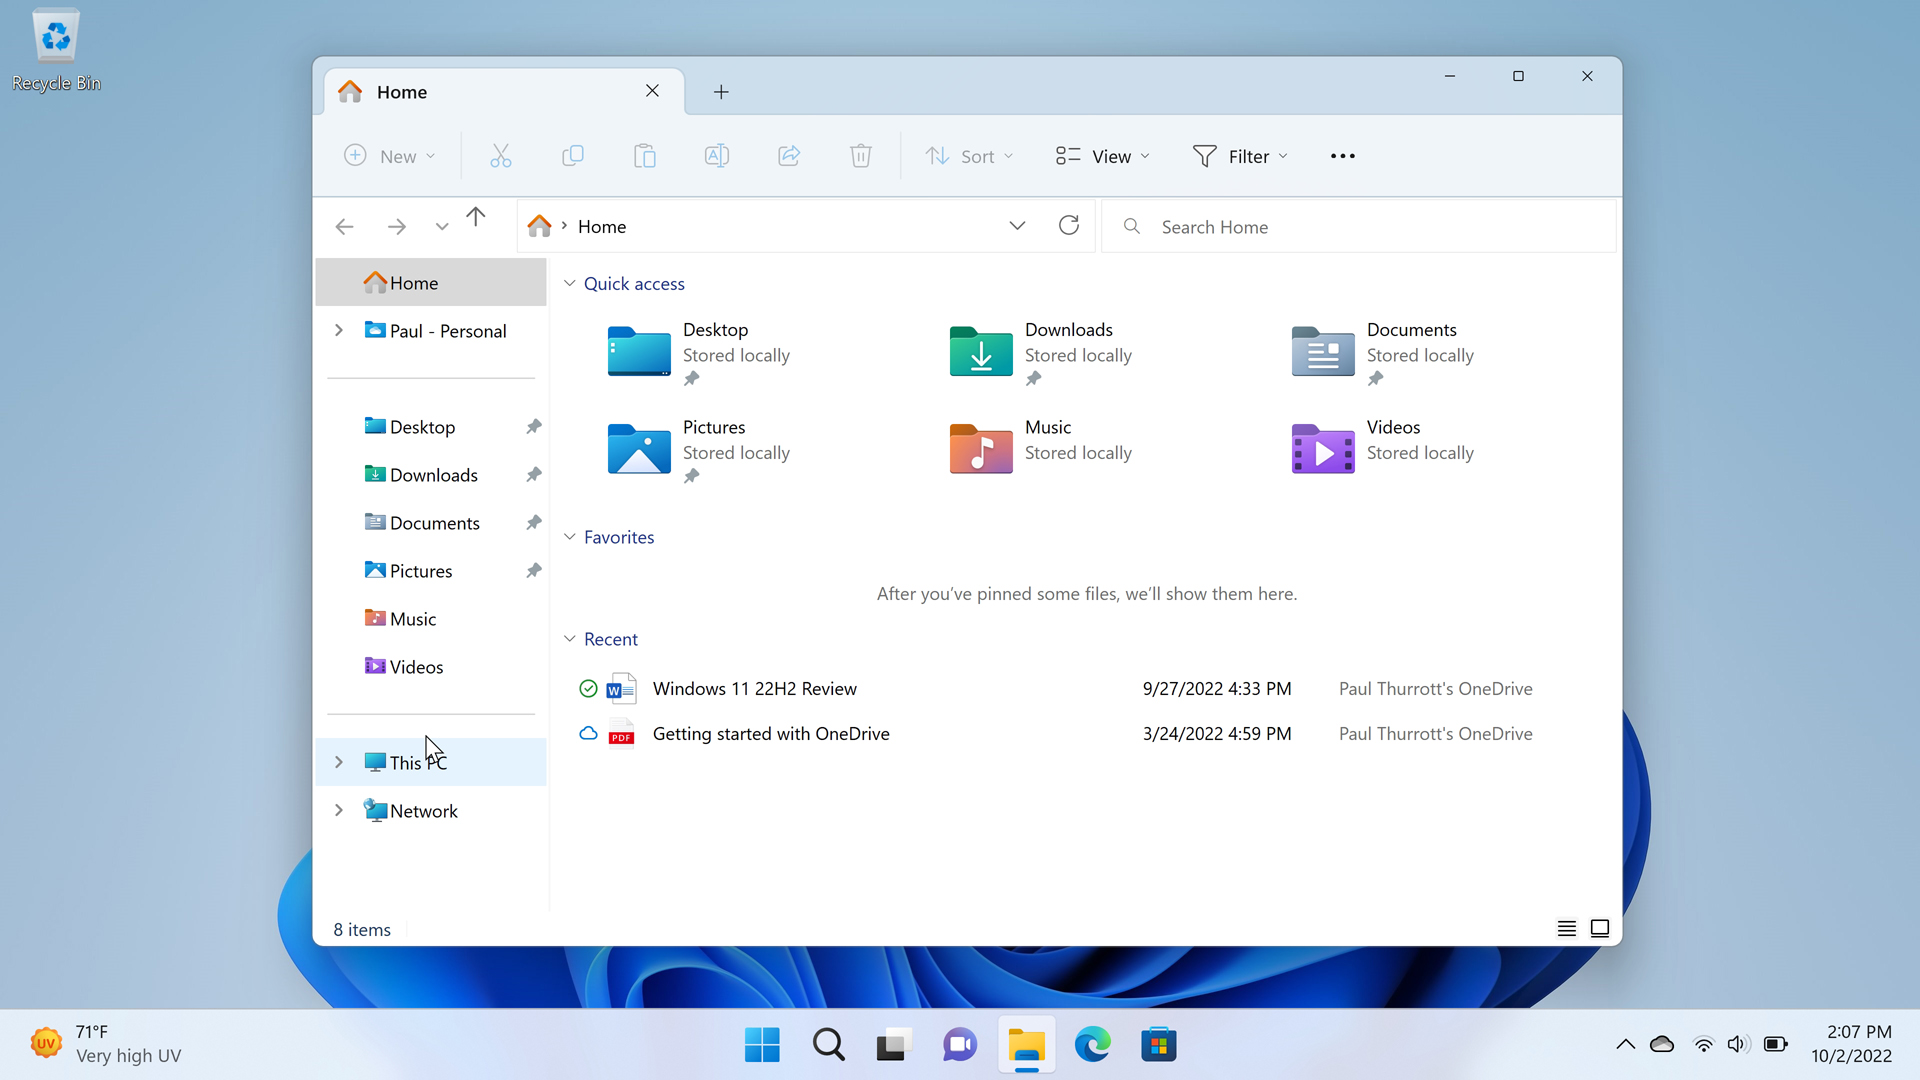
The Quick access folders displayed here also appear under Home in File Explorer’s Navigation pane.
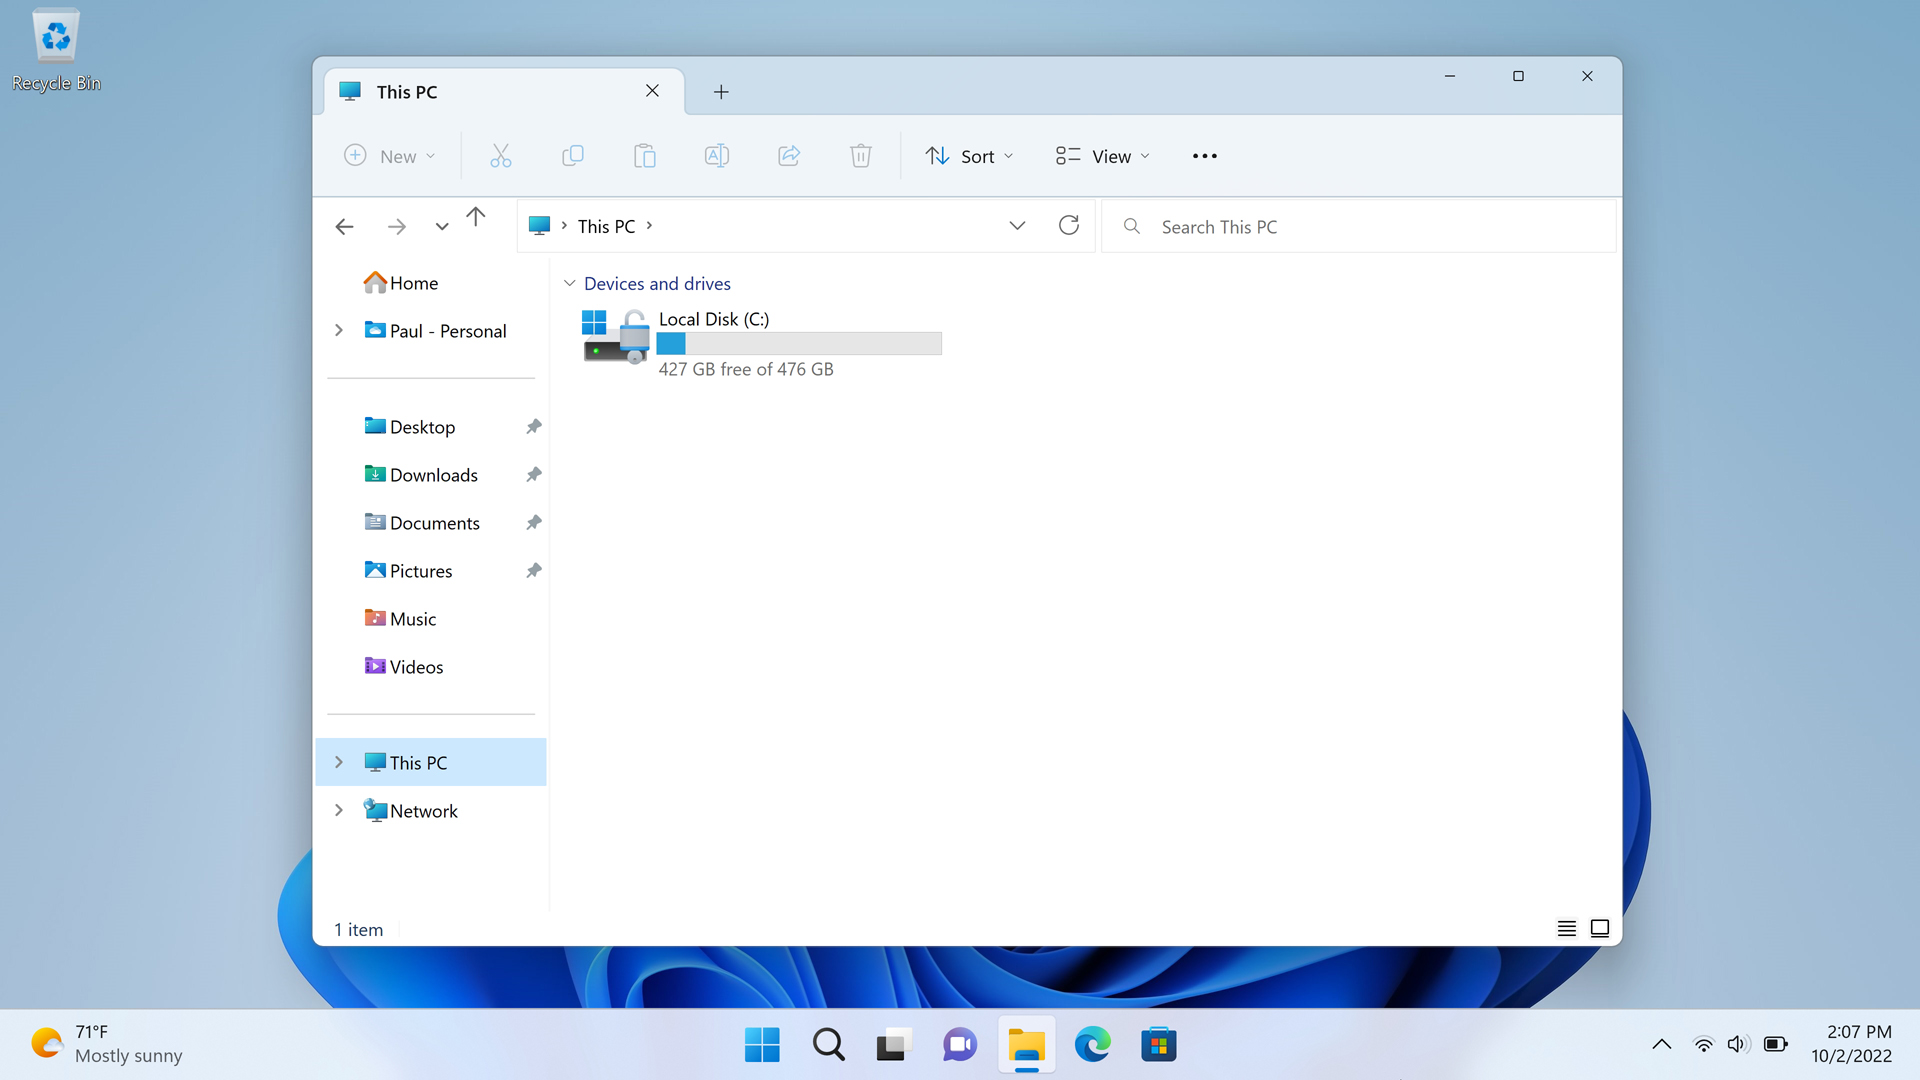
This PC. This more traditional view displays six key user account folders (Desktop, Downloads, Documents, Music, Pictures, and Videos) and any fixed or removable drives and devices.
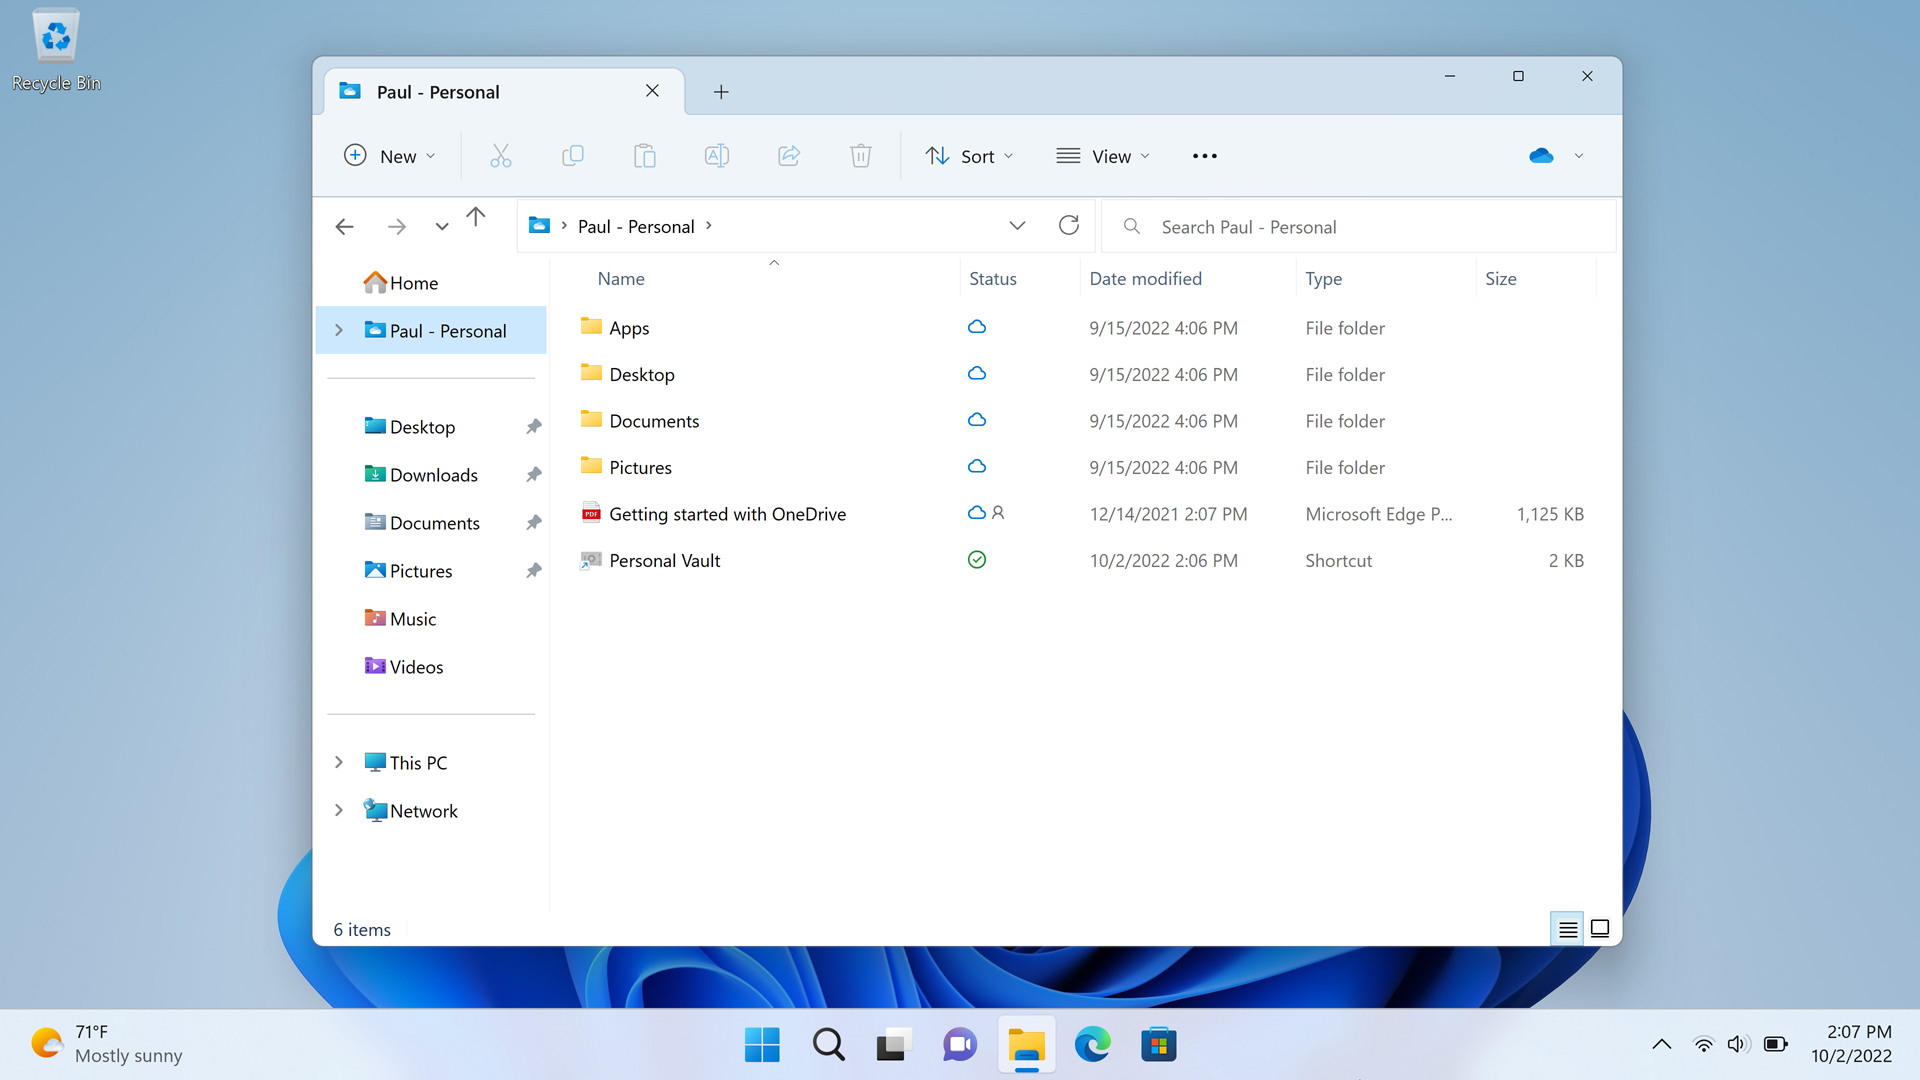
OneDrive. New to Windows 11 version 22H2, this view displays the root of your OneDrive, which can be synced to your PC for offline use.
In the Privacy section of the General tab in Folder Options, you will also see three options, all enabled by default, that impact how the Home view works. They are:
Show recently used files. When this option is enabled, the documents and files that you accessed most recently on this PC will appear in the Recent section in the Home view.
Show frequently used folders. When this option is enabled, any folders that you use regularly will be added to the Quick access section in the Home view, and to the Home section in the navigation pane.
Show files from Office.com. When this option is selected, any documents and files that you access using Office.com on the web will appear in the Recent section in the Home view.
How you configure File Explorer will be determined why how you use File Explorer. If you like the default behavior, where recently used files and frequently used folders appear automatically in the Home view and, in the case of folders, under Home in the navigation pane, then you may simply want to leave it as-is.
Otherwise, you can change the default view and consider disabling one or more of the Privacy options. For example, I (Paul) prefer the This PC view, and I disable all three of those latter options.
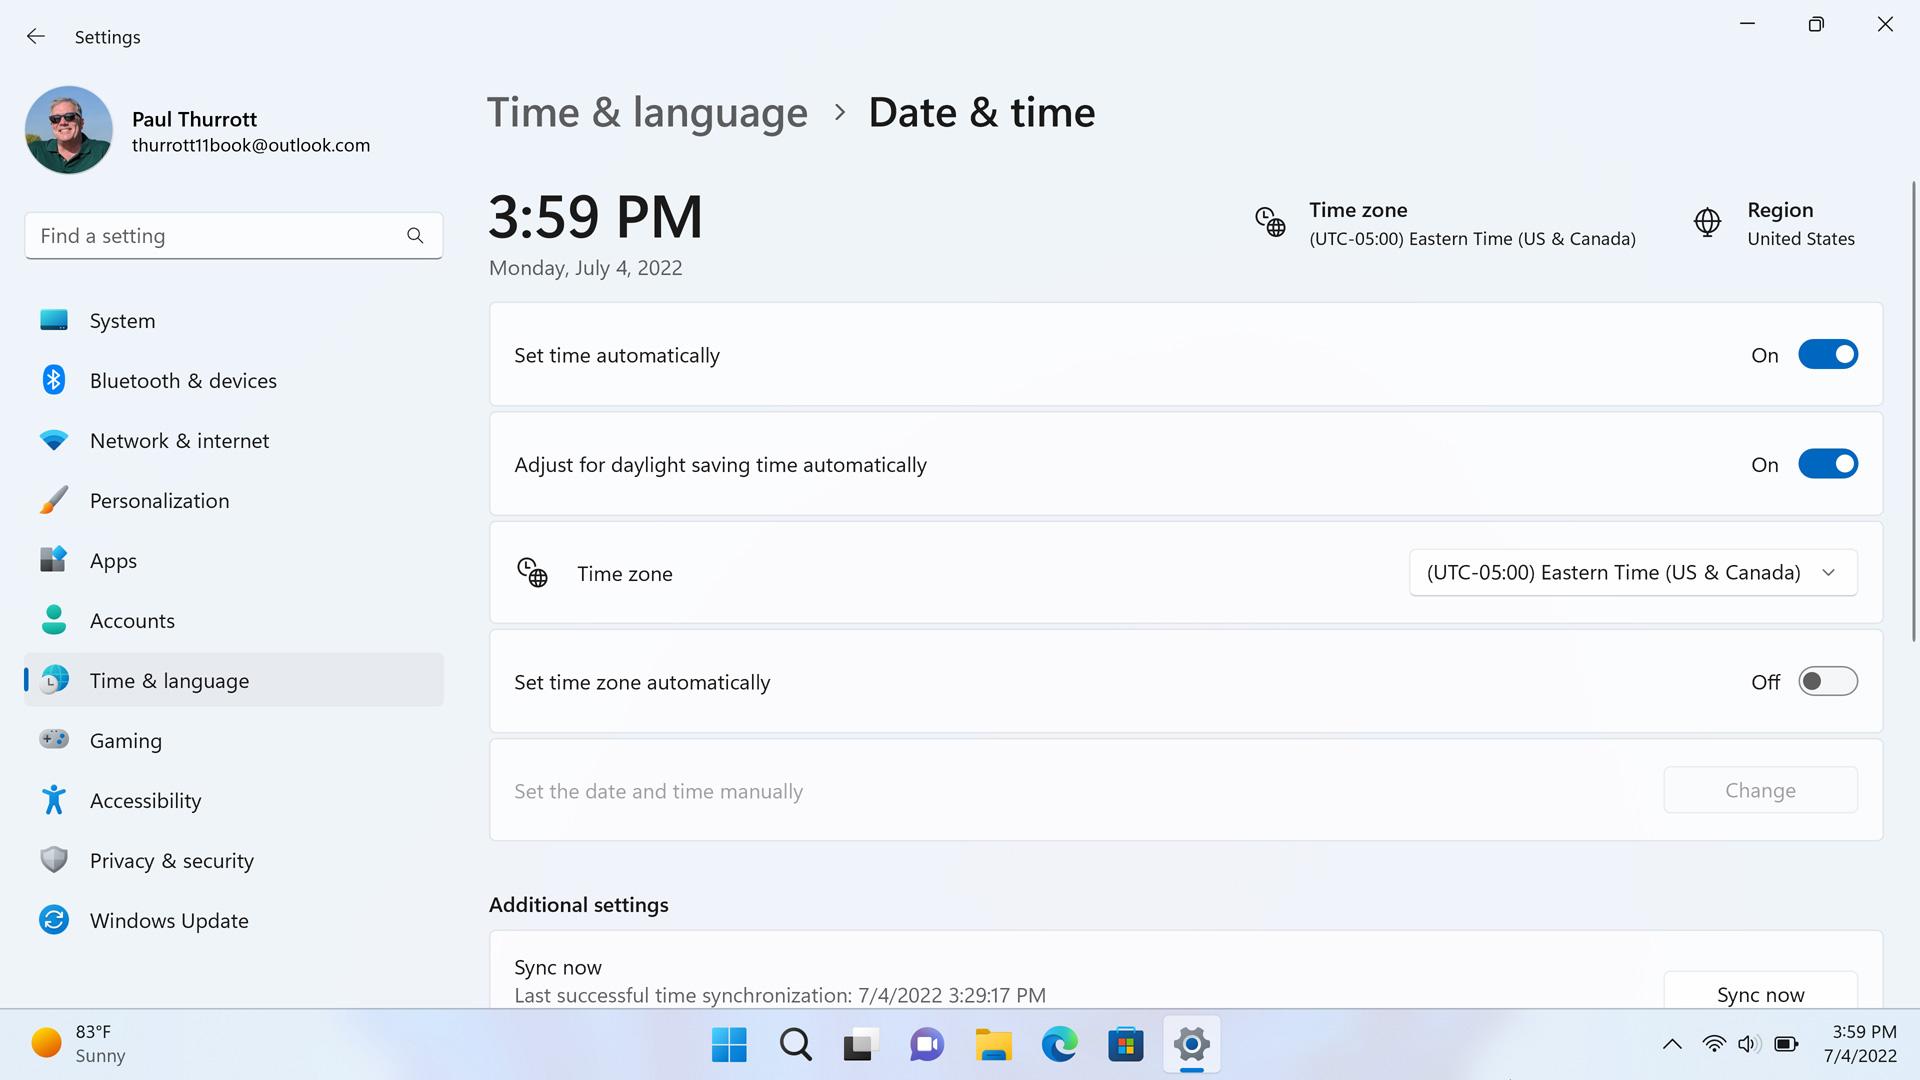
Check your date and time settings
In the old days, new Windows installs would often default to Pacific Time (where Microsoft’s headquarters are) or to whatever time zone your PC maker may have configured. But now Windows 11 tries to automatically detect your location and then set the time and date accordingly. This usually works, but check the time/date display in the far right of the Taskbar just in case.
If either or both are not correct, right-click the date/ time and then select “Adjust date and time” from the context menu that appears. You can make the necessary changes in the Date & time settings window that appears.
Rename your PC
If you didn’t create a name for your PC during the Out-of-Box Experience (OOBE), Windows Setup will create a nonsense name—like DESKTOP-TAKKU2G or similar—for the PC instead. You should rename it now because you will see your PC’s name referenced by OneDrive and other Microsoft services on the web and elsewhere.
To do so, right-click on the Start button (or type WINKEY + X) to display the Quick Access menu, and then choose “System” from the list. In the System settings window that appears, select the “Rename this PC” button and then enter a name that makes sense to you—perhaps Pauls-PC, Laptop, or whatever—and click Next. You’ll be told you have to reboot the PC. Do so.
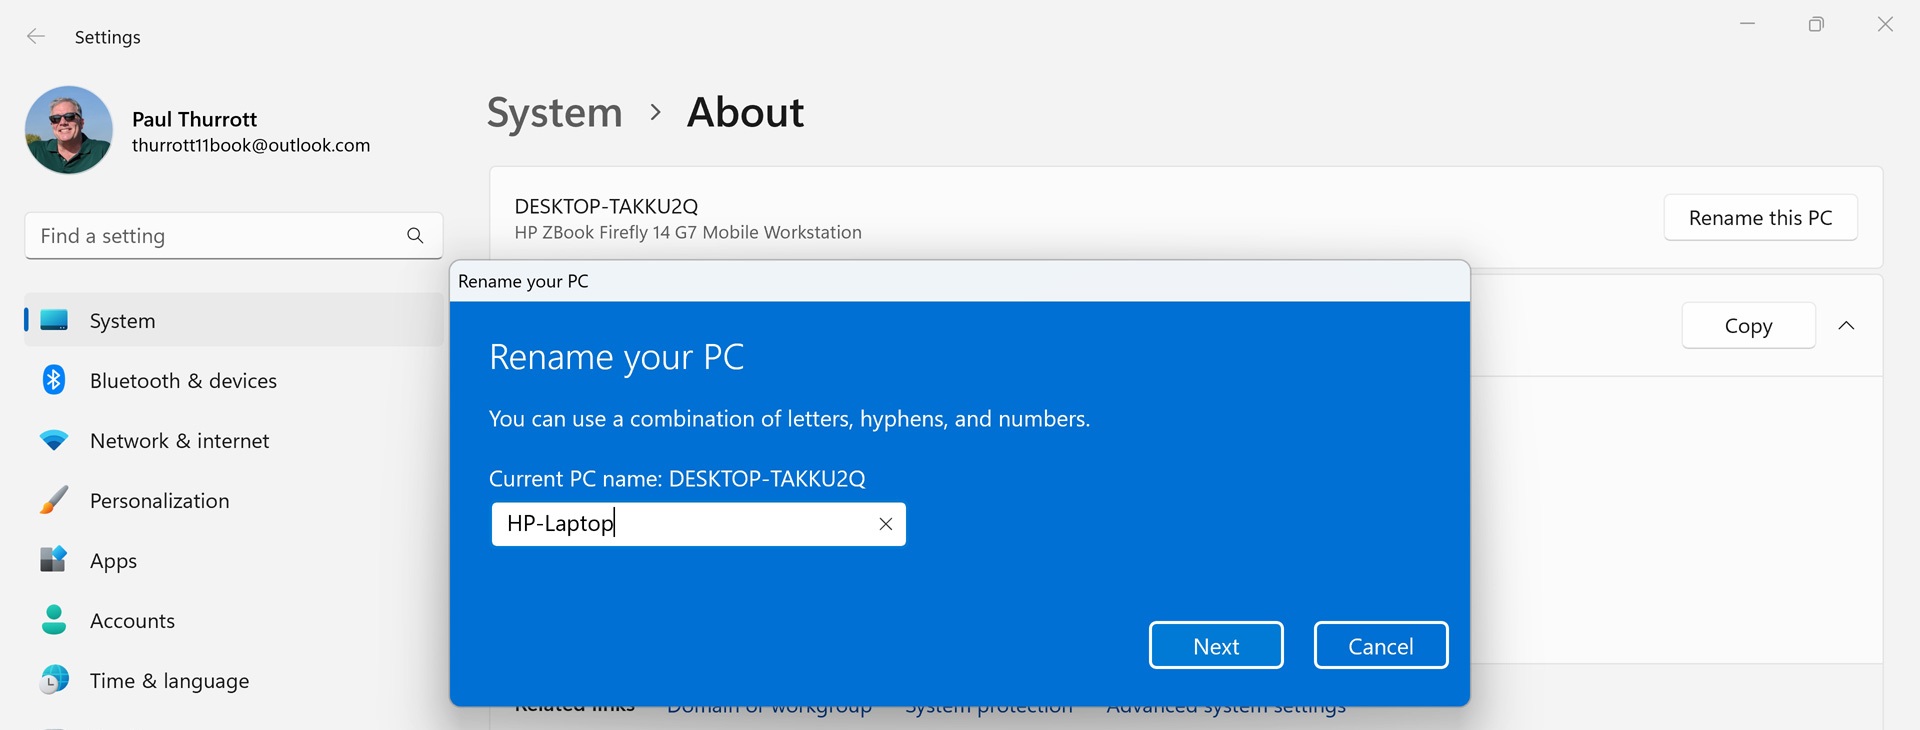
Sorry, you can’t use spaces or most special characters in the PC name. Someone tell Microsoft it’s the 21st century.
Prevent Microsoft Teams from auto-starting
Microsoft has replaced Skype in Windows 11 with the much less desirable Microsoft Teams for consumers. It’s highly unlikely you’ll want to use this app, since virtually no one does. And yet Microsoft inexplicably auto-starts Teams in the background every time Windows starts up. (OK, it’s not inexplicable: it does this so that the Chat icon that it also places in the Taskbar by default will work. You can learn how to disable that in Taskbar.)
To prevent Teams from silently starting in the background and wasting system resources, right-click the Start button to display the Quick action menu and then select “Task Manager.” Then, in Task Manager, navigate to the Startup apps tab.
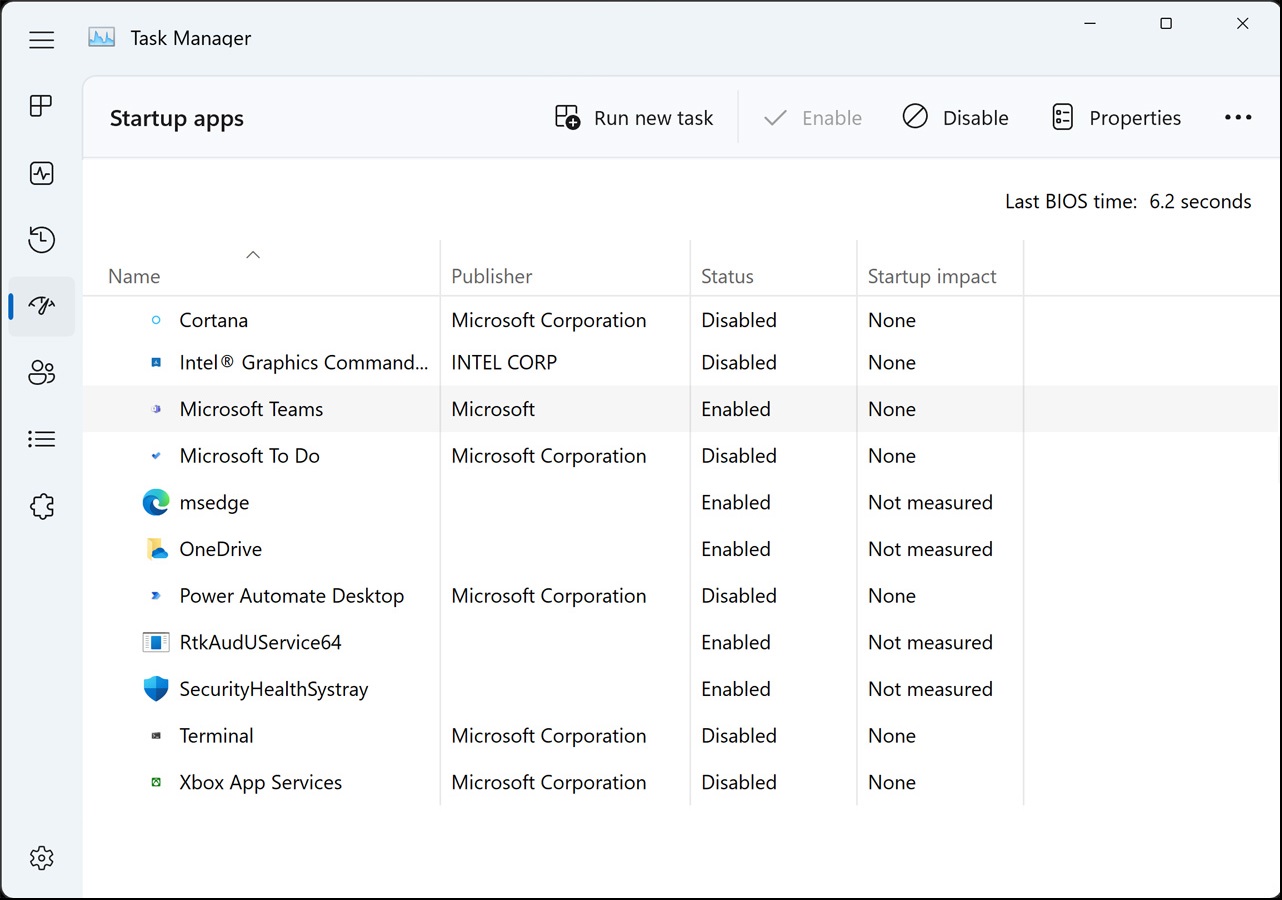
Locate Microsoft Teams in the list, select it, and then choose “Disable” in Task Manager’s toolbar.
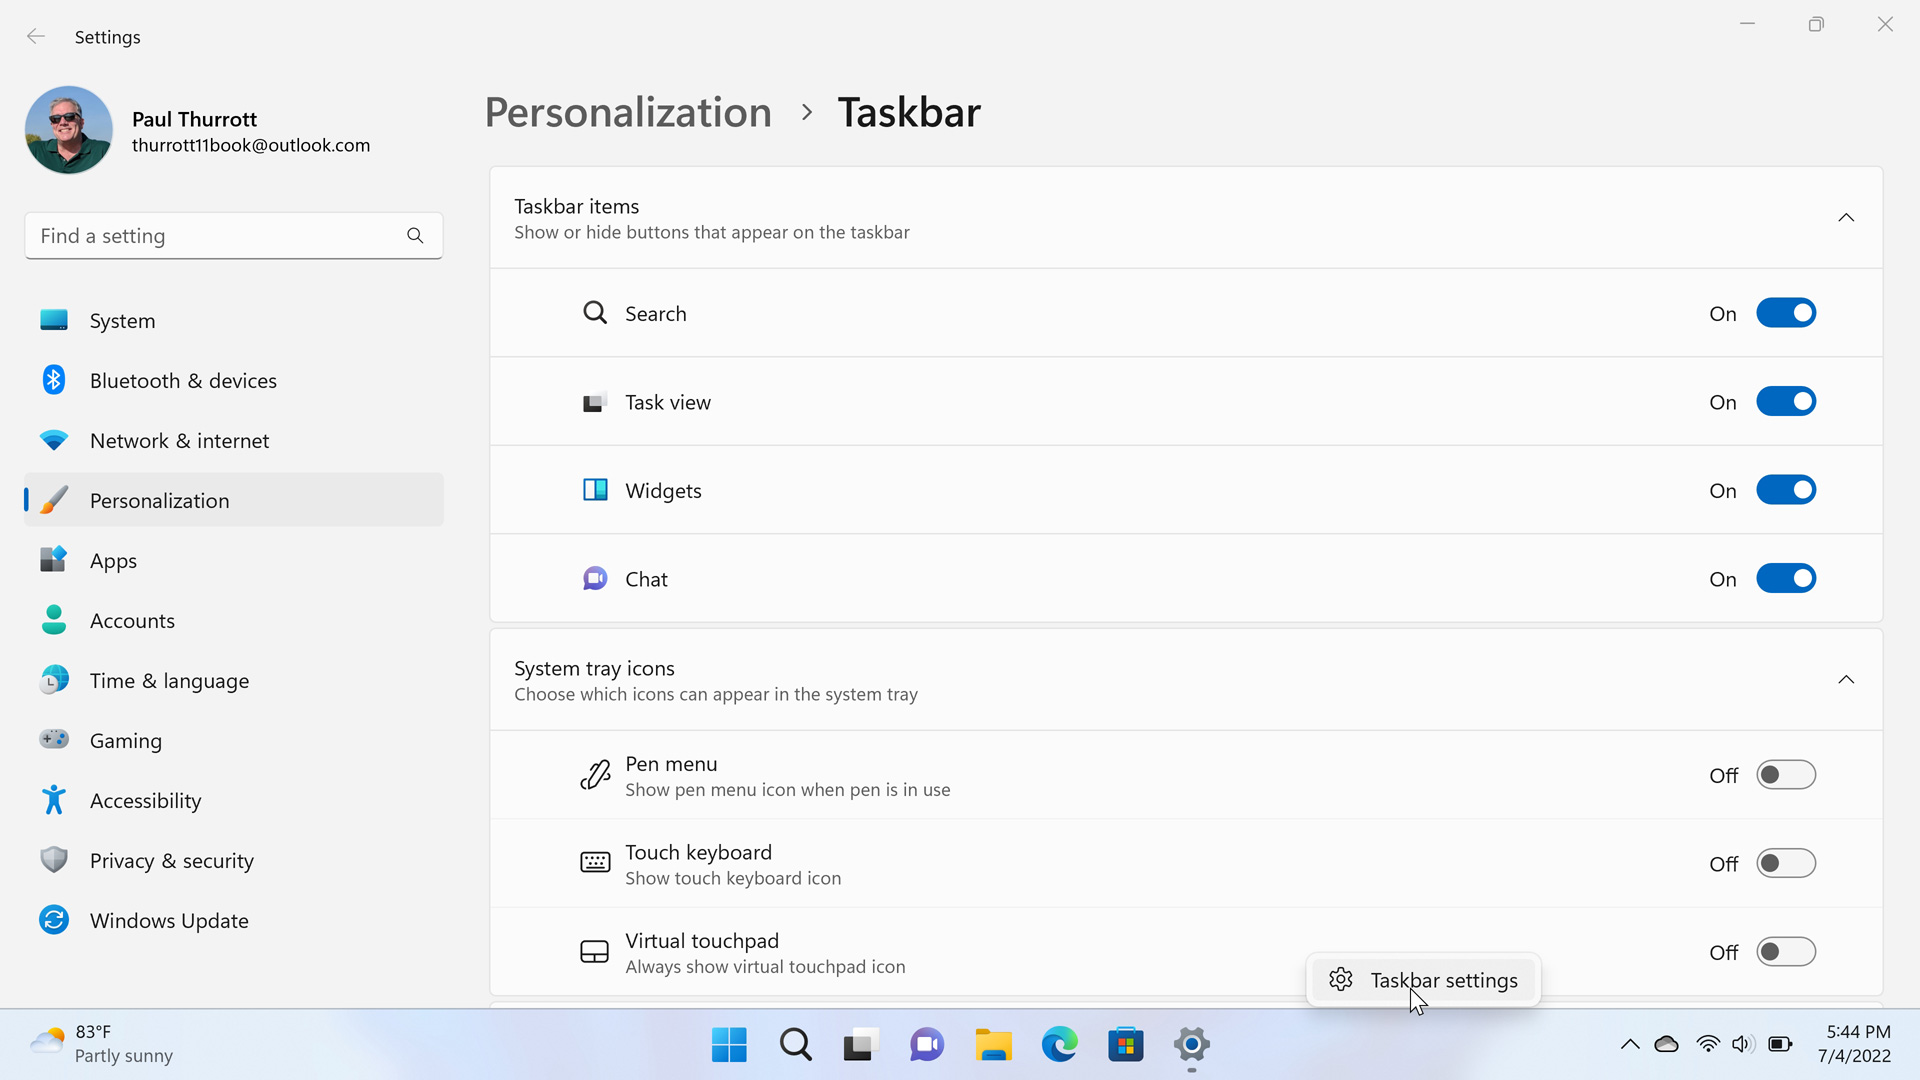
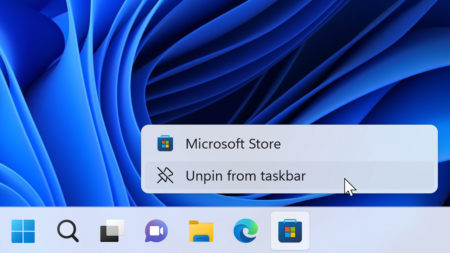
Remove unnecessary Taskbar icons
Microsoft adds items like Widgets, Search, Taskbar, and Chat to the Windows 11 Taskbar by default, plus app shortcuts for File Explorer, Microsoft Edge, and Microsoft Store. And your PC maker can add their own app shortcuts as well. If you find these items to be unnecessary, you can remove them.
To remove Widgets, Search, Taskbar, and/or Chat, right-click an empty area of the Taskbar, select “Taskbar settings” from the context menu that appears (it’s the only choice), and then deselect the items you don’t need.
To remove any app shortcut, right-click the shortcut and choose “Unpin from taskbar” from the context menu that appears.
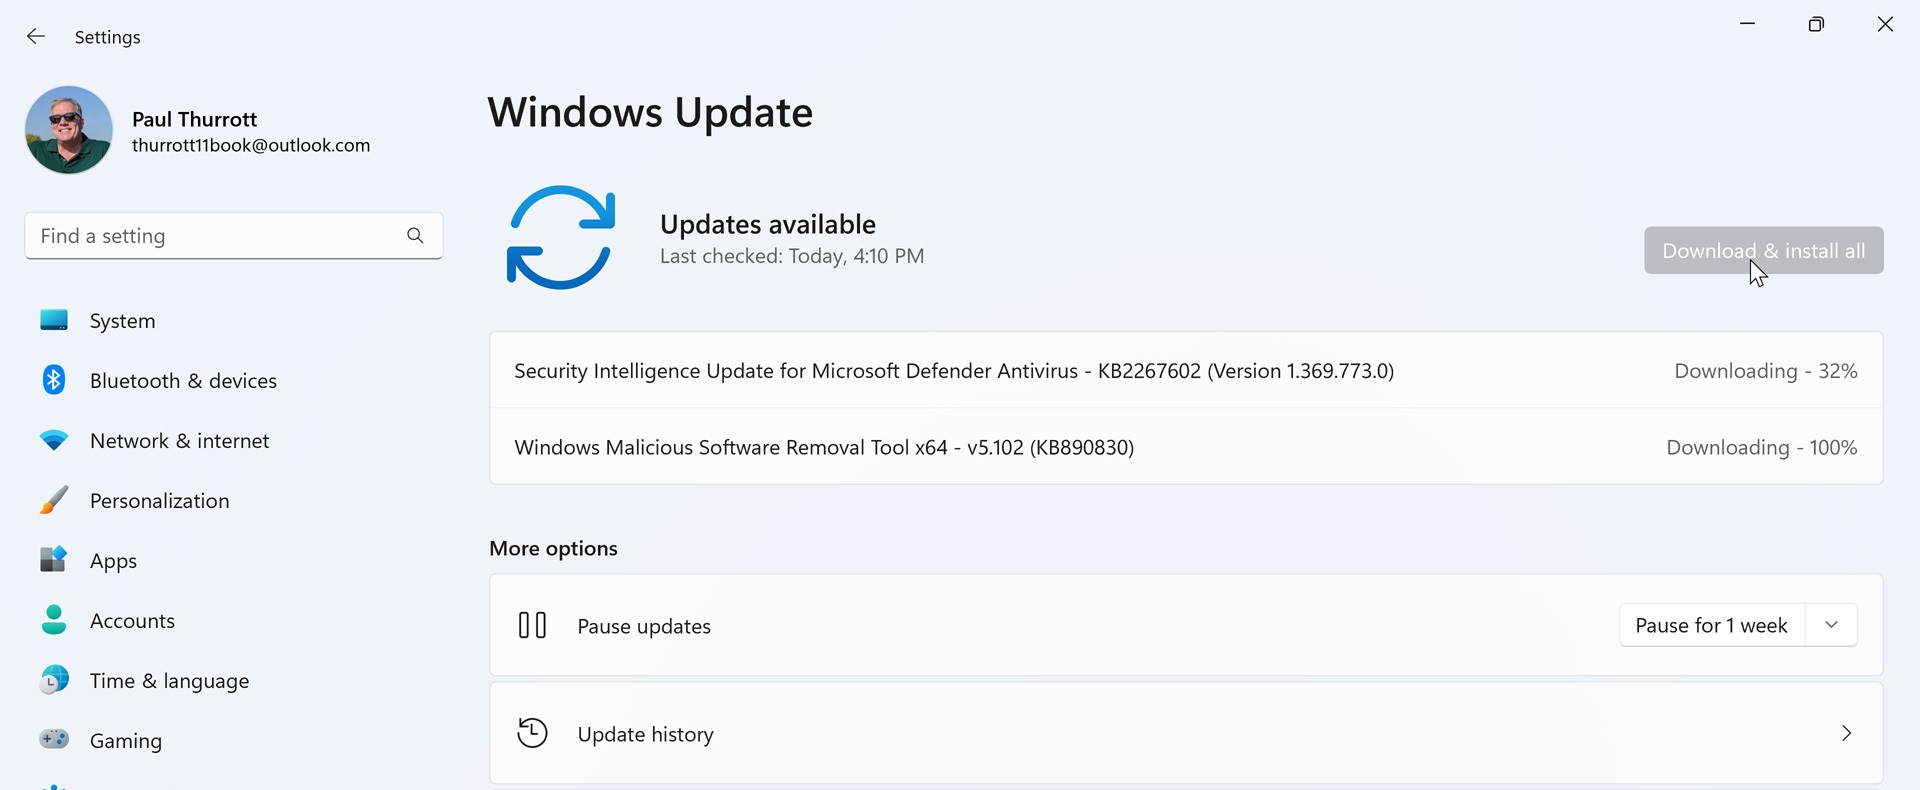
Use Windows Update to get Windows 11 up-to-date
After that reboot is complete, be sure to check Windows Update—found in Settings (WINKEY + I) > Windows Update—for any updates, rebooting as required and rechecking until there are no more updates to install.
Run your PC maker’s support/driver update application
If you have just set up a new PC, check to see whether your PC maker provides a custom application—Dell Update, HP Support Assistant, Lenovo Vantage, or similar—for delivering software and driver updates. After Windows Update is completely up-to-date, use this application to install any updates your PC maker provides.
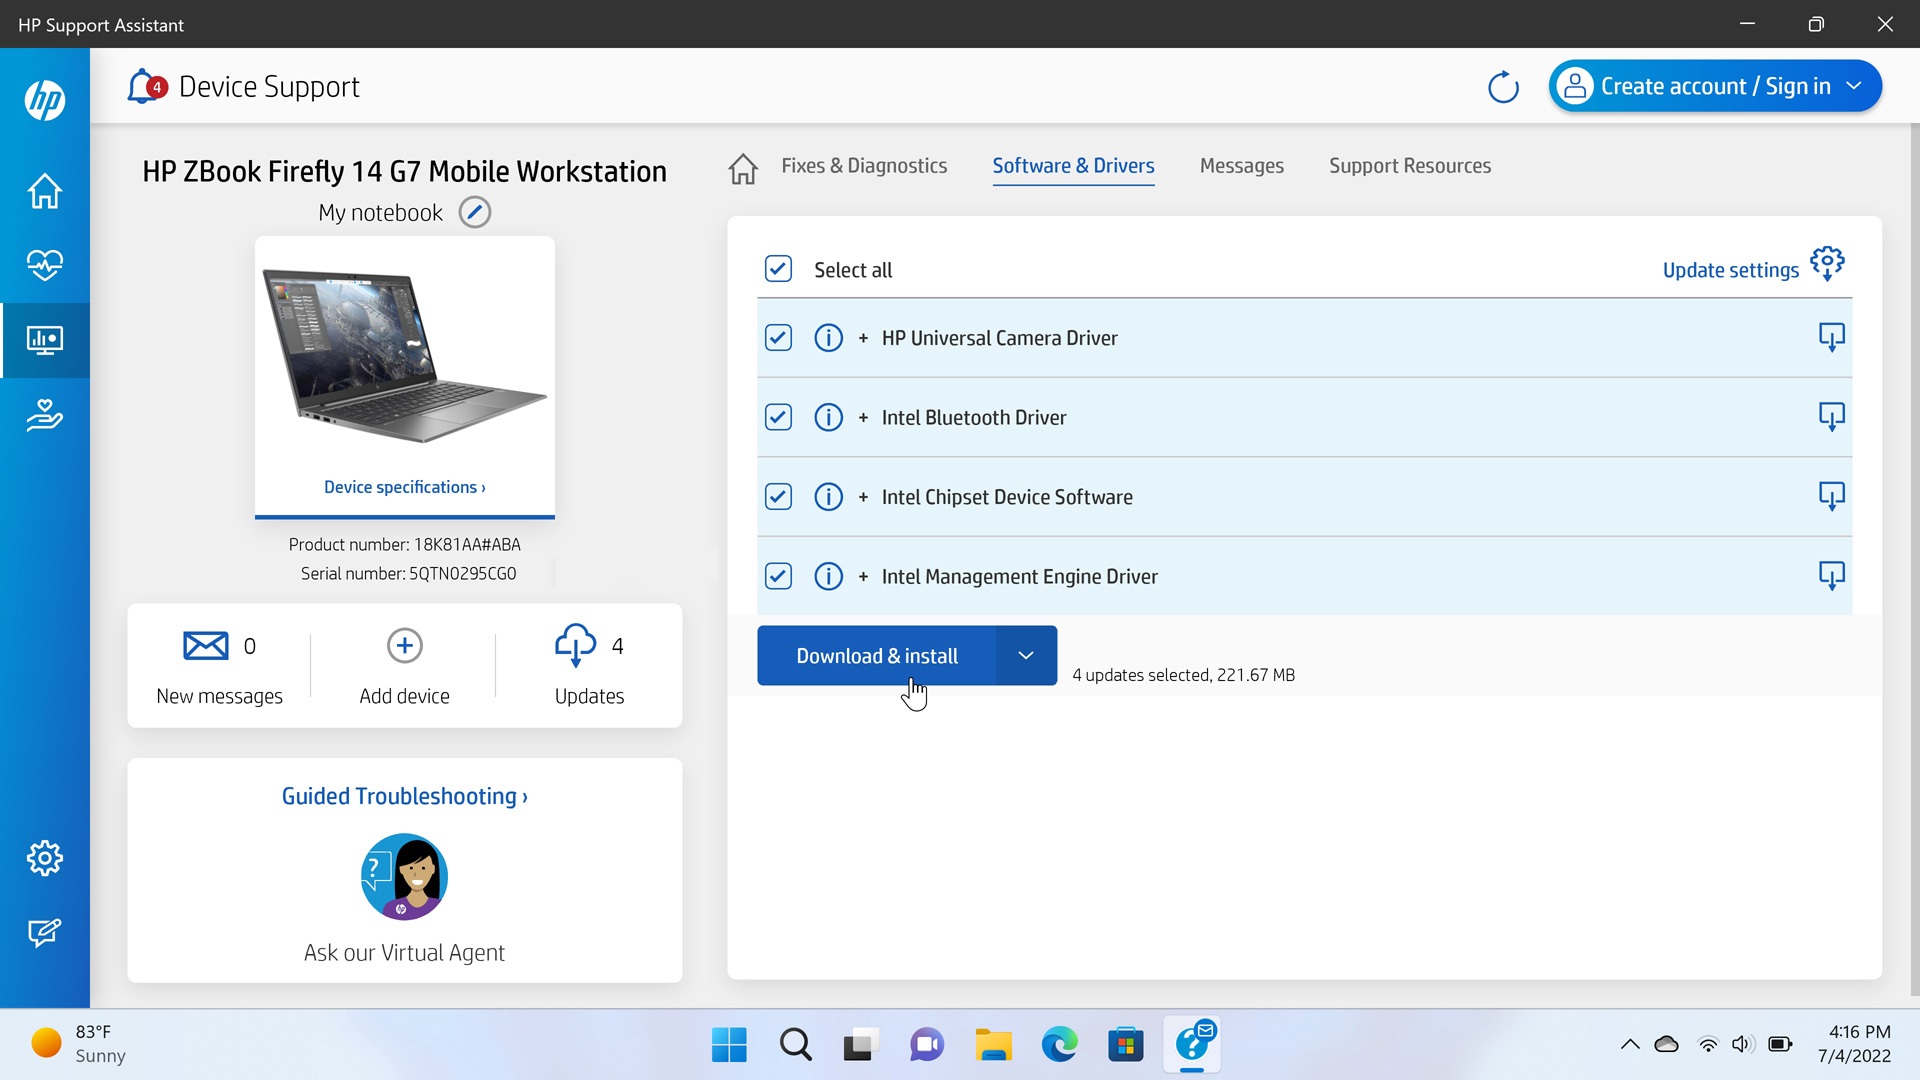
If your PC uses an Intel microprocessor, you may also want to install the Intel Driver & Support Assistant, which provides regular updates for Intel microprocessors and other chipsets.
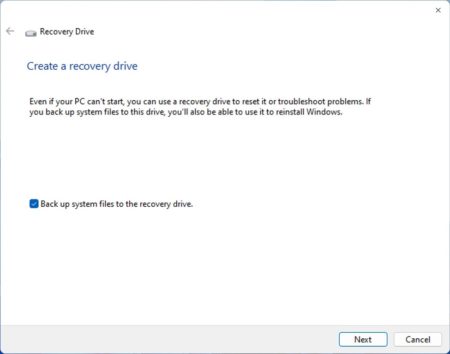
Create a recovery drive (Optional)
While Windows comes with various recovery tools, it’s possible that the disk on which you installed the OS could experience a problem, making the built-in tools unavailable. So you may want to create a USB-based recovery drive, which can be used to boot your PC and fix problems, including getting Windows 10 reinstalled if needed.
The easiest way to find this tool is with Start search: Open the Start menu and type recovery drive. In the wizard that appears, be sure to leave the option “Back up system files to the recovery drive” selected.
Should you make a recovery drive?
Not necessarily: your PC has the recovery tools built in, and if you have Windows 11 installation media, that can be used like a recovery drive. And you can always make installation media if you have another PC.
But if you only have one PC and/or just want to be sure you can recover a problematic Windows 11 PC, a recovery drive is your best bet.
Configure OneDrive
Most people will sign into Windows 11 using a Microsoft account. Among other things, that means that OneDrive, Microsoft’s cloud storage service, will be configured for that account and available in the file system via File Explorer and to compatible apps. But it’s likely that you will want to perform some additional OneDrive configuration related to two specific features right away.
Configure OneDrive backup
OneDrive Backup backs up three important folders—Desktop, Documents, and Pictures—to your OneDrive cloud storage. And it will keep those folders synced across multiple PCs if you always sign into them with your Microsoft account. This can be useful, of course, but it’s not always configured in an ideal way.
Here’s the problem: when you first set up Windows 11, you were either given the option to enable OneDrive backup (Windows 11 Pro) or, if you use Windows 11 Home, it was simply enabled for you. This may not be what you want, but you can configure OneDrive to not back up those folders. Or to only back up one or two of those folders.
To do so, find the OneDrive system icon in the system notification area, which can be tricky since it’s hidden by default. (You can display hidden system icons by selecting “Show hidden icons” (the caret-shaped icon to the left of the Network, Volume, and Power icons.) Select the OneDrive icon, which opens a OneDrive pane, and then navigate to Settings & Help (the gear-shaped icon) > Settings. When the Microsoft OneDrive window opens, navigate to the Backup tab.
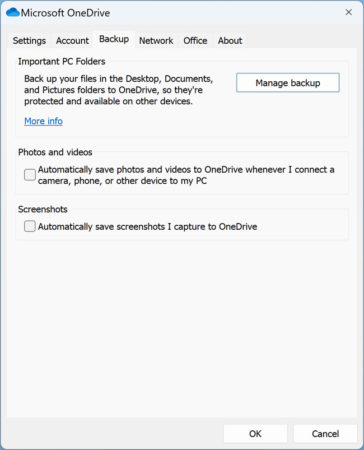
Select the “Manage backup” button in the Important PC Folders section. The Manage folder backup window opens.

Here, you can enable or stop the backup of any of the three folders that OneDrive can back up. If you don’t wish to backup any of these folders to OneDrive, for example, simply select the “Stop backup” link under all three in turn, and verify the decision as prompted.
Configure OneDrive for offline use (Optional)
As noted above, Windows 11 makes the contents of your OneDrive storage available in File Explorer by default. But whatever files and folders you have in OneDrive are not downloaded to your PC, because that might take up a lot of space. Instead, they are all available on-demand by default. This way, you can see your files and folders, and when you try to open a file, it will be downloaded to your PC and will then be available at all times, even when your PC is offline, and any changes you make will be synced to OneDrive.
This system may work well for some. But you may also want to mark some individual files or, more likely, some selection of OneDrive-based folders that could be full of files, to be available at all times.
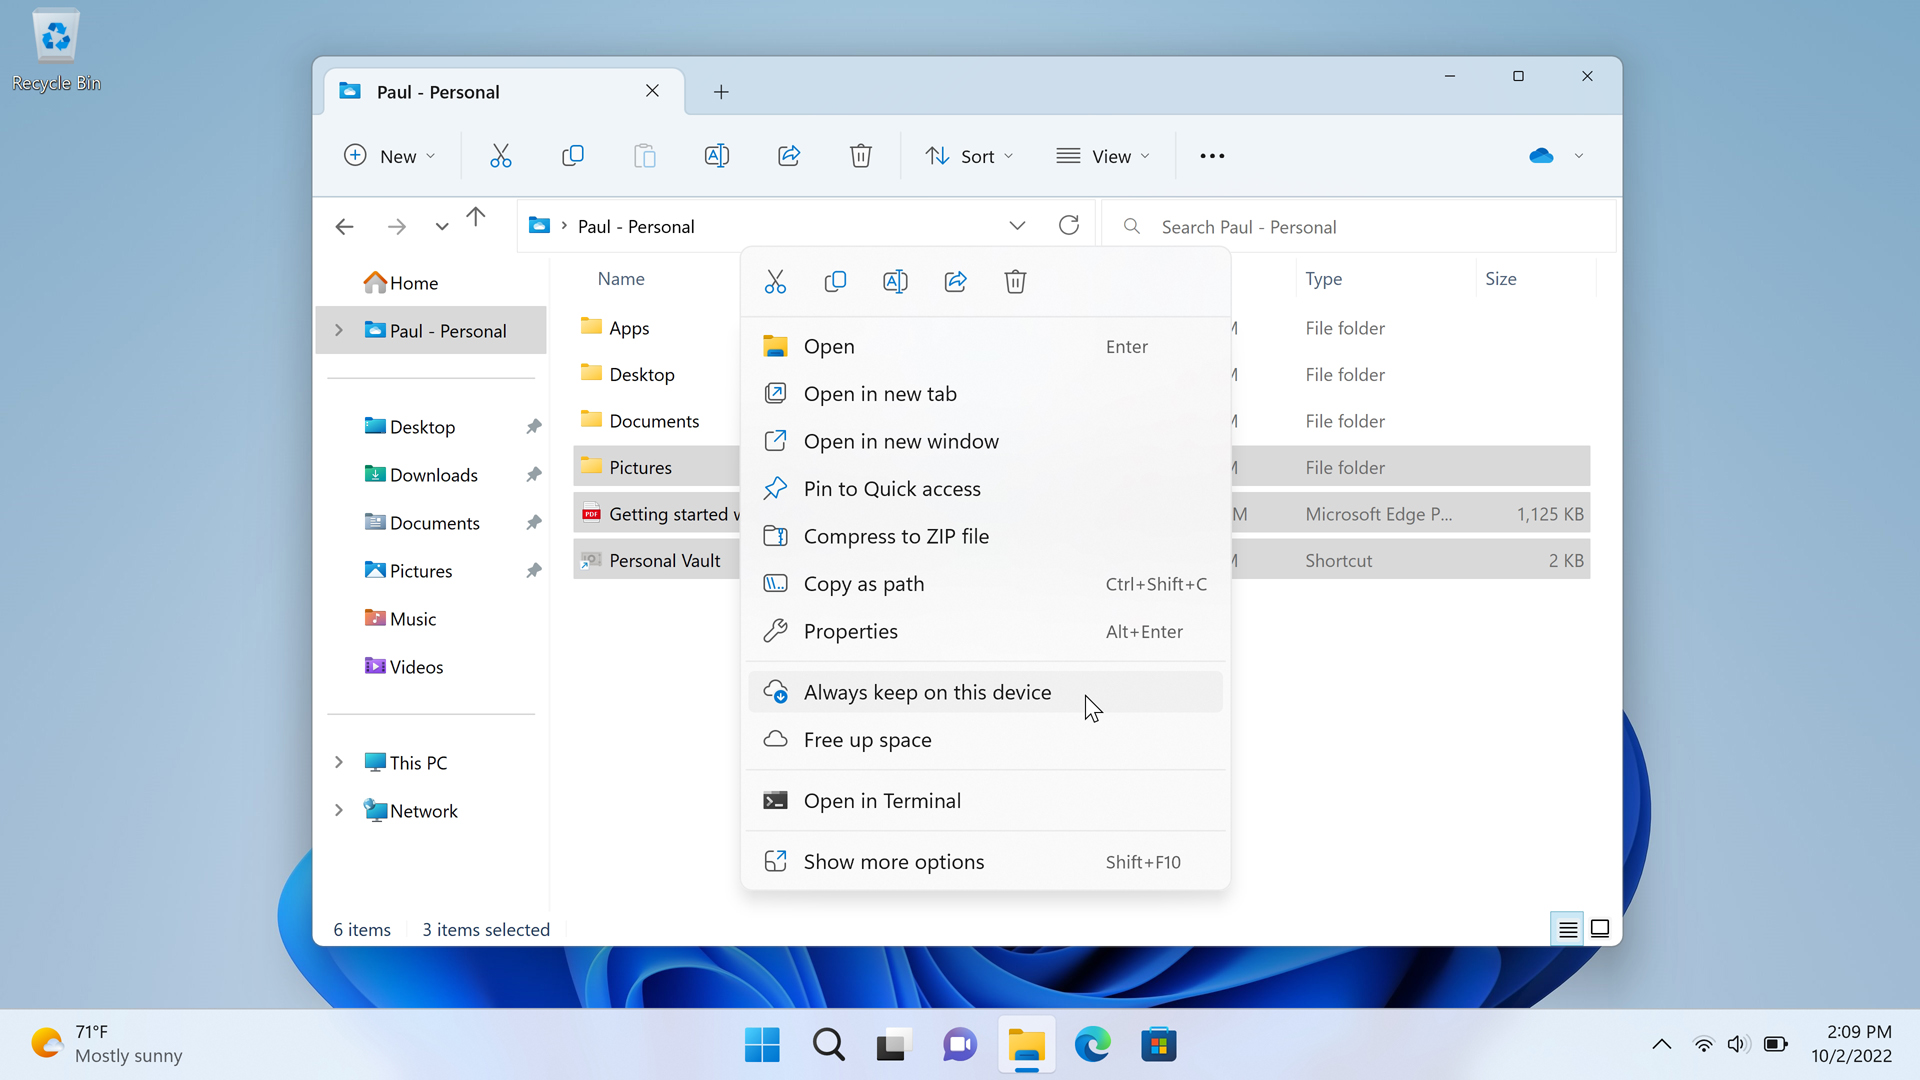
To do so, find the files/folders in File Explorer—your OneDrive-based content is available via the “OneDrive – Personal” link in File Explorer’s navigation pane—and then right-click them in turn and select “Always keep on this device” from the context menu that appears.
Update the built-in Microsoft Store apps
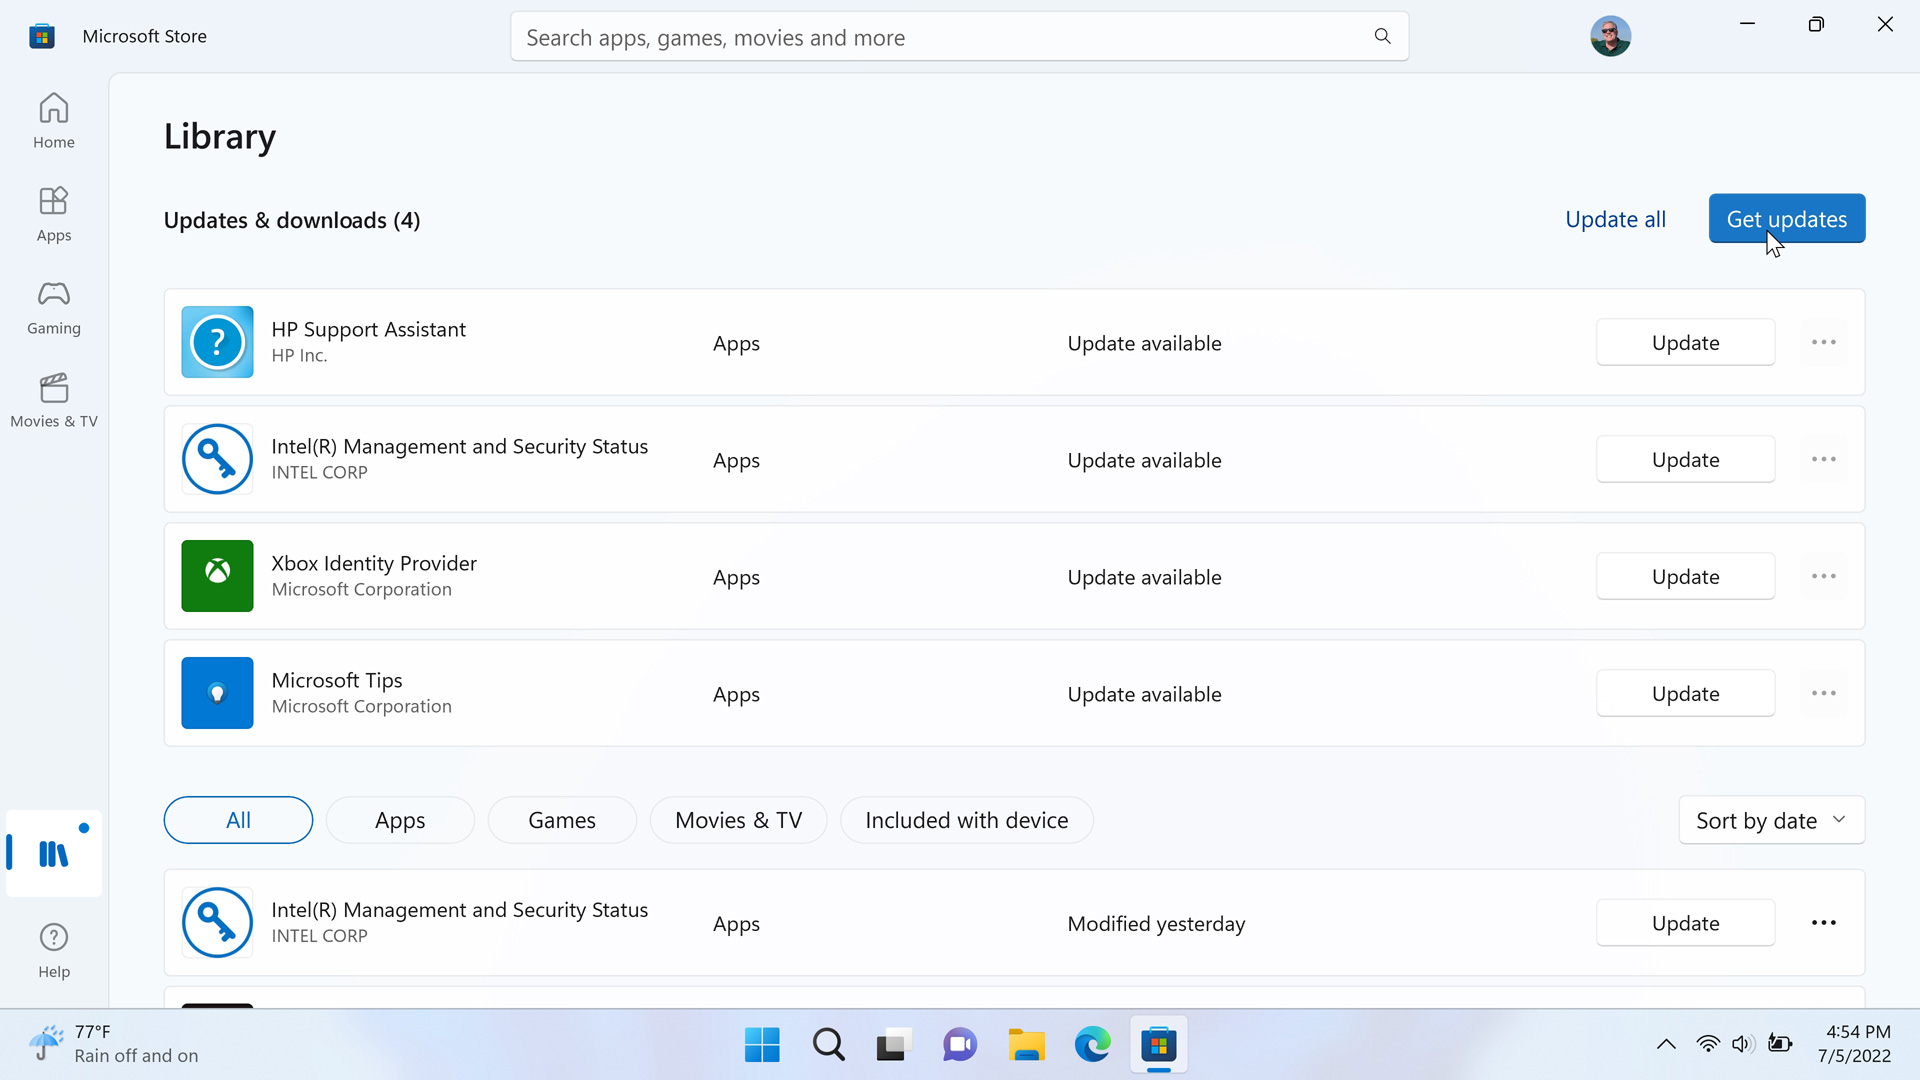
Many of the apps that Microsoft bundles with Windows 11 are updated through the Microsoft Store, and the system will keep those apps up-to-date over time. But many if not most of these apps will be out-of-date when you first configure Windows 11. So it’s worth manually updating them this one time.
To do so, open the Microsoft Store app, select Library in the navigation pane, and then select the “Check for updates” button. If there is an “Get updates” link next to that button, select that as well.
Install the applications you need
While Windows 11 ships with a fairly robust selection of apps, most people will need to install other Microsoft and third-party apps so that they can be productive. Many of these apps—the full versions of Adobe Photoshop and Premiere Pro, Google Chrome, Microsoft Teams for work and school, and others—are available from their respective websites.
But increasingly, many of the apps you rely on can be found in the Microsoft Store as well. And if you’ve purchased or downloaded those apps from the Store in the past, they will be available in your library so you can find them again more easily.
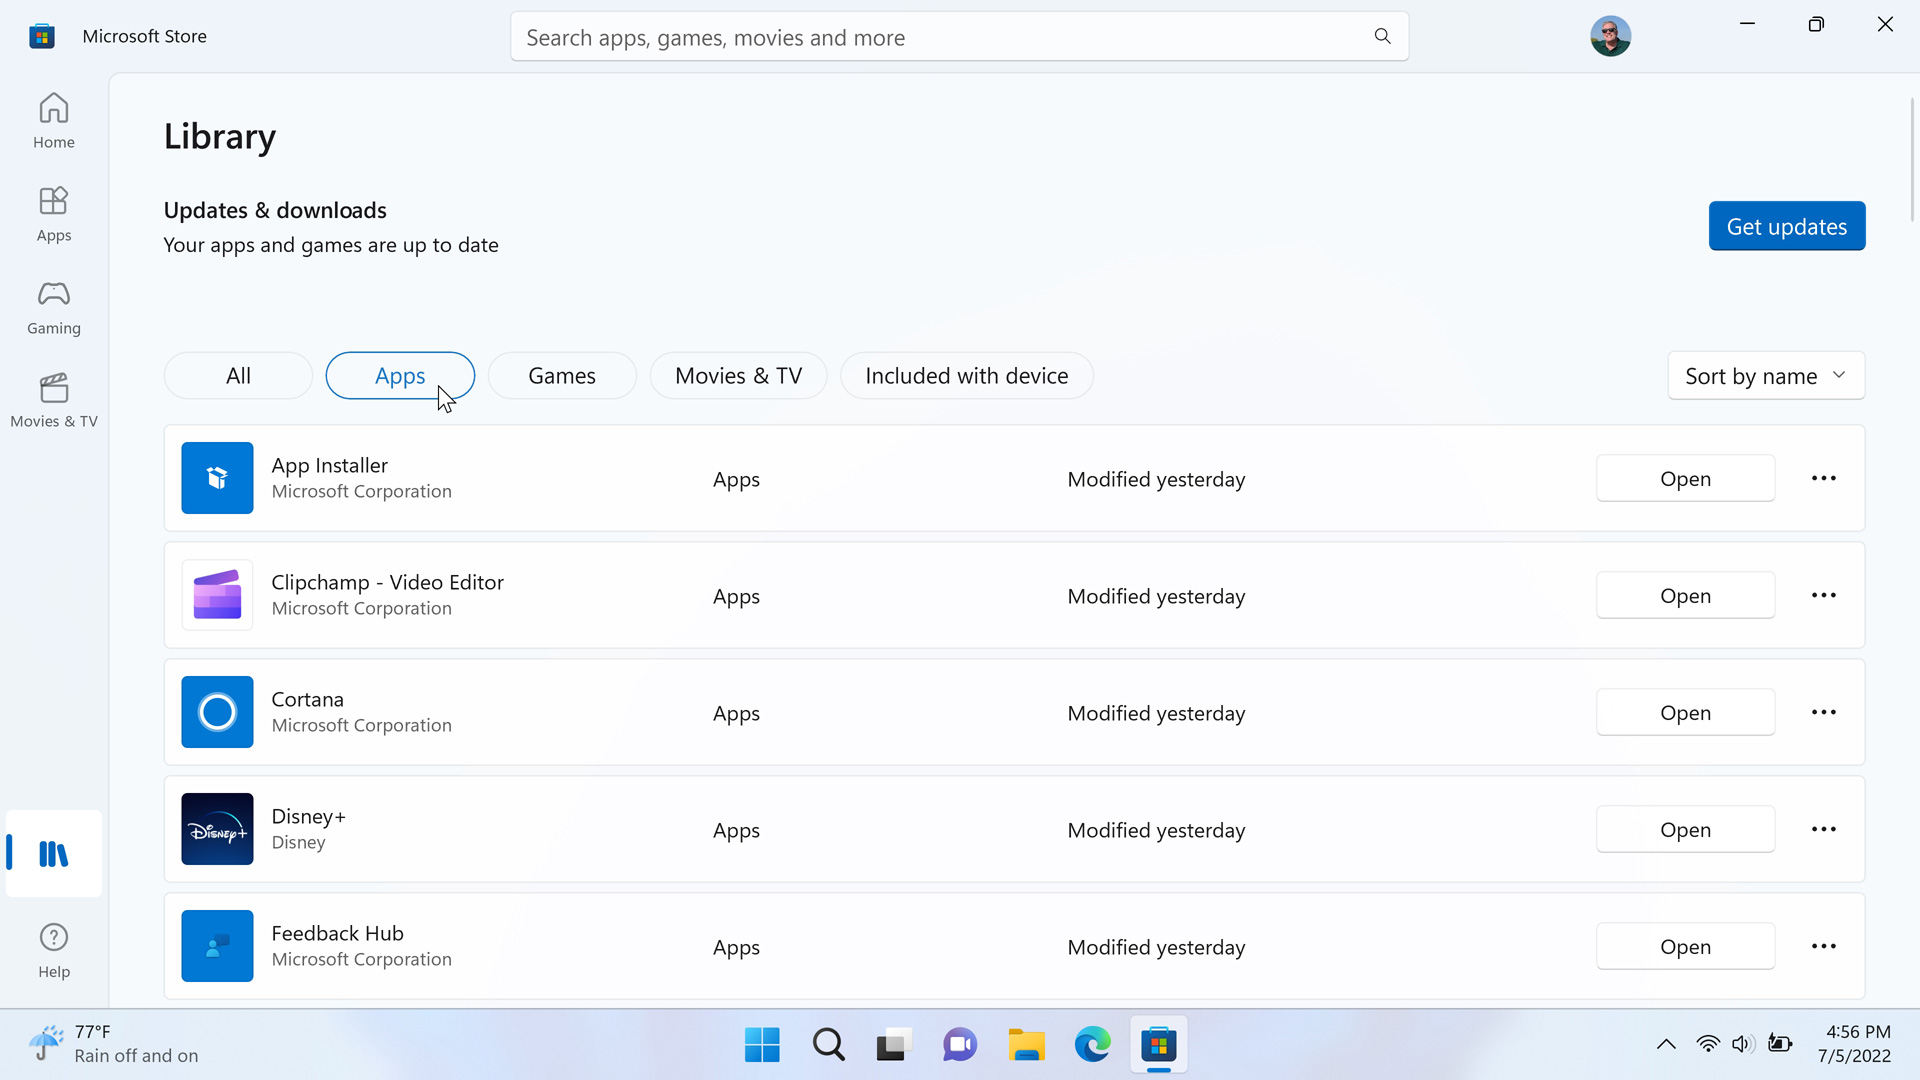
To find your previously purchased and downloaded Store apps, open the Store app, select Library in the navigation pane, and then select the Apps button to display only your apps. (You can also select Games, and/or sort the display of your content by date, name, installed, or not installed.)
Examine which apps are running when your PC boots up
Earlier, we recommended that you prevent Microsoft Teams for consumers from auto-starting every time you boot up your PC: after all, you will never need or use this app. But now that you have installed all of the applications you need, you should reexamine which are configured to run automatically at Startup. We discuss this process in more detail later in the book, in the Task Manager article.
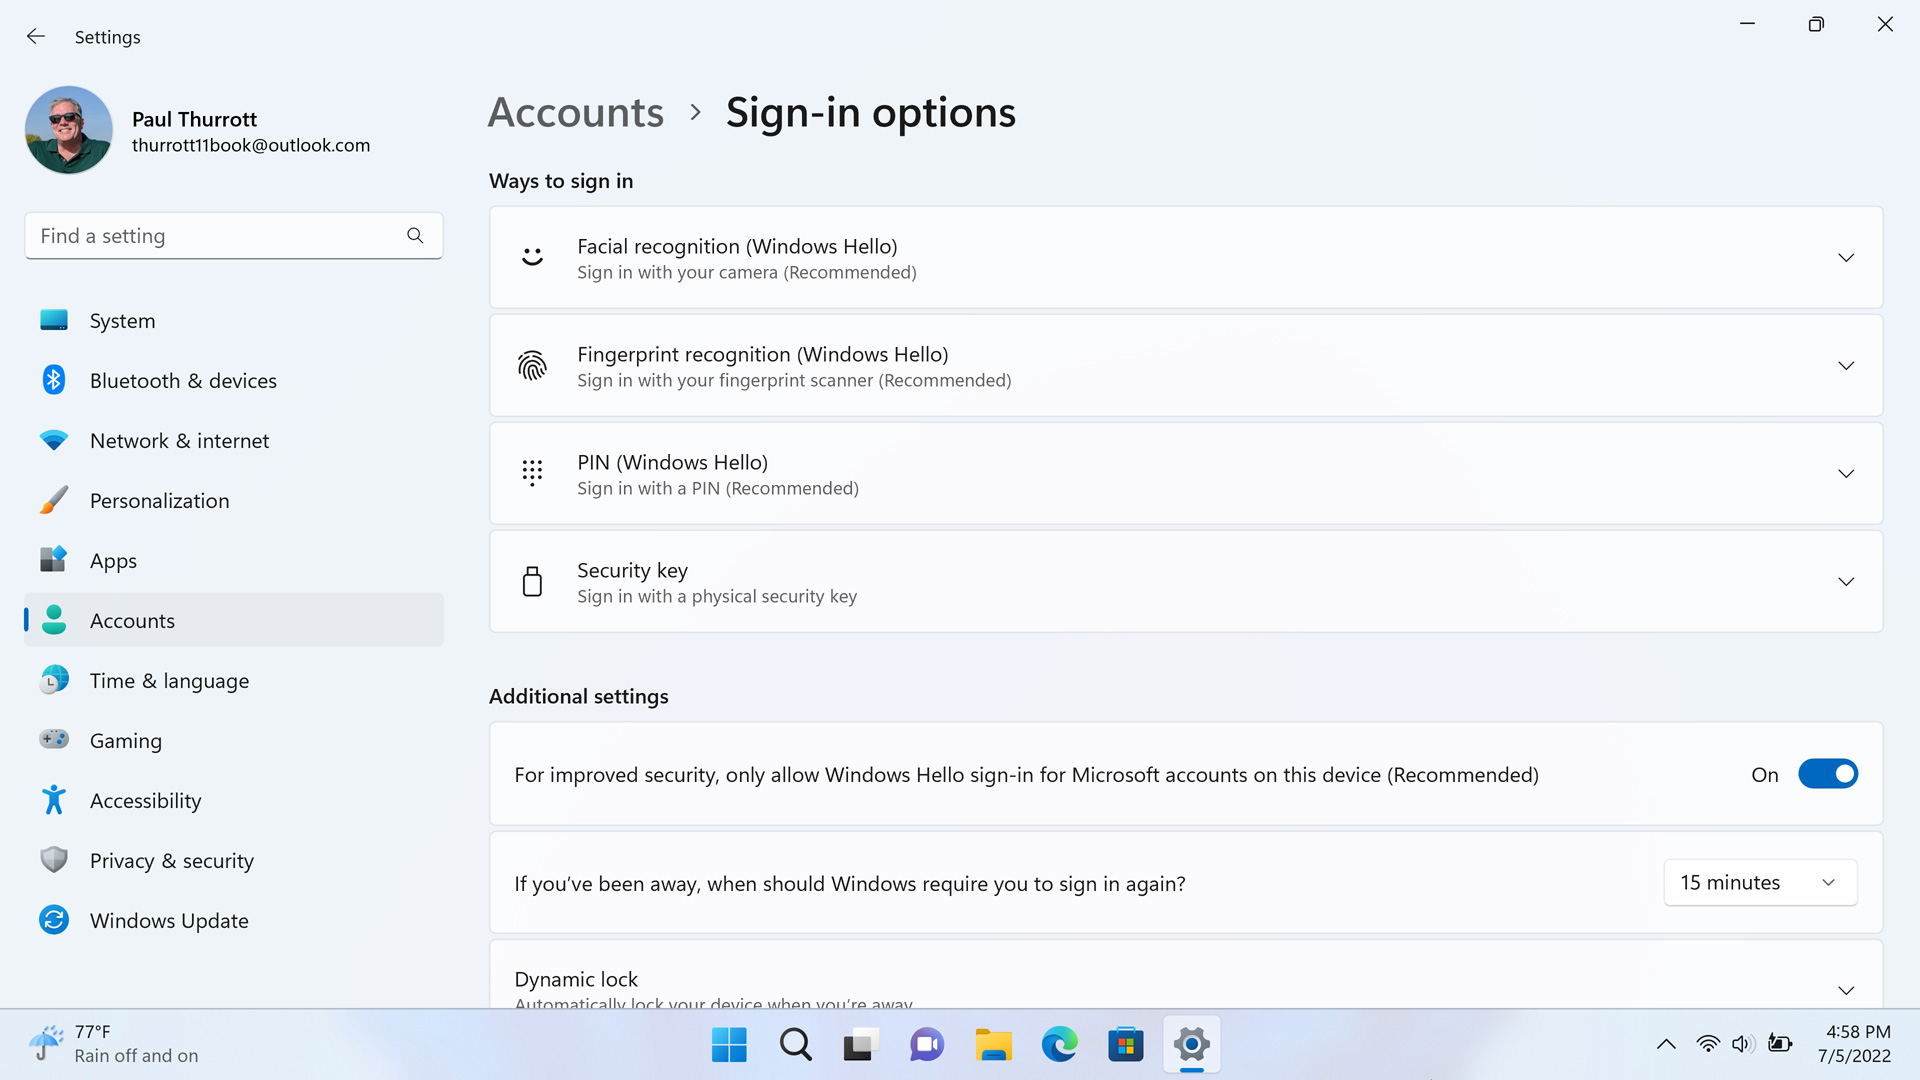
Configure Windows Hello (Optional)
If your PC is outfitted with a Windows Hello-compatible fingerprint reader or webcam, you can configure it to sign you in to your Microsoft account using either biometric capability. This can be quicker and more convenient than using a password.
To do so, open Settings (WINKEY + I) and navigate to Accounts > Sign-in options. Here, you will see entries for Facial recognition (Windows Hello) and/or Fingerprint recognition (Windows Hello), depending on the capabilities of your PC.
Eliminate “suggestions”
Windows 11 will occasionally display tips, suggestions (which are often advertisements), and other distracting and unnecessary notifications and full-screen experiences.
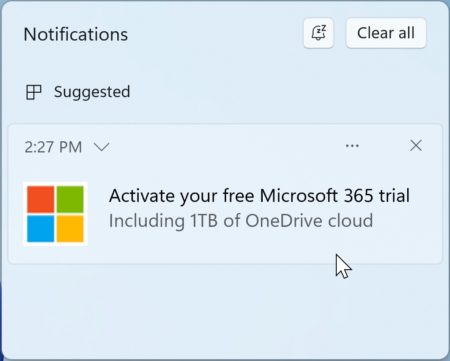
You can prevent this from happening.
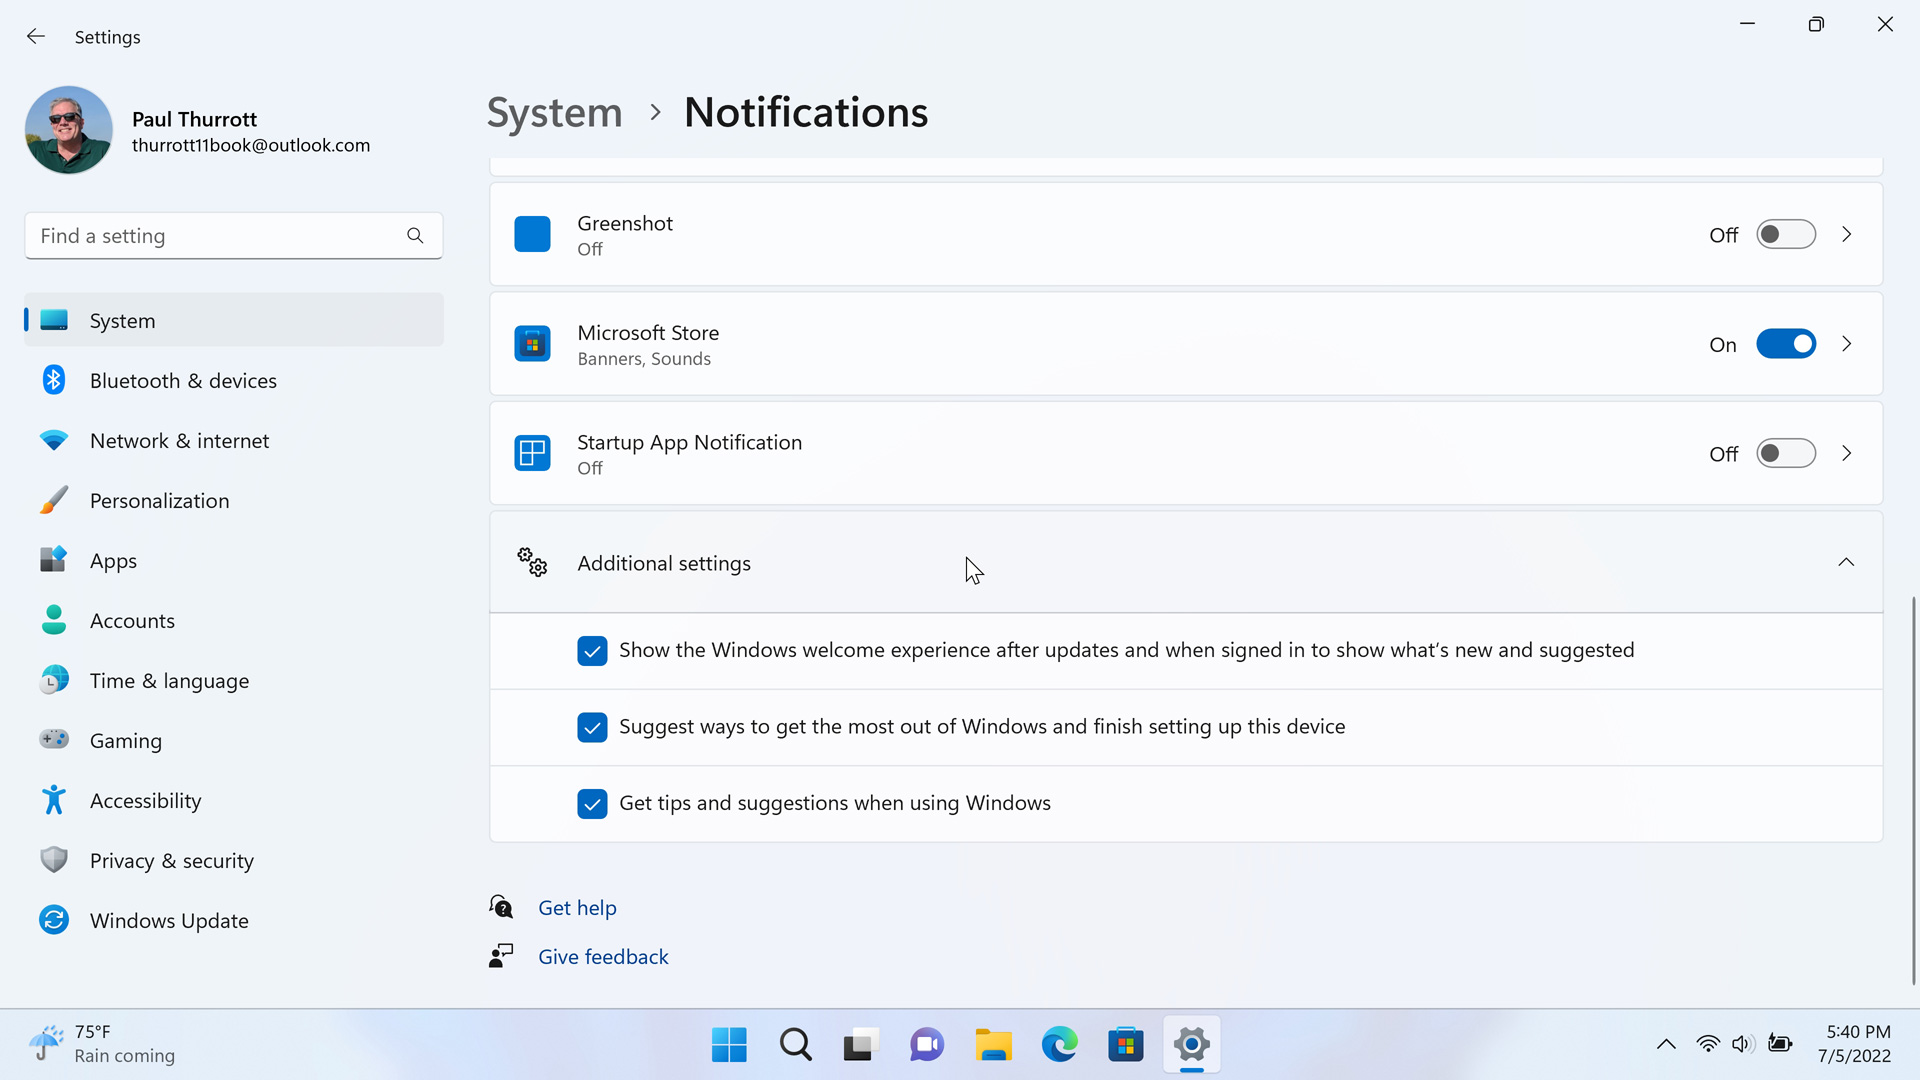
To do so, open Settings, navigate to System > Notifications, and then scroll down to the Additional settings section. Here, you will see three options to consider disabling: “Show the Windows welcome experience after updates and when signed in to show what’s new and suggested,” “Suggest ways to get the most out of Windows and finish setting up this device,” and “Get tips and suggestions as you when using Windows.”
Further personalize Windows 11
Windows 11 offers many customization capabilities, so be sure to check out the Personalization section in the Settings app (WINKEY + I). But we cover many aspects of personalization throughout this book as well.

Gain unlimited access to Premium articles.
With technology shaping our everyday lives, how could we not dig deeper?
Thurrott Premium delivers an honest and thorough perspective about the technologies we use and rely on everyday. Discover deeper content as a Premium member.